
Crochet Venus Flytrap Pattern with Four Traps and a Pot
· admin
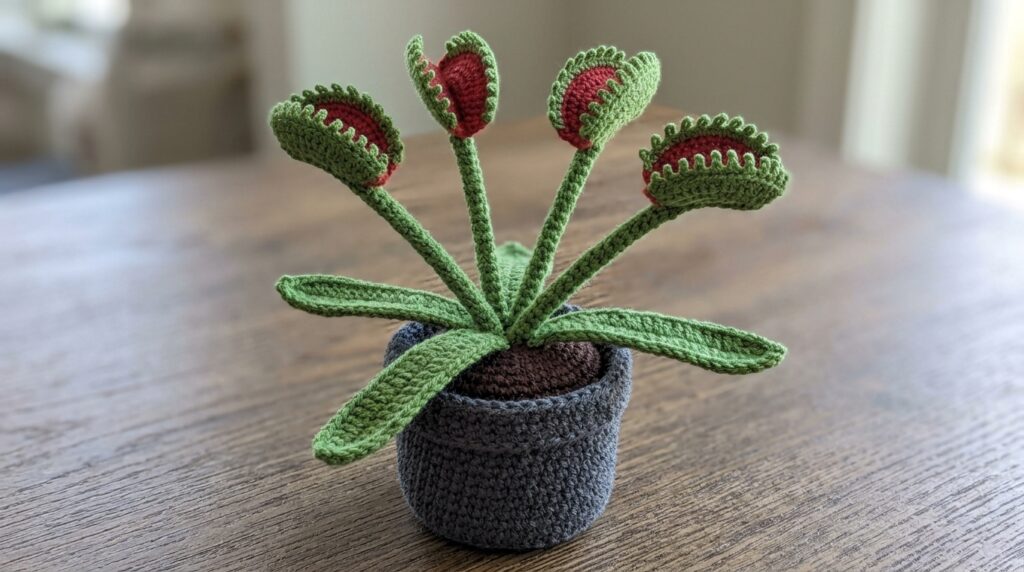
This crochet Venus flytrap pattern makes a sculptural plant with four separate stems, four red-and-green trap heads and three long leaves. Each trap starts as two small discs joined into one edged piece, then folds into its open-mouth shape. The plant is sewn onto a filled crochet pot. The design comes from Sweet Oddity Art’s supplied Planter Crochet Pattern; the new component covered here is the Venus flytrap plant.
Materials
- Worsted-weight No. 4 yarn in green, red, a pot color and a soil color. The source gives approximately 75 g main color and 25 g accent colors per planter; its allocation varies by version.
- A 3.25 mm crochet hook for the worsted version.
- Fiberfill for the pot, a sewing needle, scissors, pins and a stitch marker.
- Optional cake dowels for the four stems, as suggested in the source.
- Optional eyes or embroidered facial details if adding a face. The general source recommendation for the worsted pot is 16 mm eyes.
Stitches and Pattern Notes
US crochet terms are used throughout. Ch = chain, sl st = slip stitch, sc = single crochet, hdc = half double crochet, dc = double crochet, tr = treble crochet. An increase places two stitches in one stitch; a decrease combines stitches. Inc = 2 sc in one stitch; dec = sc2tog. BLO means back loop only and FLO front loop only. Work in continuous spirals unless stated otherwise. Mark the first stitch of each round. The source gives an approximate planter height of six inches with the suggested yarn and hook, depending on the plant; it does not give a separate precise flytrap height.
Crochet Four Green Stems
| Round / step | Instructions |
|---|---|
| 1 | Work 6 sc into a magic ring. (6) |
| 2-16 | Sc around for fifteen more rounds. (6 each round) |
Make four stems in total. Leave them unstuffed and fasten off with tails for sewing. The source optionally inserts a cake dowel inside a stem for support; use that support before closing or attaching the relevant end. The stems should remain narrow so the trap heads can sit clearly above the leaves.
Make Four Trap Heads
For each trap, make one red disc and one green disc. Work 6 sc in a magic ring for Round 1, then increase in every stitch for Round 2 to reach twelve. Fasten off the red disc. Keep the green yarn attached to its disc.
| Round / step | Instructions |
|---|---|
| Join / Round 3 | Place the backs of the red and green discs together. With green, work through the matching stitch positions of both layers: repeat (sc, inc) six times. (18) |
| 4 | With green, repeat (2 sc, inc) six times. (24) |
| 5 | Repeat (ch 3, sl st in the same stitch, sl st in each of the next two stitches) around. Fasten off with a long sewing tail. |
Make four joined trap heads in total, using four red and four green starting discs. The green edge expands beyond the small red center. The ch-3 loops create the tooth-like points around the rim. Keep the loops outside the outline rather than pulling them flat across the red center.
Crochet Three Long Leaves
With green, ch 15. Starting in the second chain from the hook, work: 1 sc, 2 hdc, 2 dc, 4 tr, 2 dc, 2 hdc and 2 sc in the last chain. Continue along the opposite side of the foundation: 1 sc, 2 hdc, 2 dc, 4 tr, 2 dc, 2 hdc and 1 sc. Fasten off with a sewing tail. Make three leaves.
In that sequence, “2 hdc” and the other numbered stitch runs mean one stitch in each of the next stated number of chains. Only the explicit 2 sc in the last chain is an increase. Keep the two sides of the foundation visible as you work so the leaf does not twist around its chain.
Make the Pot from the Bottom Up
| Round / step | Instructions |
|---|---|
| 1 | 8 sc in a magic ring. (8) |
| 2 | Inc around. (16) |
| 3 | Repeat (sc, inc) eight times. (24) |
| 4 | Repeat (3 sc, inc) six times. (30) |
| 5 | Repeat (4 sc, inc) six times. (36) |
| 6 | Sc around in BLO. (36) |
| 7 | Sc around. (36) |
| 8 | Repeat (5 sc, inc) six times. (42) |
| 9 | Sc around. (42) |
| 10 | Repeat (6 sc, inc) six times. (48) |
| 11-16 | Sc around for six rounds. (48 each round) |
| 17 | Repeat (6 sc, dec) six times. (42) |
| 18 | Repeat (5 sc, dec) six times. (36) |
| 19 | Sc around. (36) |
| 20 | Work in FLO: ch 1 and hdc around. Fasten off. (36 hdc) |
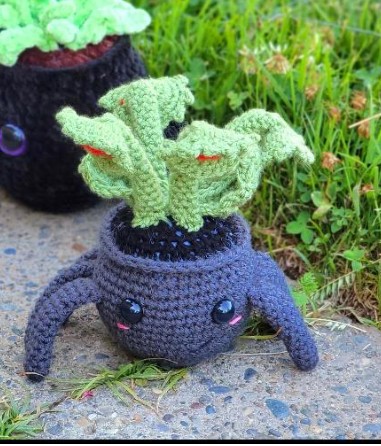
This produces the plain pot foundation. To recreate the spider-shaped reference exactly, use the optional leg attachment from our crochet spider planter tutorial while making the pot. The four-trap plant above is the new botanical option, rather than another copy of its succulent top.
Fill the Pot and Close the Soil
Join the soil yarn to the unused back loops behind the FLO rim. Add fiberfill to support the pot as the top closes. The source calls these the back loops of the rim round; use the loops left available behind that front-loop edging.
| Round / step | Instructions |
|---|---|
| 1 | Repeat (4 sc, dec) six times. (30) |
| 2 | Repeat (3 sc, dec) six times. (24) |
| 3 | Repeat (2 sc, dec) six times. (18) |
| 4 | Repeat (sc, dec) six times. (12) |
| 5 | Dec six times. (6) Fasten off and sew the remaining opening closed. |
Assemble the Flytrap Plant
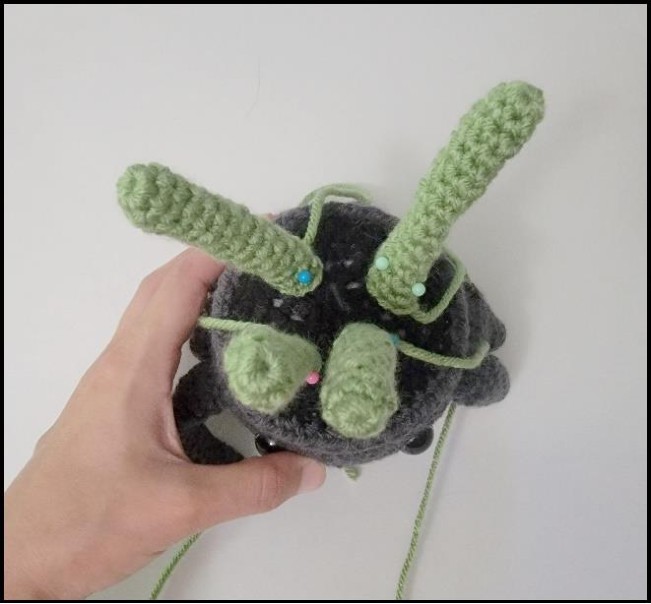
- Pin the four stem bases to the soil surface and check the spacing before sewing. Secure each base using its retained tail.
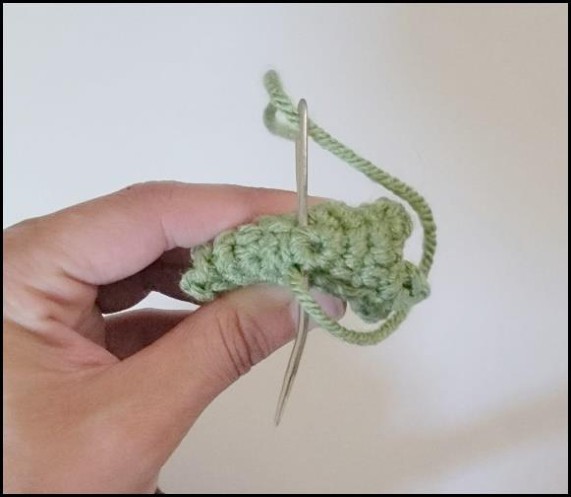
- Fold one trap head in half with the red center inside. Sew the back as shown by the source photo so the trap keeps its partly closed shape.
- Sew that trap onto the top of one stem. Repeat with the other three trap heads, varying their directions enough that the openings remain visible.
- Pin the three leaves around the stem bases and sew them to the top of the pot. Hide the tails beneath the plant parts and remove all pins.
Questions About the Flytrap
Are the stems stuffed?
The source leaves them unstuffed and offers a cake dowel for support. The pot receives fiberfill; the red-and-green trap discs are not stuffed balls.
How many plant pieces do I need?
Four stems, four red starting discs, four green starting discs and three long leaves. Join one red and one green disc for each finished trap head.
More Crochet Flowers and Plants
For another botanical project, try the spider-shaped pot and succulent option or a polar bear cactus planter.
Pattern and Photo Credits
Adapted from Sweet Oddity Art, Planter Crochet Pattern (2023). The reference photographs and diagrams show the original source project. This written adaptation has been checked against the supplied pages; it has not been physically crocheted or maker-tested for this article.
Leave a Reply