
Crochet Spider Succulent Planter with Eight Soft Legs
· admin
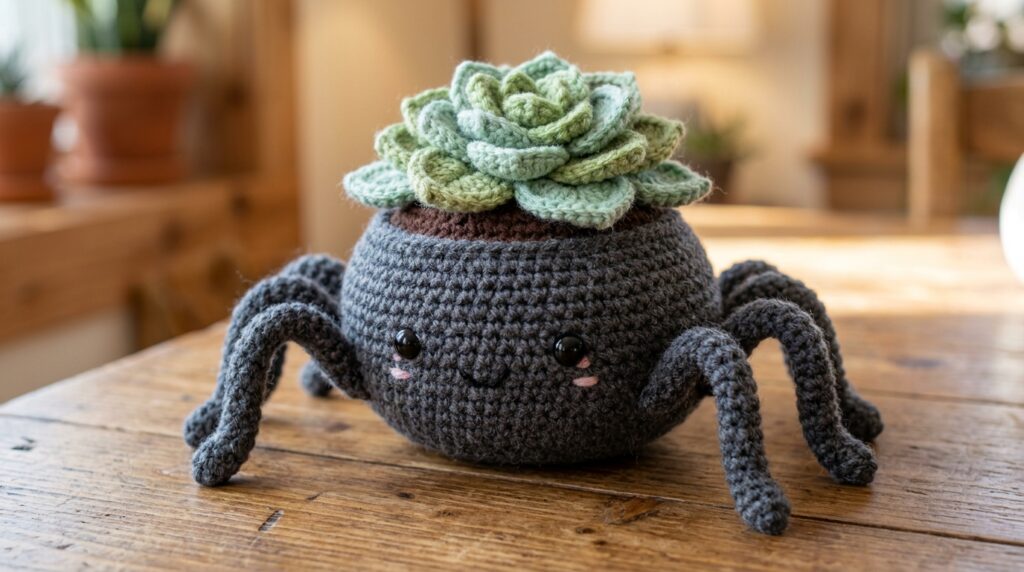
This crochet spider succulent planter combines a round spider-shaped pot with a green leafy top. Eight narrow legs are attached around the body, while the succulent is worked directly into the soil surface. The design comes from Sweet Oddity Art’s supplied Planter Crochet Pattern. Make the legs before the pot if you want to crochet them into the body as you go.
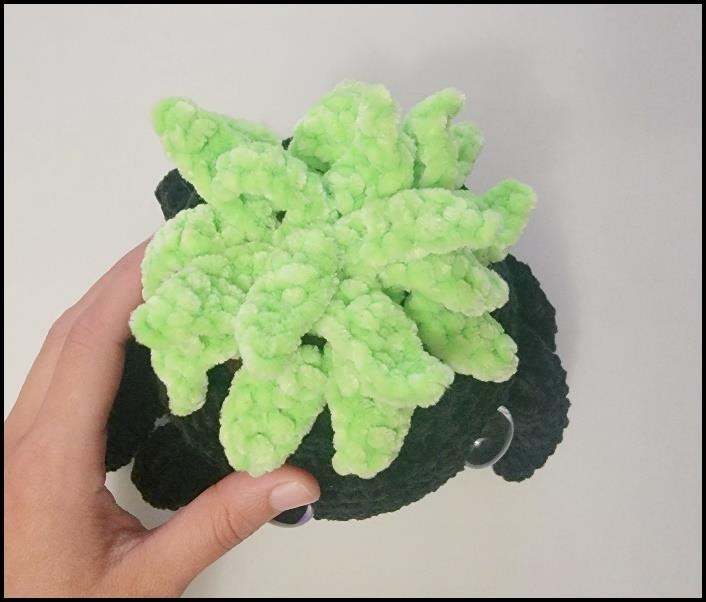
Crochet Spider Succulent Planter Materials
- Worsted-weight No. 4 yarn in the pot color, soil color and green. The source gives approximately 75 g main color and 25 g accent colors for a planter.
- A 3.25 mm hook for the worsted version. Use a hook that produces a firm fabric with your yarn.
- Two 16 mm eyes for the worsted version, or the finishing method appropriate to your project. The source separately lists 21 mm eyes for its bulky spider.
- Fiberfill, scissors, a sewing needle and a stitch marker.
- Optional pipe cleaners for the legs, as mentioned in the source.
US Crochet Terms and Preparation
Ch means chain, sl st slip stitch, sc single crochet, hdc half double crochet, dc double crochet and tr treble crochet. An increase puts two stitches into one stitch; a decrease combines two stitches. Work in continuous spirals unless the row instructions say to turn. BLO means back loop only and FLO front loop only. Inc means two sc in one stitch; dec means sc2tog. Mark the start of each pot round.
Make Eight Spider Legs
Work 7 sc into a magic ring. Sc around for Rounds 2-12, keeping seven stitches in each round. Leave the legs unstuffed. The source optionally inserts a pipe cleaner for shaping. Flatten each leg opening and single crochet it closed. Fasten off; leave a sewing tail if the legs will be attached after the pot is complete.
Crochet the Spider Pot
| Round / step | Instructions |
|---|---|
| 1 | 8 sc in a magic ring. (8) |
| 2 | Inc in every stitch. (16) |
| 3 | Repeat (sc, inc) eight times. (24) |
| 4 | Repeat (3 sc, inc) six times. (30) |
| 5 | Repeat (4 sc, inc) six times. (36) |
| 6 | Work sc around in BLO. (36) |
| 7 | Sc around. (36) |
| 8 | Repeat (5 sc, inc) six times. (42) |
| 9 | Sc around. (42) |
| 10 | Repeat (6 sc, inc) six times. (48) |
| 11-16 | Sc around for six rounds. (48 each round) |
| 17 | Repeat (6 sc, dec) six times. (42) |
| 18 | Repeat (5 sc, dec) six times. (36) |
| 19 | Sc around. (36) |
| 20 | Work in FLO: ch 1, hdc in each stitch around. Fasten off. (36 hdc) |
Option A: Crochet the Legs into Round 14
Have all eight legs ready. At Round 14, work: 2 sc; repeat (3 sc through both a leg opening and the pot, 1 sc in the pot) four times; 11 sc; repeat the same four-leg group on the other side; 3 sc. The round still contains forty-eight sc. Continue with Rounds 15-20 as listed above.
Place the two eyes between Rounds 14 and 15, leaving eight holes between them, following the source placement. Check that the leg groups frame the front rather than covering the eye positions.
Option B: Sew the Legs Afterward
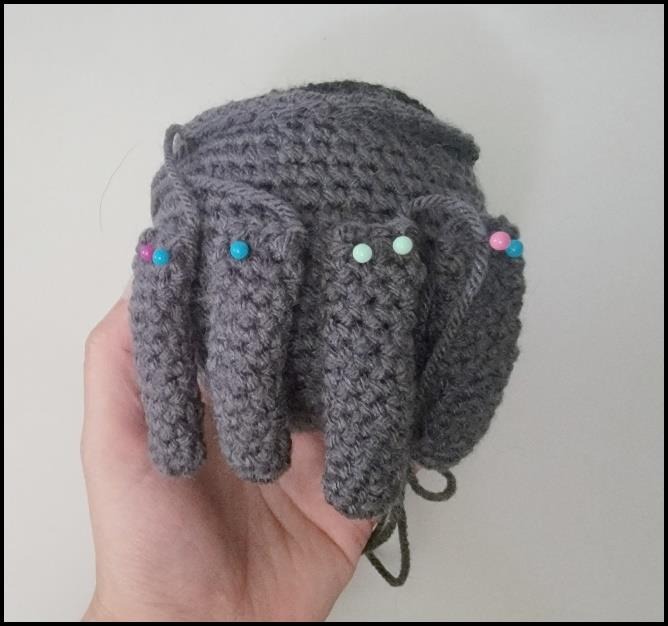
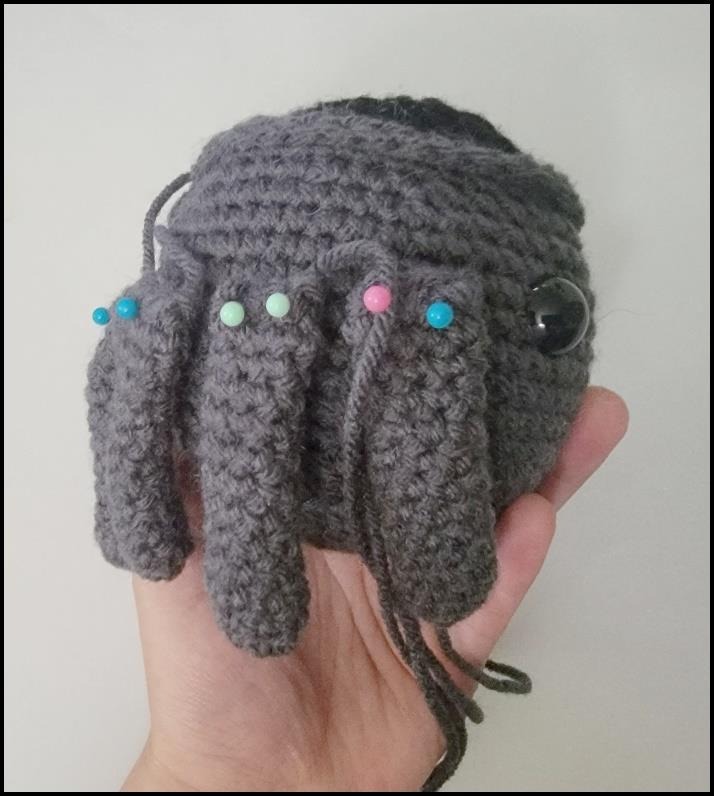
If you worked ordinary sc through Round 14, pin four legs on each side of the pot. Compare the left and right spacing, then sew the closed ends to the body. The reference photos show the positioning with pins before the final sewing. Embroider the mouth or other facial details if desired.
Close the Soil Surface
| Round / step | Instructions |
|---|---|
| 1 | Join the soil color to the unused back loops behind the FLO rim. Repeat (4 sc, dec) six times. (30) |
| 2 | Repeat (3 sc, dec) six times. (24) |
| 3 | Repeat (2 sc, dec) six times. (18) |
| 4 | Repeat (sc, dec) six times. (12) |
| 5 | Dec six times. (6) Fasten off and sew the remaining opening closed. |
The original calls this attachment the back loops at the rim round. Use the unused loops behind the FLO edging, not a new chain of stitches around the top. Add the fiberfill needed to support the pot before the soil opening becomes too small. Keep the top even so the plant does not lean.
Crochet the Succulent Leaves onto the Soil
Join green yarn with a sl st on the soil surface between its Rounds 2 and 3. Ch 7. Starting in the second chain from the hook, work sl st, sc, hdc, dc in each of the next two chains and tr in the last chain. Secure the leaf with sl st in the next two attachment positions on the soil. Repeat this chain-and-return leaf unit, following the soil spiral inward until you reach the center.
The source does not give a fixed leaf count. Arrange the attachment path on the visible soil rather than inventing extra decrease rounds or a separate flat leaf disc. Spread the finished leaves so they overlap lightly, then hide the last green tail beneath the foliage.
Check the Shape and Balance
Set the spider on a flat surface before the last leg stitches are secured. The lower body should sit evenly and the legs should spread to either side. Keep the succulent centered over the soil; a dense group placed entirely at one edge will make the pot look tilted even if the body rounds are correct.
Questions About the Spider Planter
Which leg attachment should I choose?
Crocheting the legs in during Round 14 reduces later sewing but requires the legs first. Sewing them afterward lets you adjust their placement with pins. The pot stitch count stays the same.
Is there an exact finished height?
The source gives a general planter height of about six inches with No. 4 yarn and a 3.25 mm hook, depending on the plant. It does not give a separate exact height for this spider variation.
More Crochet Flowers and Plants
For another botanical project, explore our a trailing crochet plant and a wired crochet coleus plant.
Pattern and Photo Credits
Original design and reference photographs: Sweet Oddity Art, supplied Planter Crochet Pattern (2023). This article adapts the supplied pattern; the source photographs and diagrams show the original project.
Leave a Reply