
Crochet Polar Bear Cactus Planter with Holly and Berries
· admin
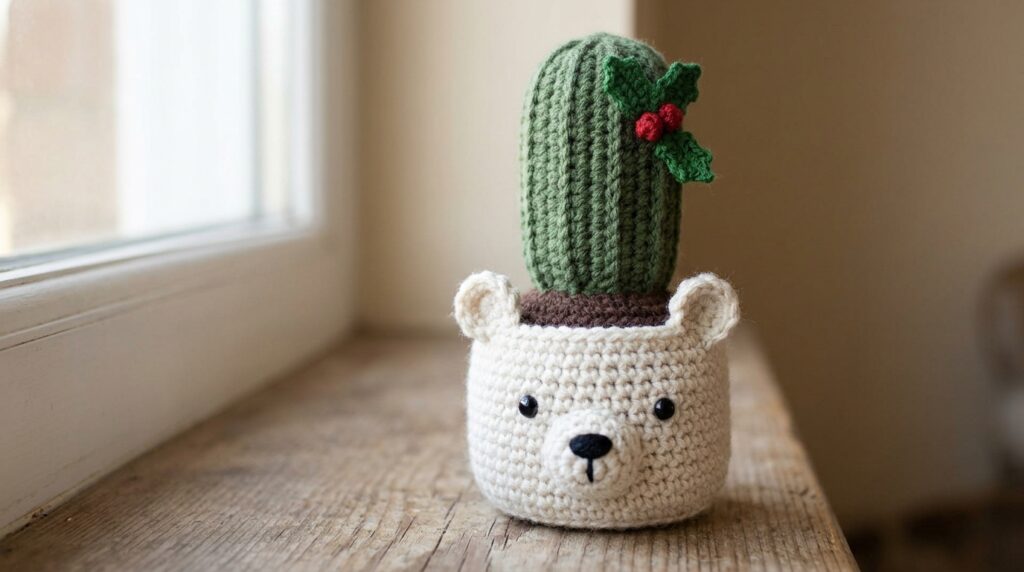
This crochet polar bear cactus planter pairs a white animal pot with a ribbed green cactus. Small ears and a rounded muzzle form the bear face, while two holly leaves and two berries add a decorative finish near the cactus top. The cactus begins as a flat back-loop panel; sewing and gathering the panel create its upright shape.
Crochet Polar Bear Cactus Planter Materials
- Worsted-weight No. 4 yarn in white, green, soil color and red. The source gives approximately 75 g main color and 25 g accent colors per planter, with colors varying by version.
- A 3.25 mm hook for the worsted version.
- Two 16 mm eyes for the worsted pot and an 18 mm nose for the bear muzzle, following the source details.
- Fiberfill, scissors, a sewing needle, pins and a stitch marker.
US Crochet Terms and Preparation
Ch means chain, sl st slip stitch, sc single crochet, hdc half double crochet, dc double crochet and tr treble crochet. An increase puts two stitches into one stitch; a decrease combines two stitches. Work in continuous spirals unless the row instructions say to turn. BLO means back loop only and FLO front loop only. Inc means two sc in one stitch; dec means sc2tog. Mark the start of each pot round. For the holly, dc inc means two dc in one stitch and inc3 means three sc in one stitch.
Crochet the White Bear Pot
| Round / step | Instructions |
|---|---|
| 1 | 8 sc in a magic ring. (8) |
| 2 | Inc in every stitch. (16) |
| 3 | Repeat (sc, inc) eight times. (24) |
| 4 | Repeat (3 sc, inc) six times. (30) |
| 5 | Repeat (4 sc, inc) six times. (36) |
| 6 | Work sc around in BLO. (36) |
| 7 | Sc around. (36) |
| 8 | Repeat (5 sc, inc) six times. (42) |
| 9 | Sc around. (42) |
| 10 | Repeat (6 sc, inc) six times. (48) |
| 11-16 | Sc around for six rounds. (48 each round) |
| 17 | Repeat (6 sc, dec) six times. (42) |
| 18 | Repeat (5 sc, dec) six times. (36) |
| 19 | Sc around. (36) |
| 20 | Work in FLO: ch 1, hdc in each stitch around. Fasten off. (36 hdc) |
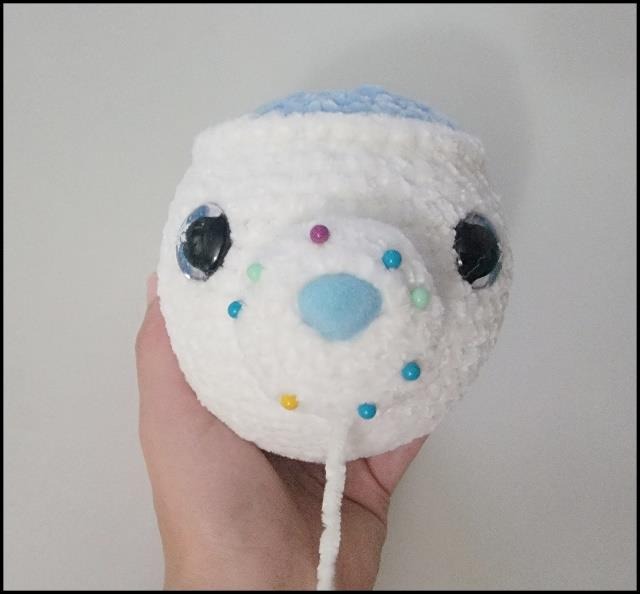
Place the eyes between Rounds 14 and 15 with ten holes between them. Check the front position before closing the soil. The general source size is approximately six inches from the pot bottom to the plant top with the recommended worsted yarn, but it varies with the plant and tension.
Make Two Bear Ears
| Round / step | Instructions |
|---|---|
| 1 | 6 sc in a magic ring. (6) |
| 2 | Inc around. (12) |
| 3 | Repeat (sc, inc) six times. (18) |
| 4 | Sc around. (18) |
| 5 | Repeat (sc, dec) six times. (12) |
Leave the ears unstuffed. Flatten each opening and sc it closed. Fasten off with a long sewing tail. Pin the ears onto the sides of the pot and check that their heights match before sewing.
Crochet and Attach the Bear Muzzle
With white yarn, work 6 sc in a magic ring. Increase around to twelve stitches, then repeat (sc, inc) six times to reach eighteen. Work eighteen sc for Rounds 4 and 5. Place the 18 mm nose between the first and second rounds, fasten off with a sewing tail and attach the muzzle to the front of the bear pot between the eyes.
Close the Soil
| Round / step | Instructions |
|---|---|
| 1 | Join the soil color to the unused back loops behind the FLO rim. Repeat (4 sc, dec) six times. (30) |
| 2 | Repeat (3 sc, dec) six times. (24) |
| 3 | Repeat (2 sc, dec) six times. (18) |
| 4 | Repeat (sc, dec) six times. (12) |
| 5 | Dec six times. (6) Fasten off and sew the remaining opening closed. |
The original calls this attachment the back loops at the rim round. Use the unused loops behind the FLO edging, not a new chain of stitches around the top. Add the fiberfill needed to support the pot before the soil opening becomes too small. Keep the top even so the plant does not lean.
Crochet the Ribbed Cactus Panel
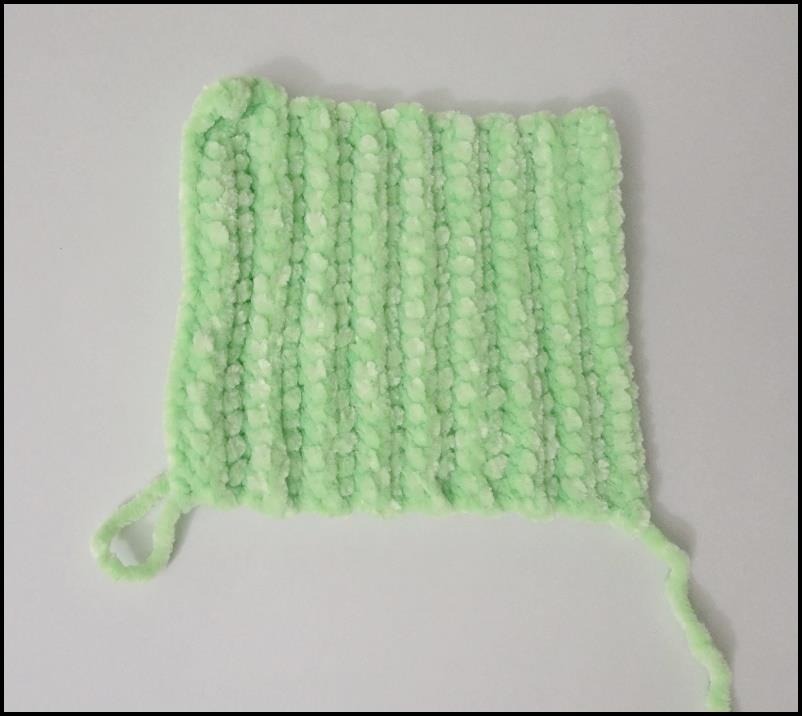
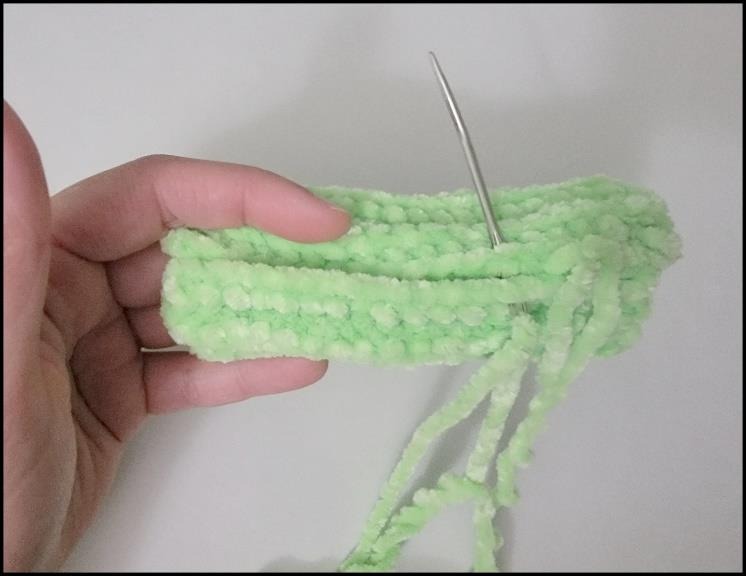
With green yarn, ch 20. Starting in the second chain from the hook, sc across: nineteen sc. For Rows 2-16, ch 1, turn and work nineteen sc through the back loops only. The turning chain does not count as a stitch. Keep the edges straight by counting the nineteen stitch tops after each row.
Sew and Stuff the Cactus
- Bring the foundation edge and final-row edge together and sew them into a tube, keeping the ribbing vertical.
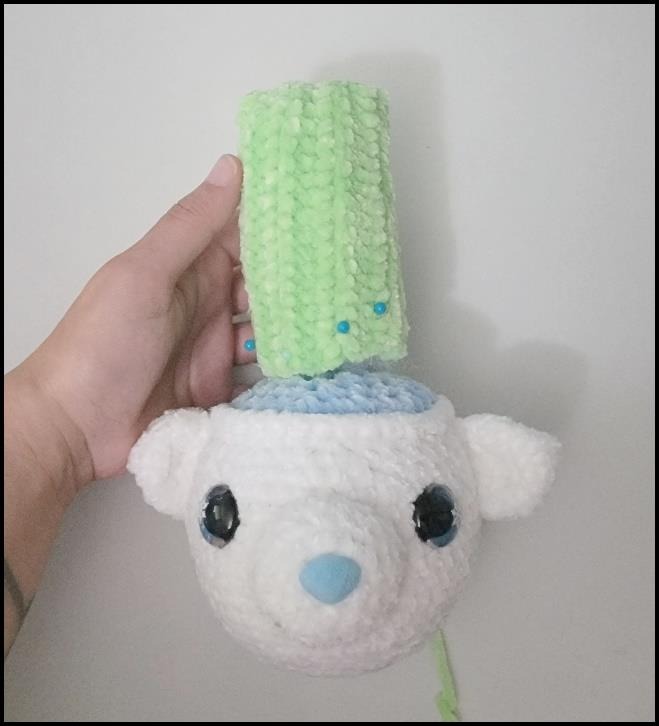
- Gather the upper end with yarn to make the rounded top. Add fiberfill so the cactus holds its shape without stretching the ribbing flat.
- Pin the open lower edge onto the closed soil surface, check the upright position and sew it securely to the top of the pot.
Make Two Red Berries
For each berry, work 6 sc in a magic ring, then sc around for a second six-stitch round. Decrease three times in Round 3 to leave three stitches. Sew the opening closed and leave a tail for attaching it.
Crochet Two Holly Leaves
Ch 10 with green yarn. Starting in the second chain from the hook, work sc, sc, hdc, dc, dc inc, dc, hdc, sc and 3 sc in the last chain. Continue on the opposite side: sc, hdc, dc, dc inc, dc, hdc, sc, then sl st in the last stitch as directed in the source.
For the pointed edge, work: sc; (ch 3, sl st in the same stitch); 4 sc; the same ch-3 point; 4 sc; a point; 2 sc; a point; 4 sc; a point; 3 sc; join with a sl st to the first stitch. Fasten off with a sewing tail. Keep the points outside the leaf outline rather than pulling the return sl st across its surface.
Finish the Holly Decoration
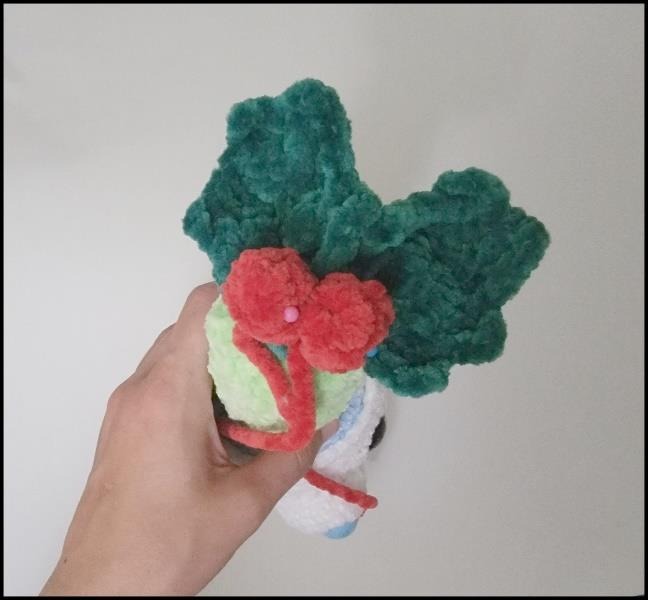
Arrange the two leaves near the cactus top and sew them in place. Attach the two berries over their bases, using the source photographs to compare the placement. Hide the tails inside the cactus and check that no pins remain in the completed planter.
Questions Before You Finish
Is the cactus worked in rounds?
No. Its body is a nineteen-stitch back-loop panel worked for sixteen rows, then sewn into a tube. The pot, ears, muzzle and berries use rounds.
Are the ears stuffed?
The source leaves the ears unstuffed and closes them flat. The cactus needs stuffing so the ribs hold an upright form.
More Crochet Flowers and Plants
For another botanical project, explore our plain ribbed crochet cacti and a crochet bonsai tree.
Pattern and Photo Credits
Original design and reference photographs: Sweet Oddity Art, supplied Planter Crochet Pattern (2023). This article adapts the supplied pattern; the source photographs and diagrams show the original project.
Leave a Reply