
Crochet Sunflower Pattern with Two Layers of Wired Petals
· admin
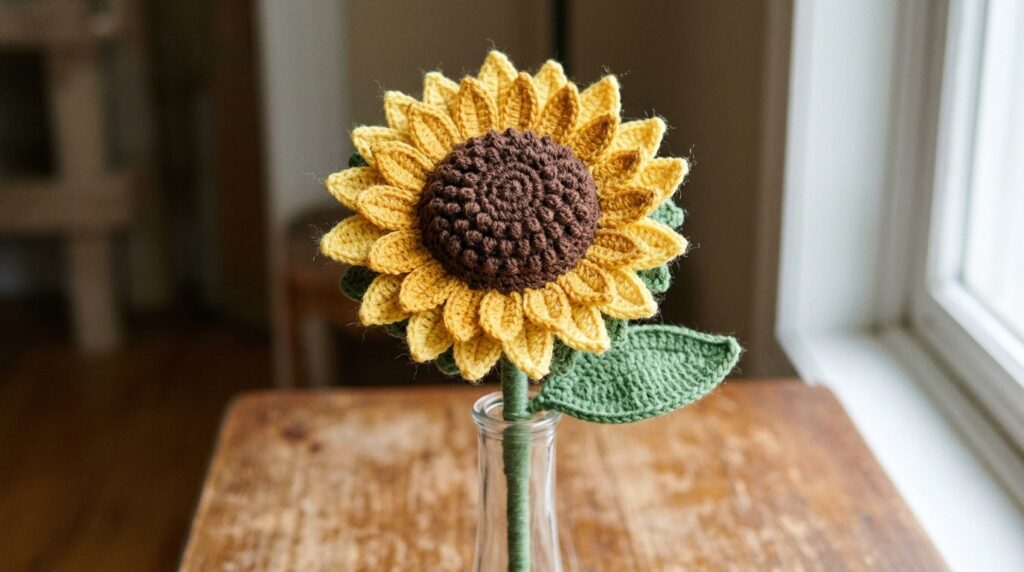
This crochet sunflower pattern builds a large flower from a textured center, two layers of wired yellow petals, a green backing and a shaped leaf. Surface chain loops create the seed texture, while the wire edging lets you curve the petals around the center. The finished bloom is attached to a reinforced wrapped stem.
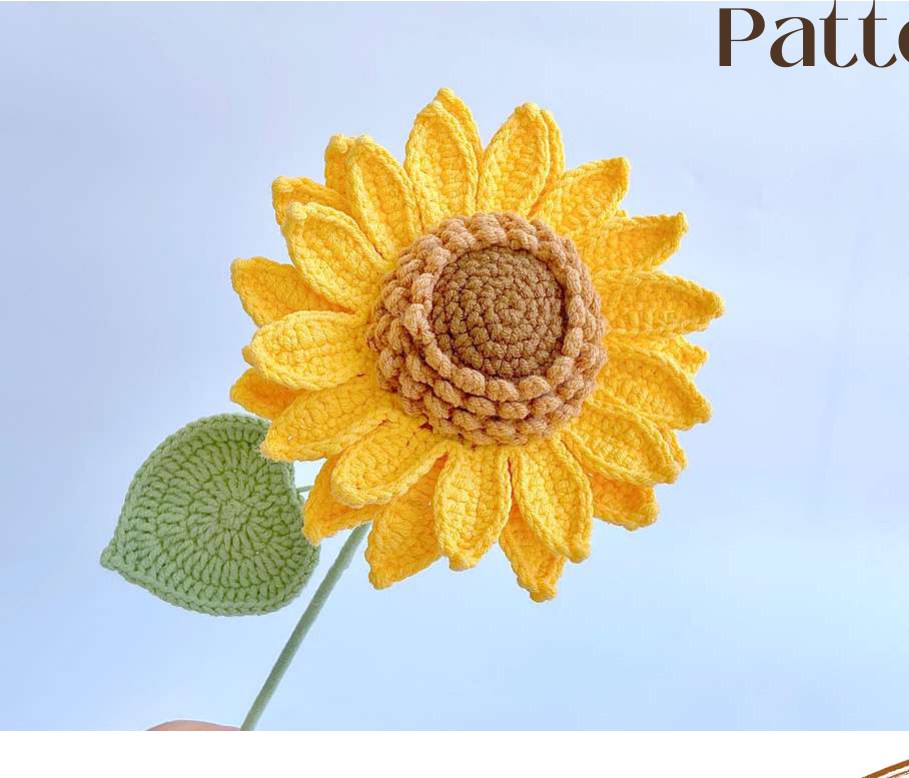
Crochet Sunflower Pattern Materials
- Four-ply milk cotton yarn in the center, petal and green leaf colors shown in the reference photo.
- A 2.5 mm hook, yarn needle, scissors and stuffing.
- 0.5 mm craft wire; approximately 15 cm is specified for the leaf edging.
- Three floral stems, each 2 mm wide and 40 cm long, plus glue and wire cutters.
Stitches and Pattern Notes
US terms are used here. Ch = chain, sl st = slip stitch, sc = single crochet, hdc = half double crochet, dc = double crochet, tr = treble crochet, MR = magic ring, inc = 2 stitches in one stitch, and dec = a decrease across two stitches. BLO means back loop only and FLO front loop only. For the joined center and backing rounds, ch 1 to start does not count as a stitch; join with a slip stitch through the full first stitch. The source uses a chain point at the petal tip and longer picots on the leaf and backing. Follow the specified chain count for each component.
Flower Center
| Round / step | Instructions | Count |
|---|---|---|
| 1 | 6 sc in MR. | 6 |
| 2 | Inc around. | 12 |
| 3 | (sc, inc) 6 times. | 18 |
| 4 | (2 sc, inc) 6 times. | 24 |
| 5 | (3 sc, inc) 6 times. | 30 |
| 6 | BLO, (2 sc, inc, 2 sc) 6 times. | 36 |
| 7 | BLO, (5 sc, inc) 6 times. | 42 |
| 8 | BLO, (3 sc, inc, 3 sc) 6 times. | 48 |
| 9 | BLO, (7 sc, inc) 6 times. | 54 |
| 10 | BLO, sc around. Fasten off. | 54 |
The unused front loops from center Rounds 5-8 are the seed anchors. Keep them free when joining the later rounds.
Add Four Rings of Seed Texture
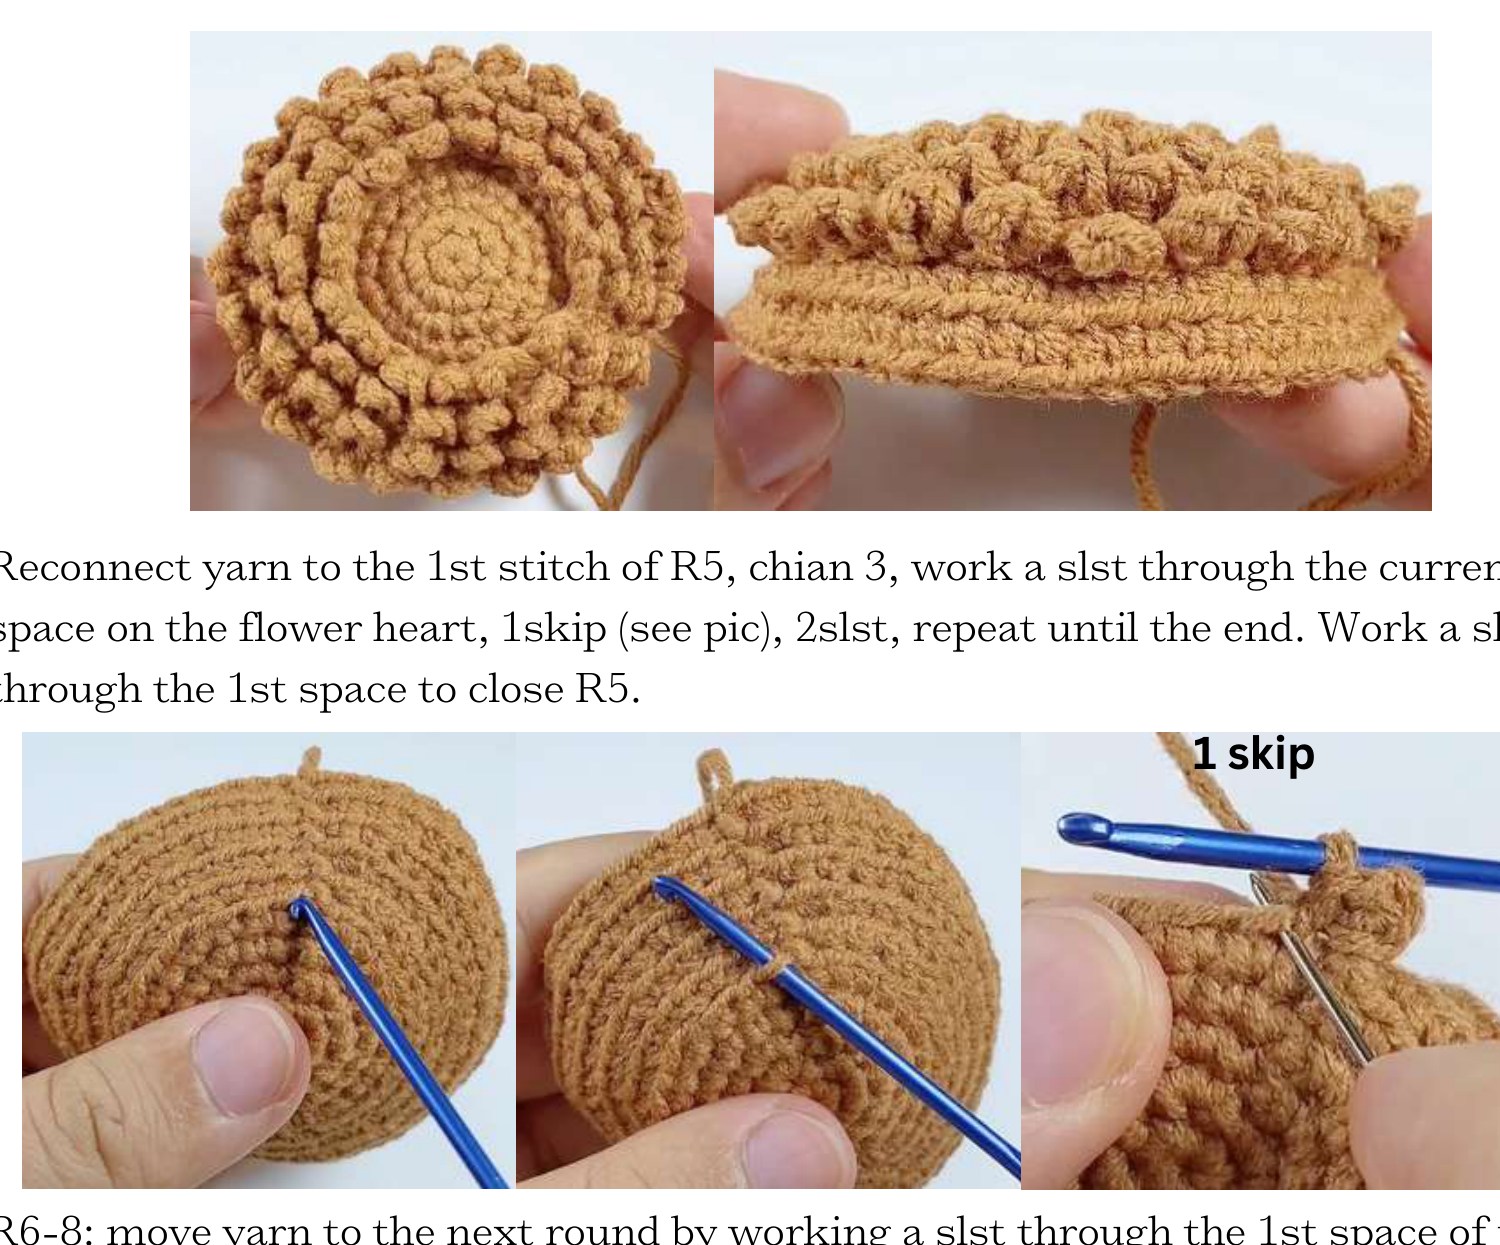
Rejoin the center yarn at the first unused front loop of Round 5. Make a ch-3 loop and secure it with a slip stitch at its base. Move along the unused loop track with slip stitches, leaving the skipped anchor shown in the source photo between seed loops. Continue the surface sequence around the ring and close at the first anchor.
Work the same surface loops on the remaining tracks, moving to the next ring with a slip stitch. The source targets are 15 loops on Round 5, 18 on Round 6, 21 on Round 7 and 24 on Round 8. Use these targets and the placement photo together; the loops are applied on the surface, not crocheted as extra increasing rounds.
First Layer: Eighteen Shorter Petals
Join the petal color at the first stitch of center Round 9. Ch 8 and work 7 sc back from the second chain. Skip one center stitch and work 2 sl st to move to the next petal position. Repeat for eighteen petals, join to the first stitch and keep the yarn attached.
Work the edging over craft wire. For each petal, work sc, hdc, 3 dc, sc, (sc, ch 1, sc) at the tip, then hdc, 3 dc, hdc and sc along the other side. Skip one stitch and sl st between petals as shown. Repeat for all eighteen, join, fasten off and secure the wire ends.
Second Layer: Eighteen Longer Petals
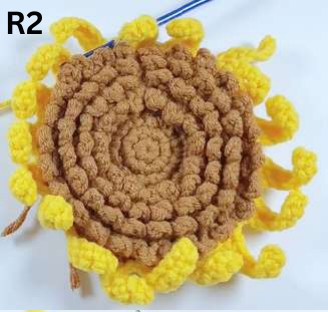
Use the remaining front-facing loops for the second layer. For each petal, ch 10 and work 9 sc back from the second chain, skip one anchor and move with 2 sl st. Make eighteen. The source begins this layer with ch 10 but later says ch 8 in the repeat; ch 10 is retained for every longer petal so all eighteen match the stated 9-sc backbone.
Edge over wire using sc, hdc, 5 dc, sc, (sc, ch 1, sc) at the tip, then hdc, 5 dc, hdc and sc on the other side. Skip one stitch and work 2 sl st between petals. Join after the final petal, fasten off and secure the wire.
Green Backing and Sepal Edge
| Round / step | Instructions | Count |
|---|---|---|
| 1 | 6 sc in MR. | 6 |
| 2-3 | Sc around. | 6 |
| 4 | Inc around. | 12 |
| 5 | (sc, inc) 6 times. | 18 |
| 6 | (2 sc, inc) 6 times. | 24 |
| 7 | (3 sc, inc) 6 times. | 30 |
| 8 | (2 sc, inc, 2 sc) 6 times. | 36 |
| 9 | (5 sc, inc) 6 times. | 42 |
| 10 | (3 sc, inc, 3 sc) 6 times. | 48 |
| 11 | (7 sc, inc) 6 times. | 54 |
Round 12 uses FLO. Work ch 1, then (2 dc, a ch-3 picot, 2 dc) in the same stitch; in the next stitch work sl st and ch 1; skip the following stitch. Repeat around, join and fasten off. A ch-3 picot is ch 3 and sl st into the first chain. The unused loops behind this edge remain available for sewing the backing to the center.
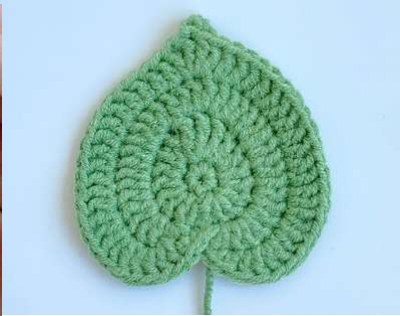
Four-Round Wired Leaf
| Round | Instructions |
|---|---|
| 1 | 7 sc in MR. |
| 2 | Ch 2, not counted. Work 3 dc in first stitch, 2 dc in each of next 2 stitches, 3 tr in next, 2 dc in each of next 2, then (3 dc, ch 2) in last. Join to first stitch of Round 1. |
| 3 | Ch 2, not counted; incorporate approximately 15 cm of wire. Work (sc, hdc) in first stitch, 3 dc in next, 2 dc in each of next 6, 3 dc in next, 2 dc in each of next 6, 3 dc in next, then (hdc, sc, ch 1). Join as shown in the source leaf photo. |
| 4 | Ch 1, not counted. Sc, hdc, 2 dc in each of next 5 stitches, 11 dc, (dc, tr, ch-2 picot, tr, dc) at the tip, 11 dc, 2 dc in each of next 5 stitches, hdc, sc, ch 1 and join. Fasten off and wrap the wire ends with the tail. |
Attach the Reinforced Stem
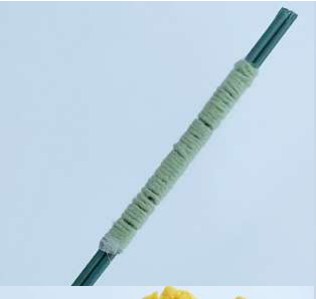
- Wrap approximately 5 cm at one end of the three 40 cm floral stems together with yarn and bend that wrapped section as shown in the assembly photo.
- Sew the sunflower center to the backing. Stop after about three quarters of the seam to insert the bent stem end and stuffing.
- Finish sewing and hide the tail. Apply a small amount of glue where the backing meets the stem to prevent movement.
- Wrap the stems with green yarn, catching in the leaf wire at the desired position. Secure the wrapping at the bottom.
- Shape the wired petals and leaf gradually, checking the balance of the flower head.
More Crochet Projects
For another project, try our crochet bluebell flowers or explore a wired crochet lily with buds.
Pattern and Photo Credits
The supplied Crochet Sunflower Pattern and reference photographs. The designer is not identified in the supplied file. This is an editorial adaptation of the supplied pattern, with the original designer credited. Reference photographs show the source project.
Leave a Reply