
Crochet Lily Flower Pattern with Wired Petals, Leaves and Buds
· admin
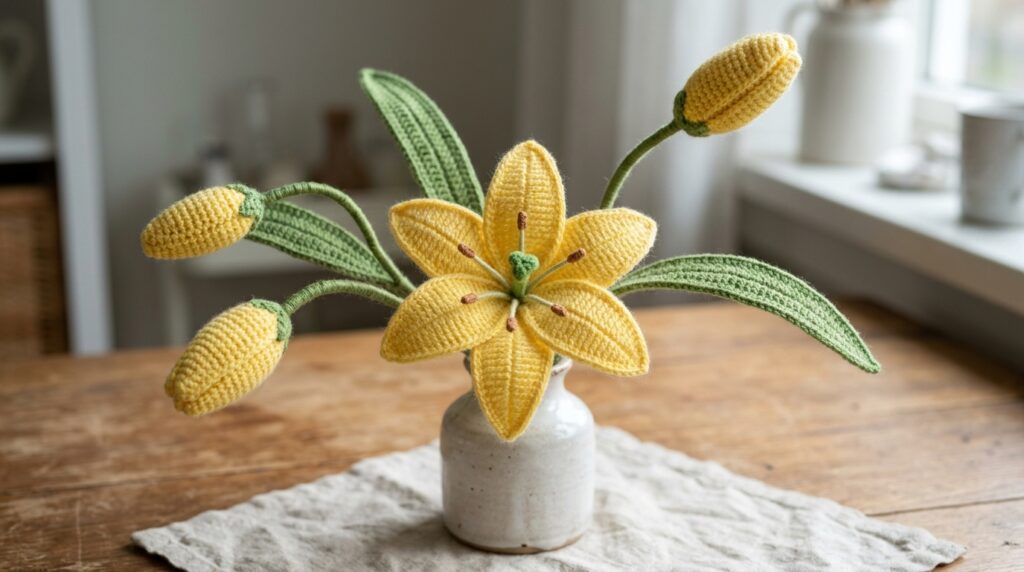
This crochet lily flower pattern creates a realistic bloom from separate wired petals, leaves and a detailed center. Three smaller A petals and three larger B petals form one open bloom; two matching petals can also be sewn into a closed bud. The source describes an intermediate project. Make and label the separate pieces before joining them so the two petal sizes stay in the right order around the flower.
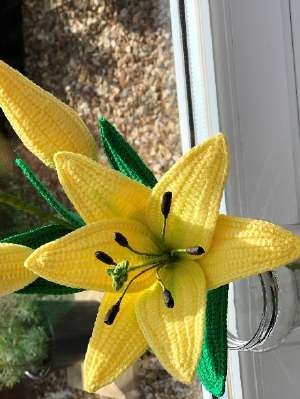
Materials for the Crochet Lily Flower Pattern
- A 1.5 mm hook and DK / light-worsted yarn in the flower color and green.
- About 30–46 cm of 1.2 mm stem wire per stem.
- 0.46 mm florist wire: about 30 cm per petal and 64 cm per leaf in the source sample, with spare length if your pieces are larger.
- Wire cutters, scissors, a yarn needle and filling for the closed buds.
- Green and dark-brown floral tape; optional craft glue or hot glue and a green crayon for shading.
Before you begin
Use US terms. Sc, hdc, dc and tr mean single, half double, double and treble crochet. An increase such as 2-dc inc means two dc in one stitch. Work through both loops unless otherwise stated. There is no numerical gauge requirement; use a hook that gives firm fabric. The source includes an optional candle-flame finishing method; this adaptation leaves that out and uses hand shaping. Keep the lettered petal shapes separate during assembly.
Petal A: make three for an open bloom
Petal: Make 3 per bloom. Make 2 per closed bud if making a smaller closed bud. Color: Flower color (yellow shown)
Foundation: Slip knot (leave a 2-3” tail), ch 26
Round 1: sc in 2nd ch from hook and next 2 chs, hdc in next 3 chs, dc in next 8 chs, hdc in next 8 chs, sc in next 2 chs, (sc, ch 1, sc inc) in last ch, rotate work (hold the tail along the chain and wrap the new sts around the tail), sc in next 2 chs down opposite side of petal, hdc in next 8 chs, dc in next 8 chs, hdc in next 3 chs, sc in next 3 chs, sl st in turning ch
Round 2: ch 1, sc in next 2 sts, hdc in next 2 sts, [dc in next 2 sts, 2-dc inc in next st] x3, dc in next 3 sts, hdc in next 4 sts, sc in next 5 sts, (sc, ch 1, sc inc) in ch 1 space of Round 1, rotate work, sc in next 5 sts, hdc in next 4 sts, dc in next 3 sts, [2-dc inc in next st, dc in next 2 sts] x3, hdc in next 2 sts, sc in next 2 sts, sl st in turning ch
Round 3: ch 3, insert .46 mm (25 Gauge US) wire through ch on hook, leaving a 3” tail (work round by wrapping each st around wire all the way around the petal) Using heavier yarn or a larger hook may require a longer piece of wire – calculate length of wire needed per petal by measuring length of one petal and multiply by 2, add an extra 2-3” for safety and comfort while working. The same can be applied to the leaves, but multiply the length of the leaf by 4 instead of 2. Remember: excess wire can be removed later, but adding more is difficult sc in 2nd ch from hook and next ch, hdc in next 13 sts, sc in next 16 sts, (sc, hdc, ch 2, sc) in ch 1 space of Round 2, sc in next 16 sts, hdc in next 13 sts, sc in next 2 chs, sl st in turning ch with hook in front of wires and yarn behind wires, cut the wire leaving a second 3” tail.
Finishing: Pull both wire tails through the last st before tightening. Wrap the tail around the wires a few times and then again so it sits between the two wires. Twist the wires twice so the twists sit right up against the end of the petal. Cut the yarn close to the wire. Trim wire tails near the end of twists.
Shaping: Pinch the tip of the petal to a point
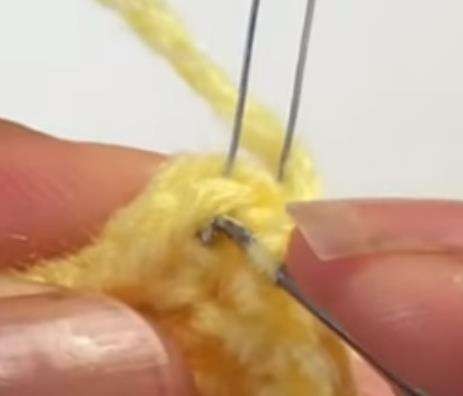
Petal B: make three for an open bloom
Petal: Make 3 per open bloom. Make 2 per closed bud if making a larger closed bud. Color: Flower color (yellow shown)
Foundation: Slip knot (leave a 2-3” tail), ch 28
Round 1: sc in 2nd ch from hook and next 2 chs, hdc in next 3 chs, dc in next 9 chs, hdc in next 9 chs, sc in next 2 chs, (sc, ch 1, sc) in last ch, rotate work (hold the tail along the chain and wrap the new sts around the tail), sc in next 2 chs down opposite side of petal, hdc in next 9 chs, dc in next 9 chs, hdc in next 3 chs, sc in next 3 chs, sl st in turning ch
Round 2: ch 1, sc in next 2 sts, hdc in next 2 sts, [dc in next 2 sts, 2-dc inc in next st] x3, dc in next 3 sts, hdc in next 5 sts, sc in next 6 sts, (sc, ch 1, sc) in ch 1 space of Round 1, rotate work, sc in next 6 sts, hdc in next 5 sts, dc in next 3 sts, [2-dc inc in next st, dc in next 2 sts] x3, hdc in next 2 sts, sc in next 2 sts, sl st in turning ch
Round 3: ch 3, insert .46 mm (25 Gauge US) wire through ch on hook, leaving a 3” tail (work round by wrapping each st around wire all the way around the petal), hdc in 2nd ch from hook and next ch, hdc in next 15 sts, sc in next 16 sts, (sc, hdc, ch 2, sc) in ch 1 space of Round 2, sc in next 16 sts, hdc in next 15 sts, hdc in next 2 chs, sl st in turning ch with hook in front of wires and yarn behind wires, cut the wire leaving a second 3” tail.
Finishing: Pull both wire tails through the last st before tightening. Wrap the tail around the wires a few times and then again so it sits between the two wires. Twist the wires twice so the twists sit right up against the end of the petal. Cut the yarn close to the wire. Trim wire tails near the end of twists.
Shaping: Pinch the tip of the petal to a point
Make two green leaves per stem
Leaf: Make 2 per stem. Color: Green
Foundation: Slip knot (leave a 2-3” tail), ch 35
Round 1: sc in 2nd ch from hook and in next 2 chs, hdc in next 3 chs, dc in next 15 chs, hdc in next 10 chs, sc in next 2 chs, (sc, ch 1, sc) in last ch, rotate work (hold the tail along the chain and wrap the sts down the 2nd side of the leaf around the tail), sc in next 2 chs, hdc in next 10 chs, dc in next 15 chs, hdc in next 3 chs, sc in next 3 chs, sl st in turning ch Insert .46 mm (25 Gauge US) wire through st on hook, leaving a 3” tail. Work Round 2 with the loop of every st around the wire.
Round 2: ch 1, sc in next 2 sts, hdc in next 2 sts, dc in next 3 sts, [tr in next 3 sts, 2-tr inc in next st] x2, tr in next 3 sts, dc in next 8 sts, hdc in next 4 sts, sc in next 4 sts, (sc, ch 1, sc) in ch 1 space, rotate work, sc in next 4 sts, hdc in next 4 sts, dc in next 8 sts, [tr in next 3 sts, 2-tr inc in next st] x2, tr in next 3 sts, dc in next 3 sts, hdc in next 2 sts, sc in next 2 sts, sl st in turning ch Continue working around the wire in Round 3.
Round 3: ch 1, sc in next 37 sts, (sc, hdc, ch 2, sc) in ch 1 space from Round 2, sc in next 37 sts, sl st in turning ch with hook in front of wires and yarn behind wires, cut the wire leaving a second 3” tail.
Finishing: Pull both wire tails through the last st before tightening. Wrap the tail around both the wires a few times and then place the yarn so it sits between the two wires. Twist the wires twice so the twists sit right up against the end of the wrapped yarn. Cut the yarn close to the wire and trim the tails near the twists.
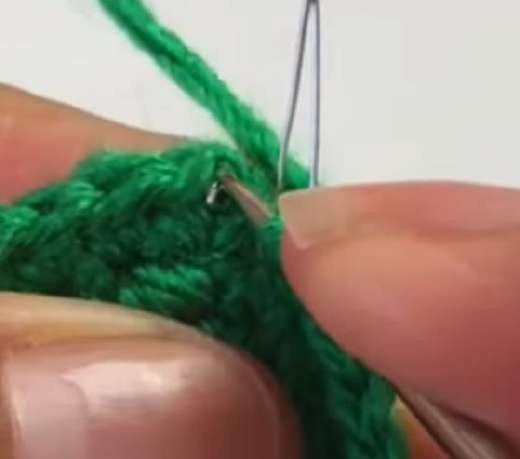
Make the stigma and six stamens
Stigma: Make 1 per bloom. Color: Green (light green shown)
Foundation: Slip knot (leave a 2-3” tail), ch 3
Step 1: sc in 2nd ch from hook, sl st in next ch, ch 2, sc in 2nd ch from hook, sl st in same ch as previous sl st, ch 2, sc in 2nd ch from hook, sl st in same ch as previous sl st, cut yarn leaving about a 15” tail. Pull yarn through last st and pull tight to secure.
Step 2: Tie both the tails in a knot twice. Trim short tail right up against knots. Stamen: Make 6 per bloom Materials: 11” length of .46mm (25 Gauge US) wire, brown floral tape, green floral tape
Step 1: Start wrapping brown floral tape around the wire so that the wire is visible on both sides. Wrap several times around the wire.
Step 2: Slide the wrapped tape into the middle of the wire and fold the wire in half so that the ends meet and the wrapped floral tape sits right next to the fold in the wire.
Step 3: Continue wrapping the floral tape around the wires several times to build up volume. Then wrap the floral tape away from the ends of the wire a few times to double the length of the brown tape.
Step 4: Fold the wrapped brown tape in half.
Step 5: Continue wrapping the floral tape around the folded tape about 7 times. Cut the tape and secure the end by wrapping down over the bottom of the stamen head and the wires.
Step 6: Start wrapping the green floral tape at the bottom of the stamen head.
Step 7: Wrap the green floral tape down and around both wires until the wires are fully covered. Cut the green floral tape and secure the end.
Prepare the center stem
Step 1: Take a 12-18” length piece of 1.2mm (18 Gauge US) wire for the stem and place a dab of hot glue on the end.
Step 2: Place the middle of the underside of the Stigma on the glue to secure it to the stem.
Step 3: Wrap the yarn tail around the wire starting directly below the Stigma and wrap the yarn through the hot glue while the glue is still hot.
Step 4: Continue wrapping the yarn around two thirds of the length of the wire. Use a dab of hot glue to secure the yarn. Cut the yarn close to the stem.
Step 5: Take 6 Stamen and place them around the Stigma. The top of the Stamen should be about ½” below the Stigma. Hold the Stamen about 6” down the stem.
Step 6: Wrap the green yarn around all the Stamen several times to secure them to the stem. Place a dab of hot glue to the yarn and wrap the yarn around once more, through the glue.
Step 7: Smear the dab of hot glue across the wrapped yarn and trim the yarn close to the stem. Set aside.
Assemble an open flower
Step 1: Have the Petals and Stem within reach. It is helpful to keep all Petal As and all Petal Bs separate. Place a dab of hot glue on the right side, base of a Petal A (Petal A1). Glue Petal A1 to the stem with the glue where the green yarn was wrapped around the stem in the last step of the stem assembly.
Step 2: Take the green yarn and wrap it around the base of the petal and stem twice. Hold the yarn so it doesn’t unwrap.
Step 3: Add a dab of hot glue to the same spot of another Petal A (Petal A2). Glue Petal A2 right next to Petal A1. Petal A1 and Petal A2 should be surrounding two thirds of the stem. Wrap the green yarn once around all petals and the stem. Hold tight.
Step 4: Repeat Step 3 with the third Petal A (Petal A3). The stem should be entirely surrounded by Petal A1, A2 and A3. Wrap the yarn tightly around all petals and the stem several times to cover the wire ends of the three petals. Add a dab of hot glue and wrap the yarn through it to secure it. Do not cut the yarn.
Step 5: Place a dab of hot glue on the right side, base of a Petal B (Petal B1). Glue Petal B1 to the stem so that the glue is over the yarn tail from Step 4 and so that Petal B1 is centered between two of the Petal As. Cut the yarn.
Step 6: Repeat Step 5 with a second Petal B, Petal B2. Glue it to the stem so that it sits next to Petal B1 and in between two of the Petal As. Two thirds of the stem should be surrounded by Petal B1 and B2 and the tips of these petals should sit in between the tips of the Petal As.
Step 7: Repeat Step 5 with the third Petal B, Petal B3. Glue it to the stem so that it sits in between Petal B1 and B2 and in between two of the Petal As. The stem should be surrounded by Petal B1, B2 and B3 and the tips of these petals should sit in between the tips of the Petal As.
Step 8: Start wrapping green floral tape around the petals and stem at the base of the Petal Bs. Wrap around everything 5 times.
Step 9: Wrap all the way down the remaining stem, wrapping with more overlap in the beginning, until the wire tails from the petals are fully covered. This will build up a bit more thickness right below the base of the petals. Widen the wrapping on the way down to lessen the amount of overlap, but make sure the wire is still fully covered all the way down. Do not cut the tape.
Step 10: Continue wrapping the tape around the stem, this time working back up the stem. Make sure the tape sits cleanly at the bottom of the stem. Wrap wire with more overlap at the top and then a few times right at the base of the petals. Do not cut the tape.
Step 11: Continue wrapping back down and up the stem until there are 5 layers of tape on the stem (3 times down the stem, 2 times up the stem). Keep the wrapping wider and consistent for the remaining wrapping. Be sure to finish wrapping at the bottom of the stem, not the top. Cut the tape and secure the end.
Gently bend the stamens outward after completing the stem wrapping. Shape the petals by hand. Optional green crayon shading can be applied near their bases without using flame.
Make closed buds
Step 1: Using either two of Petal A or two of Petal B, place the two petals back to back so that the right side of each is facing outward. Either one can be used to create the Closed Bud, as long as two of the same size are used. Petal B will make a slightly larger bud than Petal A.
Step 2: Take the wool needle with the petal color threaded through it and put the needle through the first stitch from the base of both the petals. Pull through enough yarn to sew up to the tip, about 4-5 times the length of the petal, and leave the tail on the other side of the petal.
Step 3: Thread the needle through the second stitch on each petal. Pull the yarn tight.
Step 4: Repeat Step 3 in each stitch up the petals. Sew up to the tip of the petals. One side of the petals is now sewn together.
Step 5: Continue sewing the petals together by working through each aligned stitch down the second side of the petals. Continue until there are about 10 stitches left to sew together.
Step 6: Push the pocket made by the petals open and stuff the filling into it. Stuff with enough filling to make the closed bud stiff. A long thin rod, such as a chopstick, may be helpful in pushing the filling all the way into the tip of the bud and making sure the bud is full.
Step 7: Sew up the rest of the bud.
Step 9: Take a 12-18” length piece of 1.2mm (18 Gauge US) wire for the stem and place a large dab of hot glue around the first inch of the wire.
Step 10: Take the bud and push the base of the two petals apart and insert the wire, hot glue end first, into the bud. Insert about 2 inches into the bud, making sure the hot glue is spread around to secure the wire.
Step 11: Press the bases of the bud back together and around the wire. The hot glue should secure them to the wire. Press the yarn tails into the hot glue to secure them as well. Trim the yarn tails close to the stem.
Step 12: Start wrapping the green floral tape around the base of the bud.
Step 13: Wrap down the length of the stem. If you prefer a thinner stem, cut the floral tape and secure the stem. If you prefer a thicker stem, continue wrapping back up and then back down the stem to build up some thickness. Make sure to finish wrapping at the bottom of the stem. Cut the tape and secure the end.
Combine a full bloom, two buds and two leaves
This assembly uses a full bloom, 2 closed buds, and 2 leaves. Feel free to pick and choose how many of each piece you want and use the methods here to make your own arrangement.
Step 1: Take a leaf and place it, right side facing towards the stem, on the stem of a closed bud so that only the top third of the leaf is touching the closed bud.
Step 2: Start wrapping the floral tape around the wire tails of the leaf and the stem. Wrap down about an inch.
Step 3: Add a dab of hot glue at the base of the leaf. Pinch the leaf around the stem until the glue sets.
Step 4: Wrap the floral tape back up to the base of the leaf.
Step 5: Add a second closed bud to the assembly so that it sits above the first.
Step 6: Wrap the floral tape around both the new and original stems. Continue wrapping down the stem for about an inch.
Step 7: Take a second leaf and place a dab of hot glue at the bottom of the right side of the leaf. Place the leaf about an inch below the first leaf and staggered so that it isn’t on the same side of the stem as the first leaf.
Step 8: Wrap the floral tape around the stem and the base of the new leaf several times. Continue wrapping down the stem for another 1-2 inches.
Step 9: Place a full bloom along the stem and continue wrapping the floral tape around both stems.
Step 10: Wrap the remainder of the stem in floral tape. Cut the tape and secure the end.
Questions before you finish
How many petals form an open lily?
Three A petals and three B petals, six in total. Place the A petals in the inner layer and the B petals between them in the outer layer.
How is a closed bud made?
Sew two matching A petals for a smaller bud or two matching B petals for a larger bud. Add filling before closing the seam, then attach and wrap the stem.
More Crochet Flowers and Plants
For another handmade botanical project, try our crochet bluebell flowers or crochet lavender stem pattern.
Design credit
Original design and reference photographs: Natagor Finlayson. This article is an editorial adaptation of the supplied pattern.
Leave a Reply