
Crochet Phone Bag with a Popcorn Flower Pocket
· admin
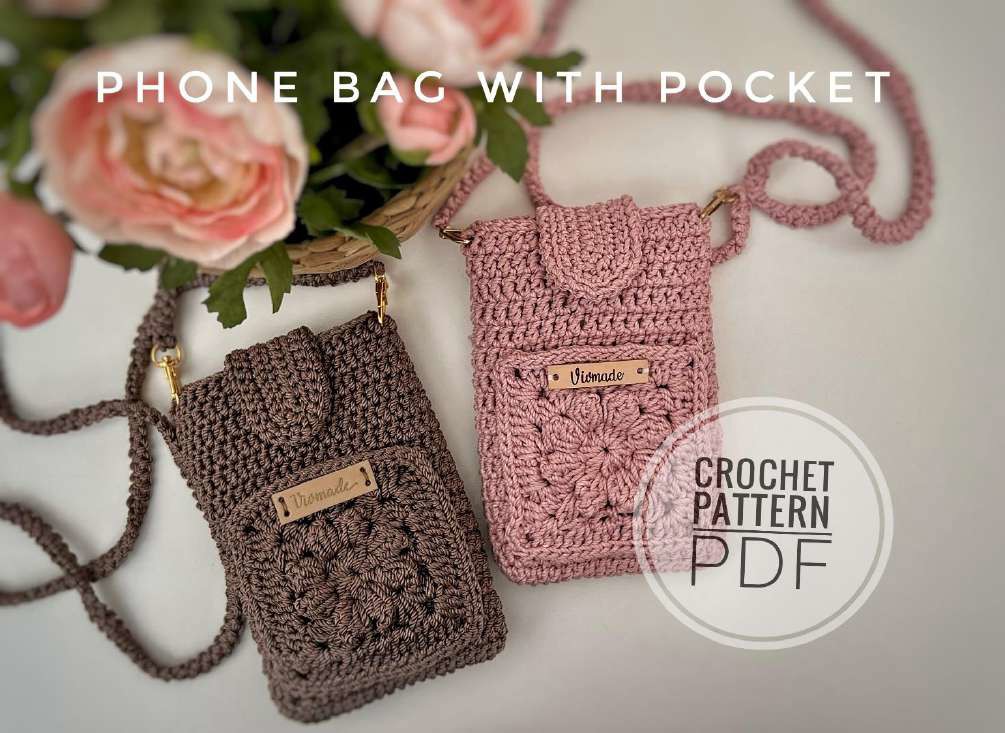
This crochet phone bag with a flower pocket combines a double-crochet pouch, a raised popcorn-flower square and a rounded magnetic closure. The decorative square is sewn to the front as an extra pocket. A Romanian-cord strap can be clipped on with small hooks or sewn directly to the sides. Work the square and bag separately, then check their proportions before assembly.
Materials, Size and Fit
- About 100 m of 2 mm polyester yarn/cord, lightweight yarn or firm cotton, as specified by the source.
- 3.5 mm crochet hook, tapestry needle, scissors and stitch markers.
- One 14 mm magnetic snap; optional 33 mm hook buckles for the strap.
- Optional label and sewing thread.
Level: advanced beginner, with popcorns and clustered stitches. Reference bag size: about 11 × 16 cm (4.3 × 6.3 in). Source chain gauge: 15 chains measure about 8 cm (3.15 in). The strap is approximately 90 cm long. Measure your phone in its case and compare it with the usable space inside the bag before sewing the front pocket.
US Terms and Special Stitches
Ch = chain; sc = single crochet; dc = double crochet; hdc = half double crochet; sl st = slip stitch; inc = 2 sc in one stitch; MR = magic ring; sp = space. A number before a stitch name means that many consecutive stitches unless the instructions explicitly place them into one stitch or space. The square motif is worked in joined rounds.
- Popcorn: make 5 dc in one stitch or space, remove the hook from the live loop, insert it through the first dc of the group, catch the live loop and pull it through.
- Dc2tog: begin one dc in each of the next two stitches, stopping after its first pull-through-two; yarn over and close the remaining three loops together. When a cluster is specified in one ring/space, work both partial dc there.
- Dc3tog: make three partial dc in the indicated place, leaving the last loop of each on the hook; yarn over and close the four remaining loops together.
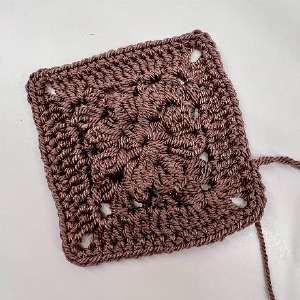
Step 1: Crochet the Popcorn-Flower Pocket
| Round / row | Instructions | Total |
|---|---|---|
| 1 | In MR: ch 2, then repeat (dc2tog in the ring, ch 1) eight times. Join as in the source. | 8 clusters / 8 ch-1 spaces |
| 2 | Sl st into the next ch-1 space and ch 2. In each ch-1 space work a popcorn followed by ch 3. Join to the first popcorn. | 8 popcorns / 8 ch-3 spaces |
| 3 | Sl st into a ch-3 space, ch 2 and dc3tog there. Repeat [ch 2; (sc, ch 2, sc) in the next ch-3 space; ch 2; (dc3tog, ch 3, dc3tog) in the next ch-3 space] three times. Ch 2, (sc, ch 2, sc) in the next space, ch 2, dc3tog in the starting space, ch 3 and join to the first dc3tog. | 4 corners |
| 4 | Sl st into the next ch-2 space. Ch 2 as the first dc and add 2 dc there. Put 3 dc into each of the next two ch-2 spaces, then (3 dc, ch 3, 3 dc) in the corner ch-3 space. Repeat [3 dc in each of the next three ch-2 spaces; (3 dc, ch 3, 3 dc) in the next corner] three times. Join to the starting ch 2. | 60 dc / 4 corners |
| 5 | Ch 1, 11 sc, 3 sc in the corner space; repeat (15 sc, 3 sc in the next corner) three times, then 4 sc to finish the round. Join. | 72 sc |
| 6 | Sl st through both loops of each edge stitch. Finish with an invisible join and retain a sewing tail. | 72 edge positions |
The first and last clusters of Round 3 share the starting corner space. The four ch-3 corner spaces must remain visible after Round 4; do not mistake a ch-2 side space for a corner. Lay the square flat before continuing so a missed space is easier to spot.
Step 2: Crochet the Bag Body
| Round / row | Instructions | Total |
|---|---|---|
| Foundation | Ch 22. | |
| 1 | Dc in the third chain, dc in each of the next 18 chains, 3 dc in the last chain. Along the other side of the foundation, work 18 dc and 2 dc at the starting end. Join. | 42 dc |
| 2–16 | Ch 2, then work 42 actual dc around, beginning at the base of the lifting chain. Mark the first actual dc and join without adding an extra body stitch. | 42 dc each round |
| 17 | Ch 1, sl st around the opening and finish with an invisible join. | 42 edge positions |
Count note: the source labels the body rounds as forty-two dc while also making an opening ch 2. Treat that lifting chain as height rather than an additional body stitch. Keep forty-two actual dc in every body round so the bag does not grow at its seam.
Step 3: Make the Rounded Closure Strap
This is a flat U-shaped piece worked back and forth around a chain, not a closed tube. Ch 18 and begin in the second chain. Ch 1 and turn after each of the first three rows.
| Round / row | Instructions | Total |
|---|---|---|
| 1 | Sc in the second ch, 15 sc, 3 sc in the last ch; continue along the other side with 16 sc. | 35 sc |
| 2 | 16 sc, inc in each of the next 3 sts, 16 sc. | 38 sc |
| 3 | 16 sc, inc, 2 sc, inc, 18 sc. | 40 sc |
| 4 | Repeat (sl st in the next stitch, ch 1) along the edge. Finish with a tail for attachment. |
Editorial correction: the source’s second row uses only 34 of the 35 stitches from Row 1 and labels the following rows 37 and 39. The table above works the remaining edge stitch and updates the next row accordingly, giving 38 and 40. This keeps the rounded construction while making the written stitch counts complete.
Step 4: Make the Romanian-Cord Strap
Leave a starting tail of about 20 cm. Ch 2 and sc into the second chain. Turn the cord from right to left; sc under the single side loop at its base. Turn the same way again and sc under the two side loops now visible. Continue turning and working through the next pair of side loops until the cord measures about 90 cm, or your chosen length. Keep the stitches even and avoid tightening the side loops so much that the hook cannot enter them.
Finish with tails long enough for attachment. Fit the cord to the two hook buckles if using them, or sew each end directly to the bag sides. Test the intended carrying length with the phone in the bag; the cord can extend under weight.
Step 5: Assemble the Pouch
- Center the closure strap inside the back of the bag, approximately 3 cm below the opening, and sew its straight end securely.
- Place the square at the lower center front. Sew through its back loops along both sides and the bottom, leaving the upper edge free if you want a usable front pocket.
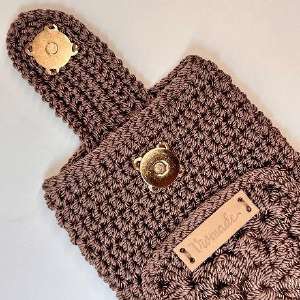
- Align the flap over the front and position the magnetic snap halves where they meet. Attach them through reinforced fabric.
- Attach the shoulder cord with its clips or sewn ends, add the optional label, then finish every remaining tail.
Frequently Asked Questions
Is the flower square a separate appliqué?
It is made separately and attached as the front pocket. Leave the top edge unsewn to keep that pocket usable.
Can I leave off the hook buckles?
Yes. The source offers sewing the strap directly to the two bag sides as the alternative.
Why are the closure-row totals different from the PDF?
The source omits one edge stitch in its written second row. The correction above consumes all stitches and updates the following total; it is identified rather than silently presented as the source count.
More Crochet Phone Pouches
Browse our crochet phone cases and covers, compare animal phone-pouch styles, or try a simple phone pouch with a strap.
Pattern and Photo Credits
Written adaptation of Vivmade, Phone Bag with Pocket, supplied PDF and original reference photographs. The rounded closure’s arithmetic correction is explained in Step 3. The instructions have been checked against the supplied pattern pages; this article has not been physically crocheted or maker-tested. Reference images show the source project, rather than a newly made sample.
Leave a Reply