
Crochet Star Lily Phone Bag Pattern with a Floral Pocket
· admin
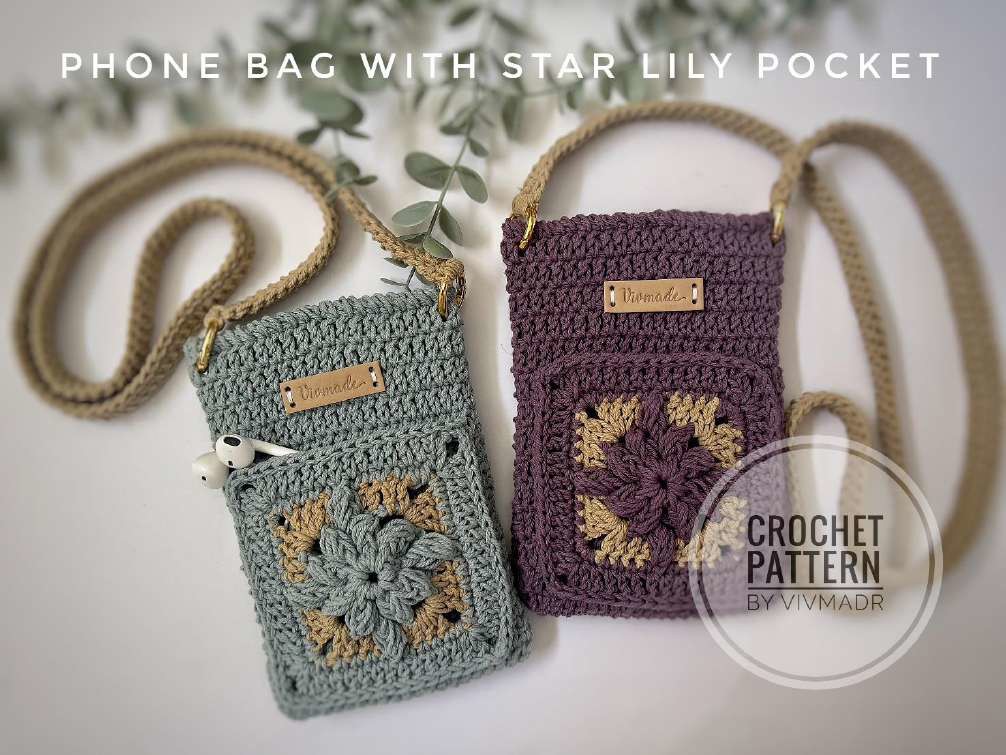
This crochet star lily phone bag pattern features a raised floral square, a button-loop opening and a contrasting Romanian-cord strap. Front-post puffs create the center petals and the smaller raised details around the square. Make the five-round pocket first, then attach it to a compact double-crochet bag.
Materials and Reference Measurements
- Approximately 150 m of firm cotton, polyester or other suitable lightweight yarn; choose two contrasting colors. The source uses green and khaki for its instructions.
- 3.5 mm crochet hook, tapestry needle, scissors and stitch marker.
- One 2.5 cm button and optional 2 cm spring O-rings for the strap.
Level: intermediate. Source bag size: about 12 × 17 cm (4.7 × 6.7 in), with a roughly 100 cm (39.4 in) strap. Actual size depends on yarn and tension. Compare the inside space with your phone and everyday case before sewing the square in place.
US Terms and Special Stitches
Ch = chain; sc = single crochet; dc = double crochet; hdc = half double crochet; sl st = slip stitch; inc = 2 sc in one stitch; MR = magic ring; sp = space. A number before a stitch name means that many consecutive stitches unless the instructions explicitly place them into one stitch or space. The square motif is worked in joined rounds.
Front-Post Half-Double-Crochet Puff
Yarn over, take the hook from front to back and around the indicated dc post, then draw up a loop. Repeat the yarn-over and draw-up around that post twice more, giving seven loops on the hook. Yarn over and draw through six loops, then yarn over and draw through the remaining two. Below, this is abbreviated FP puff. In the center petal round, the two puffs of a corner are made around two successive dc posts; the next 3-dc group goes into the following stitch.
Reverse Single Crochet
Reverse sc, also called crab stitch, is single crochet worked backward along the edge. With the right side facing, a right-handed crocheter works toward the right instead of the usual left. Insert into the next stitch in that direction, draw up a loop, then yarn over and close both loops. A left-handed crocheter mirrors the direction.
Step 1: Make the Star-Lily Pocket
| Round / row | Instructions | Total |
|---|---|---|
| 1 — green | Ch 5 and join into a ring. Ch 3 as the first dc, 11 dc into the ring, then join to the top of ch 3. | 12 dc |
| 2 — green | Ch 3, 2 dc in its base stitch. Repeat [FP puff around the next dc post, ch 2, FP puff around the following dc post, 3 dc in the next stitch] three times. Work FP puff, ch 2, FP puff around the final two posts and join to the top of the starting ch 3. Finish green. | 4 puff-pair corners |
| 3 — khaki | Join in a ch-2 corner. Ch 3, dc, ch 3, 2 dc in that corner. Work 2 dc, ch 1, skip 1 st, 2 dc along the side. Repeat [(2 dc, ch 3, 2 dc) in the next corner; 2 dc, ch 1, skip 1 st, 2 dc along the side] three times. Join and finish khaki. | 4 corners |
| 4 — green | Join in a ch-3 corner and work (sc, ch 2, sc). Repeat [4 sc, FP puff around the middle dc of the Round 2 group of three, 4 sc, (sc, ch 2, sc) in the next corner] three times. Work the final side of 4 sc, FP puff, 4 sc; join to the first sc and sl st into its corner ch-2 space. | 4 raised side puffs |
| 5 — green | Ch 3, dc, ch 3, 2 dc in the starting corner. Repeat [11 dc; (2 dc, ch 3, 2 dc) in the next corner] three times. Work the final 11 dc and join to the top of the starting ch 3. Sl st around the edge and leave about 100 cm of yarn for sewing. | 60 dc / 4 ch-3 corners |
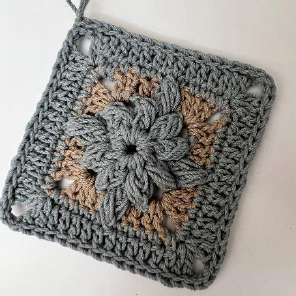
Draw the loops of each puff to the same height. In Round 4, the hook reaches down to the middle post of a three-dc group from Round 2; it does not go into an ordinary top stitch from Round 3. This is the raised detail that makes the motif different from a flat granny square.
Step 2: Make the Phone Bag Body
| Round / row | Instructions | Total |
|---|---|---|
| Foundation | With green, ch 22. | |
| 1 | Dc in the third ch, 18 dc, 3 dc in the last ch. Along the opposite side of the chain, work 18 dc and 2 dc at the starting end; join. | 42 dc |
| 2–13 | Ch 2 and work 42 actual dc around. Mark the first actual dc and join without adding another body stitch. | 42 dc each |
| 14 | Work 13 dc, ch 18 and sl st back into the base of that chain to make the button loop. Continue with 29 dc and join. Use the opening ch 2 only for height. | 42 dc + loop |
| 15 | Ch 1 and reverse sc around the opening, following the button-loop edge as shown in the reference. Finish and hide the end. |
The body’s opening ch 2 is a lifting chain in these forty-two-stitch rounds. Count the actual dc and avoid treating the lifting chain as an extra stitch. Before the final edging, check that your 2.5 cm button fits through the loop; a different yarn or button may require a different loop length.
Step 3: Make the Contrasting Strap
Leave a starting tail of about 20 cm. Ch 2 and sc into the second chain. Turn the cord from right to left; sc under the single side loop at its base. Turn the same way again and sc under the two side loops now visible. Continue turning and working through the next pair of side loops until the cord measures about 100 cm, or your chosen length. Keep the stitches even and avoid tightening the side loops so much that the hook cannot enter them.
To attach a spring O-ring, draw yarn through its center and work four sc around the ring. Sl st along one side of the cord to the opposite end, attach the second ring in the same way, then sl st back along the remaining side. Fasten off and finish the ends. Open each spring ring and clip it to the corresponding side of the pouch. The source also allows sewing the cord ends directly to the bag when rings are omitted.
Step 4: Attach the Pocket and Button
- Center the star-lily square on the lower front of the bag and pin it flat.
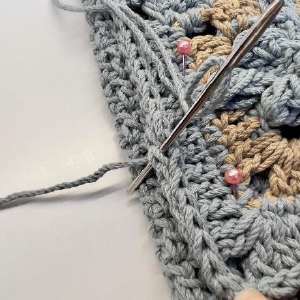
- Using the retained tail, sew through the square’s back loops along its bottom and sides. Leave the upper edge open for a functional pocket. Keep the opposite bag wall clear of the needle.
- Bring the loop over the opening and mark the button location where it reaches the opposite face. Sew the button securely and test it with the phone inside.
- Attach the optional label above the square, check the strap rings and finish the yarn ends.
Frequently Asked Questions
What makes the star lily stand out?
Front-post puffs wrap around earlier dc posts. The first puff pairs form the petals, and Round 4 adds four raised details reaching into Round 2.
Do I need the video clips named in the source?
The source lists clip references, but this article spells out the stitch and assembly steps. The still photographs show the finished motif and seam placement.
Can I use one color?
The stitch structure remains the same, but contrasting colors make the petal outlines and side puffs easier to see. Check your square before choosing the final palette.
More Crochet Phone Pouches
Browse our crochet phone cases and covers, compare animal phone-pouch styles, or try a simple phone pouch with a strap.
Pattern and Photo Credits
Written adaptation of Vivmade, Phone Bag with Star Lily Pocket, supplied PDF and original reference photographs. The instructions have been checked against the supplied pattern pages; this article has not been physically crocheted or maker-tested. Reference images show the source project, rather than a newly made sample.
Leave a Reply