
Crochet Closed Green Bud Pattern from a Folded Rectangle
· admin
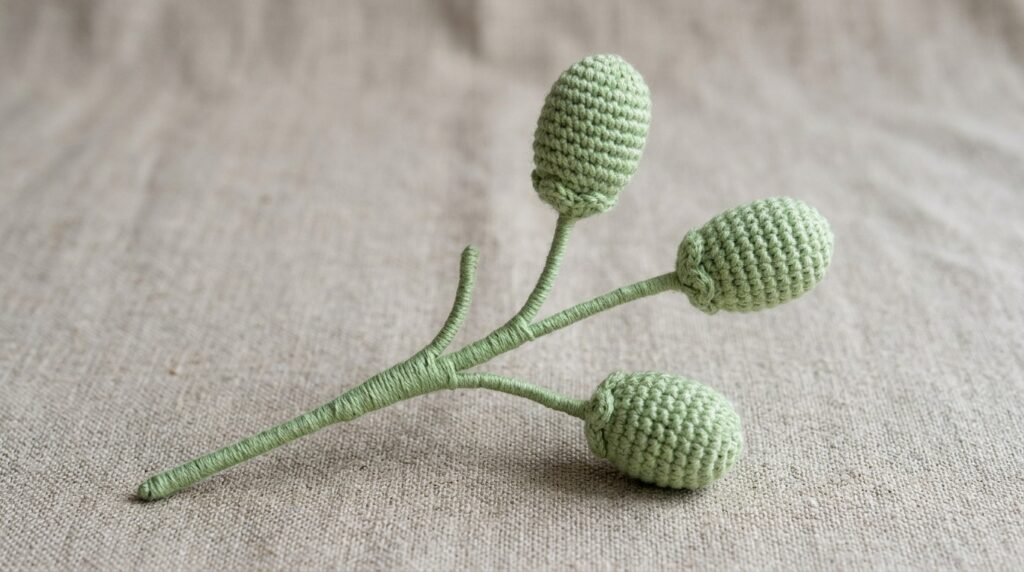
This crochet closed green bud pattern starts with a small flat rectangle rather than a magic-ring ball. After six rows, two sides are joined, the seam is turned inward and a little filling gives the bud its rounded shape. A wire passes through the lower end to form its stem. The source calls it Unopened Bud and shows three finished buds arranged on a branch.
Materials
- Cotton No. 8 in soft green.
- A 1.90 mm crochet hook.
- 0.8 mm floral wire and green floral tape.
- A small amount of sponge or cotton wool, as listed in the source.
- Scissors, a yarn needle and wire cutters.
No numerical gauge, yardage or finished bud length is given. Make matching buds with the same thread and tension. The photograph shows multiple buds, but the written construction below makes one at a time.
Stitches and Pattern Notes
US crochet terms are used throughout. Ch = chain, sl st = slip stitch, sc = single crochet, hdc = half double crochet, dc = double crochet, tr = treble crochet. An increase places two stitches in one stitch; a decrease combines stitches. The ch 3 at the beginning of a return row is shown as the edge turning chain in the original chart. Keep the twelve dc worked after that chain; do not replace the first of those twelve with the turning chain.
Crochet the Six-Row Rectangle
| Round / step | Instructions |
|---|---|
| 1 | Ch 15. Beginning in the fourth chain from the hook, dc in the remaining twelve chains. The three skipped chains form the first edge rise. |
| 2-6 | Ch 3, turn and work 12 dc across each row, following the charted edge. Complete five return rows after the foundation row. |
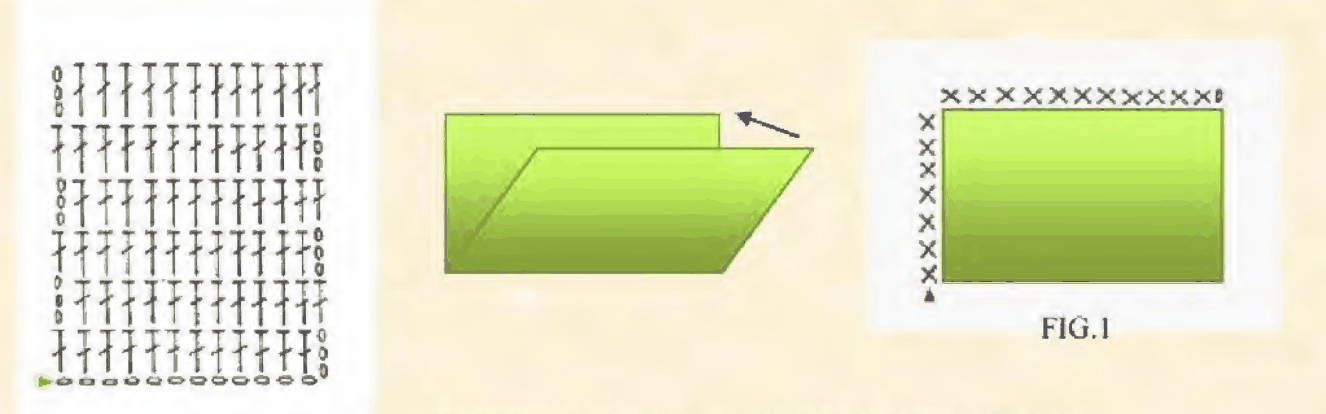
Keep the two long edges straight and compare the last row with the foundation edge before folding. The source shows the ch-3 edge rises beside the twelve dc, so an apparent mismatch is best checked against the chart rather than solved by adding a new increase row. The closing step is labeled Round 7 in the original, but it is a seam, not another dc row.
Fold and Conceal the Seam
- Fold the rectangle in half as shown by the arrow in the original diagram. Bring the matching edges together while leaving the lower opening accessible.
- Single crochet the two indicated sides together. Work through both layers along the side and across the closed end to create the small pouch.
- Turn the pouch inside out so the seam lies inside. Smooth the corners with your fingers before adding filling.
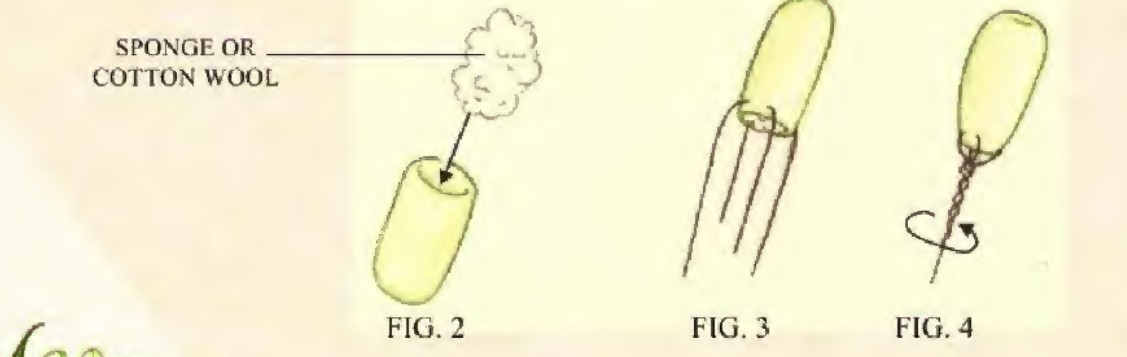
- Add a small amount of sponge or cotton wool. Shape it into a compact bud without pushing the filling through the dc gaps.
Attach the Wire Stem
Insert the 0.8 mm wire through the lower part of the filled bud as shown in the assembly drawing. Bend the wire and twist its ends beneath the bud so the lower fabric gathers around the support. Finish by covering the stem with green floral tape. Keep the top rounded instead of flattening it while tightening the lower join.
Arrange Several Buds
Make additional buds by repeating the same rectangle, seam and filling steps. The reference photograph places three at different heights on a branched stem. Their angles come from bending the individual support wires; the source does not supply a measured branching layout, so establish the arrangement before wrapping the grouped stems.
Questions About the Closed Bud
Is this a crochet rosebud?
It is a green unopened filler bud without overlapping pink petals. The rectangle-and-seam construction is different from the three-petal rosebud and the gathered flower buds in the bouquet tutorials.
Can I leave out the filling?
The source includes sponge or cotton wool to support the oval shape. Without it, the dc pouch can collapse against its wire.
More Crochet Flowers and Plants
For another botanical project, try a wired crochet lily or a crochet leaf garland.
Pattern and Photo Credits
Adapted from Crochet Flower Patterns Book, supplied file with BEBRIGHT.IN on the cover. The reference photographs and diagrams show the original source project. This written adaptation has been checked against the supplied pages; it has not been physically crocheted or maker-tested for this article.
Leave a Reply