
Crochet Leaf Garland Pattern with Small and Large Leaves
· admin
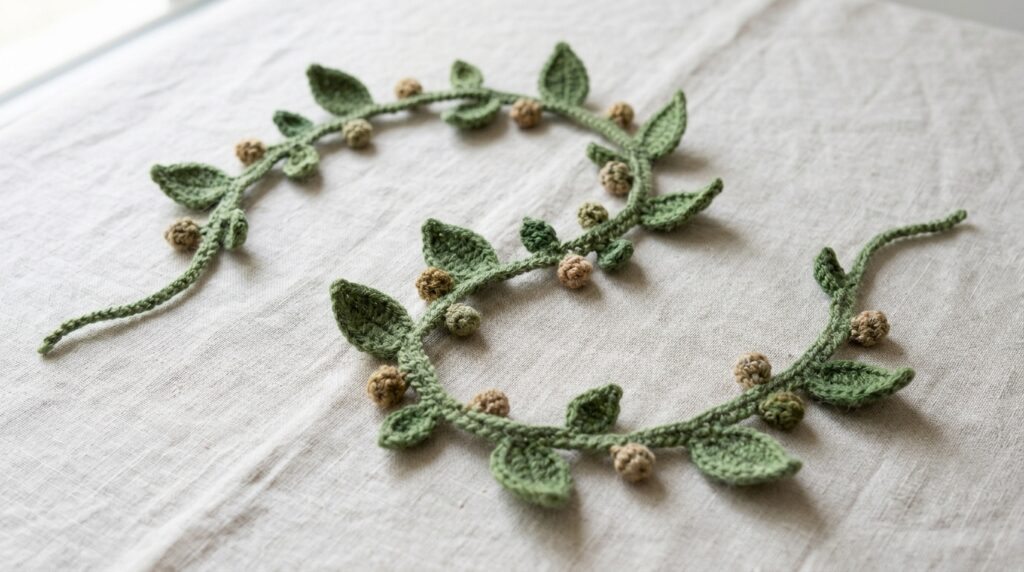
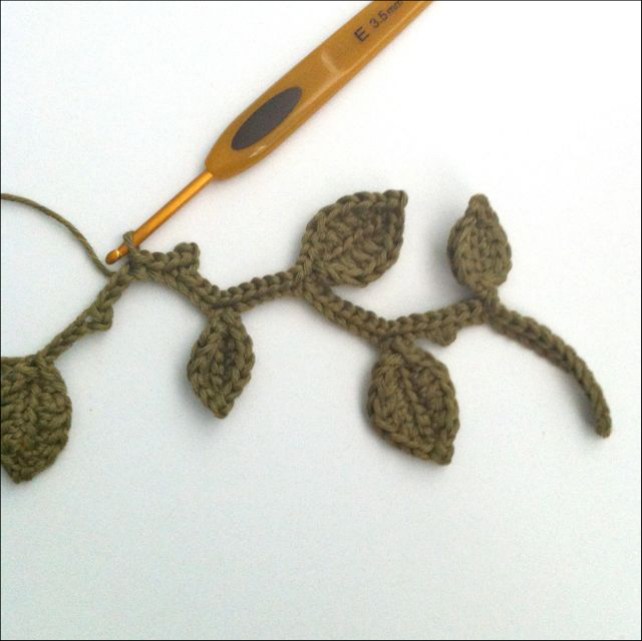
This crochet leaf garland pattern joins small leaves, larger leaves and tiny nodules along one continuous vine. You can stop after the first pass for a delicate strand or work back along the foundation for a fuller garland. Clare Trowbridge’s design keeps the right side facing throughout, so the leaves lie consistently along the chain.
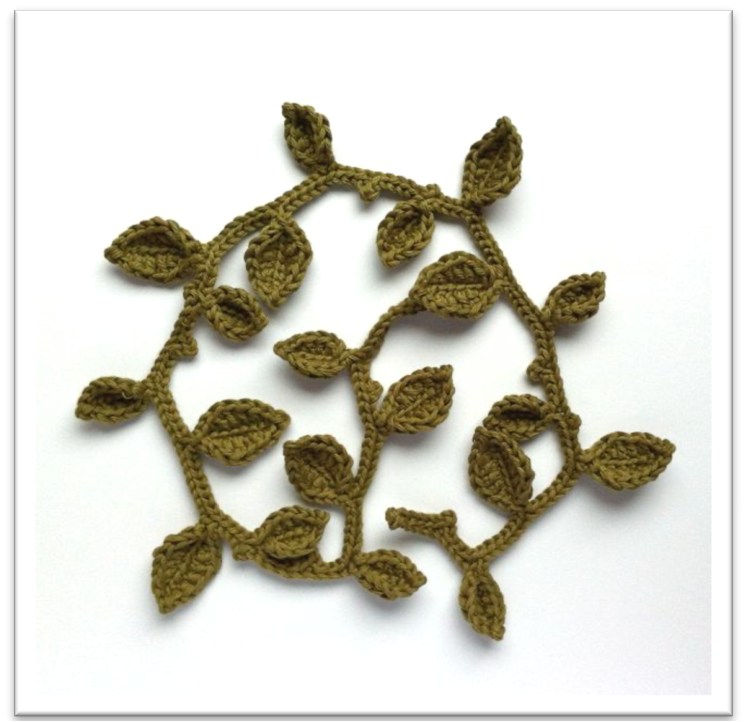
Materials for the Crochet Leaf Garland Pattern
- DK cotton or another non-stretchy yarn such as linen or hemp.
- A 3.5 mm hook for the source DK cotton example, plus scissors and a yarn needle.
- Choose colors for the intended season; the same construction can be made in green, autumn tones or metallic yarn.
The source example uses five repeats plus a final ch 10 and measures about 65 cm in the metric edition, or about 25 inches in the US edition. These are approximate source measurements, not a fixed gauge requirement. Use a yarn and hook combination that produces leaves you like.
Stitches and Pattern Notes
US terms are used here. Ch = chain, sl st = slip stitch, sc = single crochet, hdc = half double crochet, dc = double crochet, tr = treble crochet, MR = magic ring, inc = 2 stitches in one stitch, and dec = a decrease across two stitches. BLO means back loop only and FLO front loop only. Use both loops unless BLO is stated. Rotate the work to reach the other side of a leaf; do not turn it over. The supplied PDF includes UK and US editions of this same pattern. The instructions below follow the US edition only.
Work the First Vine Repeat
Begin with ch 9, then make a small leaf. Continue with ch 14, make a large leaf, then ch 3 and make a nodule. Repeat that whole sequence for the desired length. Finish the outward vine with ch 10.
Small leaf
- Ch 6. Starting in the second chain from the hook, work 5 sl st through the back loops of the chains.
- Rotate without turning over. Work into the unused loops on the other side of the same foundation: sc, 3 hdc, sc.
- Ch 2 and sl st into the back loop of the second chain from the hook to make the pointed tip.
- Return along the back loops of the original slip stitches: sc, 3 hdc, sl st. Sl st again at the junction where the leaf meets the vine.
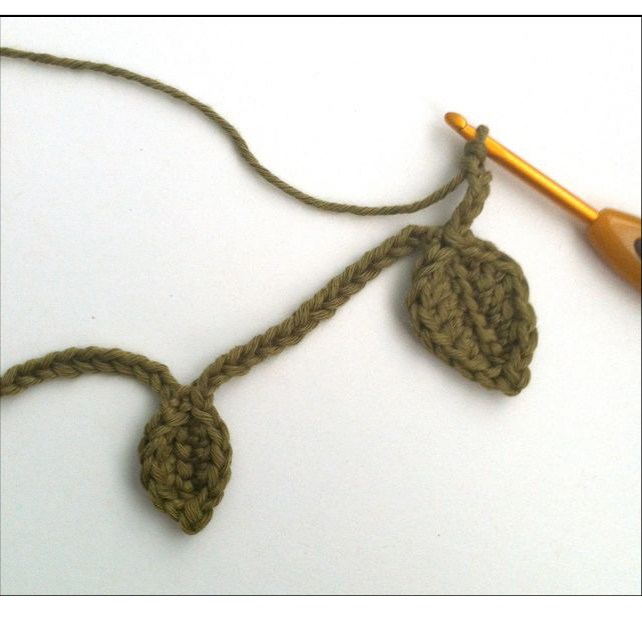
Large leaf
- Ch 8. Starting in the second chain from the hook, work 7 sl st in BLO.
- Rotate and work in the unused foundation loops: sc, hdc, 2 dc, 2 hdc, sc.
- Ch 2; sl st in BLO of the second chain from the hook.
- Work back into the back loops of the slip stitches: sc, 2 hdc, 2 dc, sc, sl st. Sl st at the base where the leaf meets the chain.
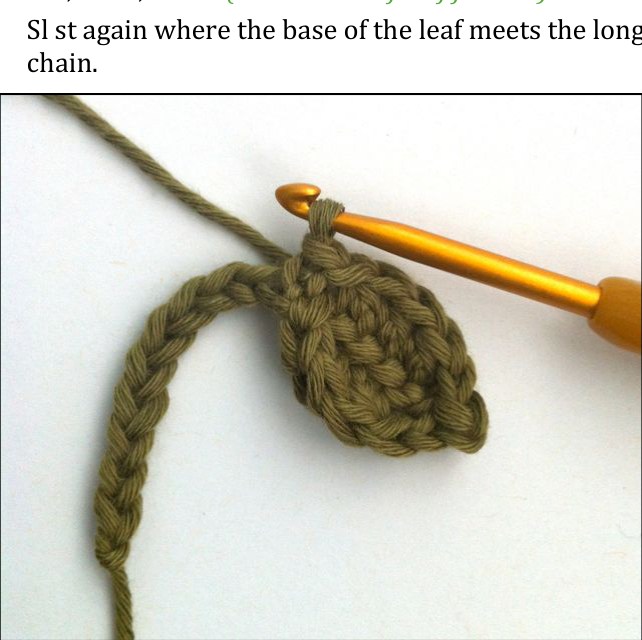
Nodule
Ch 2, then sl st in BLO of the second chain from the hook. This small bump separates the larger leaf shapes without requiring another full leaf.
Optional Return Pass for a Fuller Garland
At the end of the outward vine, either fasten off now or add the return pass. To return, ch 5, begin in the second chain from the hook and work slip stitches in BLO, continuing onto the main vine until the initial 12 sl st have been worked. The 12 stitches continue along the existing vine; they are not twelve stitches squeezed into the new ch-5 section.
- Make a small leaf. Continue with 12 sl st along the main vine.
- Make a large leaf. Continue with 10 sl st along the main vine.
- Make a nodule. Continue with 4 sl st along the vine.
- Repeat these return-pass groups, adjusting the spacing if you want a more irregular vine. The source sample has five return groups.
- Continue slip-stitching to the end, fasten off and weave in the ends.
Finishing and Variations
Lay the vine flat and arrange the leaves so their points do not fold under. If the yarn benefits from blocking, dampen and shape it according to its care instructions. A short strand can decorate a napkin ring, while fine thread makes a more delicate decorative strand. Changing the yarn changes the scale, so compare the finished leaf size before committing to a long garland.
More Crochet Projects
For another project, try our crochet bluebell flowers or explore a wired crochet lily with buds.
Pattern and Photo Credits
Leaf Garland by Clare Trowbridge / Little Conkers, littleconkers.co.uk. The supplied edition is revised September 2021. This is an editorial adaptation of the supplied pattern, with the original designer credited. Reference photographs show the source project.
Leave a Reply