
Canadian Maple Leaf Crochet Coaster or Appliqué
· admin
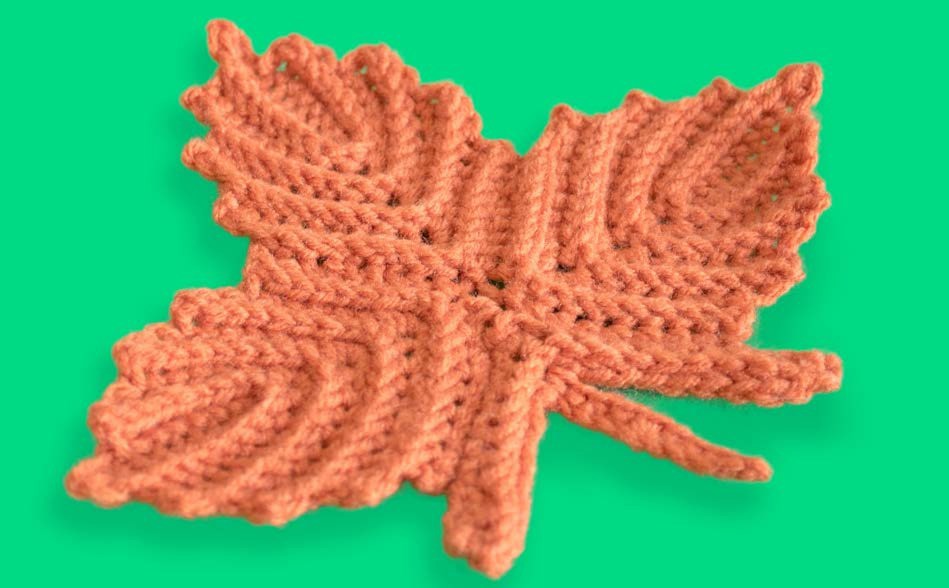
This maple leaf crochet coaster is assembled from three matching lobes, then finished with a lower shaping section and stem. Front-post and back-post single crochet create the visible ridges. IraRott’s Canadian Maple Leaf design can be used as a large coaster or as an appliqué, with the final outline shaped by blocking.
Project details
| Skill level | Intermediate |
|---|---|
| Finished size | Approximately 21.6 cm wide × 19 cm tall in the source yarn. |
| Hook | 4.5 mm |
| Pattern source | Canadian Maple Leaf Coaster / Appliqué by IraRott, 2016. |
Materials
Worsted / medium-weight yarn, 4.5 mm hook, tapestry needle, stitch markers, straight pins and optional blocking board. The source sample uses Red Heart Super Saver; gauge is 8 sc × 8 rows over 5 cm.
Learn the two post stitches
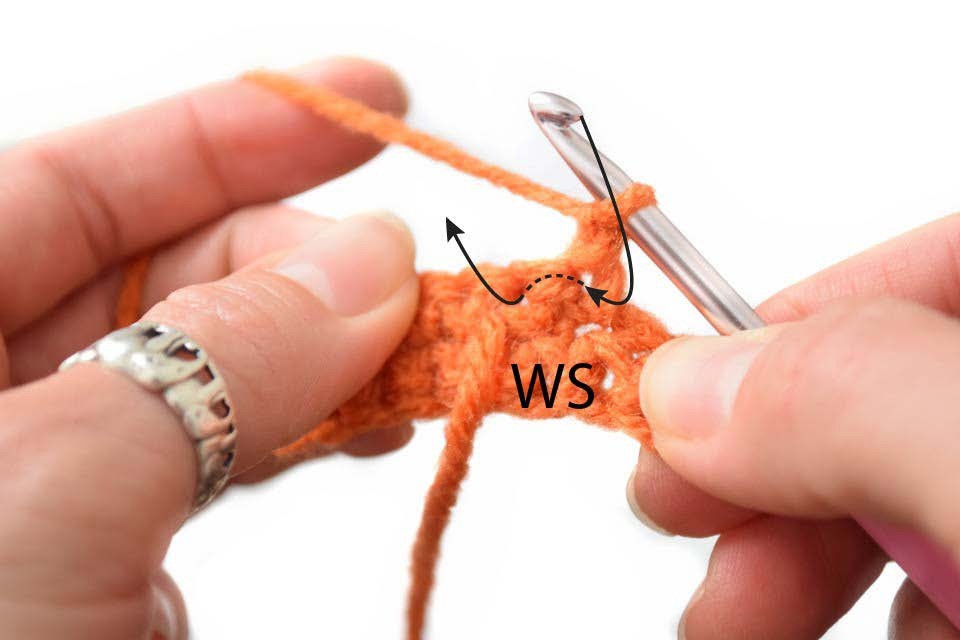
Use US terms. For front-post sc, insert the hook from front to back to front around the next stitch post, pull up a loop and complete a single crochet. Back-post sc goes from back to front to back around the post. These stitches wrap around the post rather than going through the normal top loops.
Sc2tog combines two stitches into one. Sc4tog combines four into one: draw up a loop from each of the next four stitches, then yarn over and pull through all loops. The starting chain 1 does not count as a stitch. Mark the right side of the first lobe so the post-stitch ridges remain consistent on all three.
Make three matching lobes
- Foundation and row 1: Chain 10. Sc in the second chain and the next seven chains, work five sc in the final chain, then continue along the underside with six sc. Turn with 19 stitches.
- Row 2: Chain 1 and work 17 front-post sc. Turn, leaving the final two stitches unworked.
- Row 3: Chain 1, 8 sc, five sc in the next stitch and 6 sc. Turn with 19 stitches, again leaving the source’s unused edge stitches.
- Rows 4–7: Repeat rows 2 and 3 twice.
- Row 8: Repeat row 2 for 17 front-post sc. Fasten off with a sewing tail.
The short rows and the five-stitch turning point are deliberate. Do not fill every unworked edge stitch simply to make each row reach the previous row’s end. That changes the lobe shape and removes the stepped maple-leaf outline.
Join the three lobes
After finishing each lobe, turn it and place a marker in the ninth stitch from the finishing point. Lay all three beside one another with the marked stitches meeting in the center. With the wrong side facing, whipstitch nine stitches along each adjoining inner edge.
Remove the markers from the outer lobes as their seams are completed, but keep the middle marker. It identifies the central stitch to skip when working the lower shaping section. Weave seam tails on the wrong side and keep the seams relaxed so the leaf can open flat.
Work the lower shaping and stem
First row: Hold the right side toward you with the center marker at the top of the working area. Begin with chain 4. Across the exposed nine-stitch edge of the right lobe, work sc in the first stitch, 6 sc and sc2tog. Skip the marked center stitch and remove the marker. Across the left lobe, work sc2tog and 7 sc. Chain 5 and turn. The source lists sixteen solid stitches with chain extensions at both ends.
Second row: Sc in the second chain from the hook and the next three chains. Continue with 6 sc, sc4tog, 6 sc and sc across the remaining four foundation chains. Turn with 21 stitches. The four-stitch decrease brings the center of the lower edge into shape.
Third row: Chain 1 and work 10 back-post sc. Chain 10 for the stem, then return with 9 sc beginning in the second chain. Continue with 10 back-post sc along the leaf and slip stitch into the last stitch. The source total is thirty including the finishing slip stitch. Fasten off and weave the tails into the back.
Block the five-point outline
The source recommends wet blocking to remove creases and define the points. Follow the care requirements of the actual yarn: dampen appropriately, squeeze out excess water gently and lay the piece flat. Pin the outer points and the valleys between them into a balanced maple-leaf shape. Let it dry fully before removing pins.
A smaller yarn and hook make a smaller leaf, but both the lobe and post-stitch tension need to change together. If using it as an appliqué, sew through stable edge stitches after blocking. If using it as a coaster, check that the center lies flat beneath the cup; the source does not give a hot-pan resistance specification.
Frequently asked questions
How many separate lobes are made?
Three identical lobes. Their inner nine-stitch edges are whipstitched together before the lower section and stem are added.
Why leave stitches unworked on the lobe rows?
Those short rows create the stepped shape. Working to every row end would change the outline.
Is blocking required?
The source describes it as optional but recommended for removing creases and defining the points. Use a method suitable for your fiber.
Source and project reference
Canadian Maple Leaf Coaster / Appliqué by IraRott, 2016. This article is a source-based crochet guide with its own explanations and clearly identified editorial clarifications. Project photographs and the original diagrams shown here come from the supplied source, with crops described in their captions.
Open the original Maple Leaf Applique.pdf reference in Drive — Whole PDF. Keep the original charts with your project, especially where this guide points to a pictured construction step.
Leave a Reply