
Stella Crochet Spider: A Halloween Doll With Six Arms
· admin
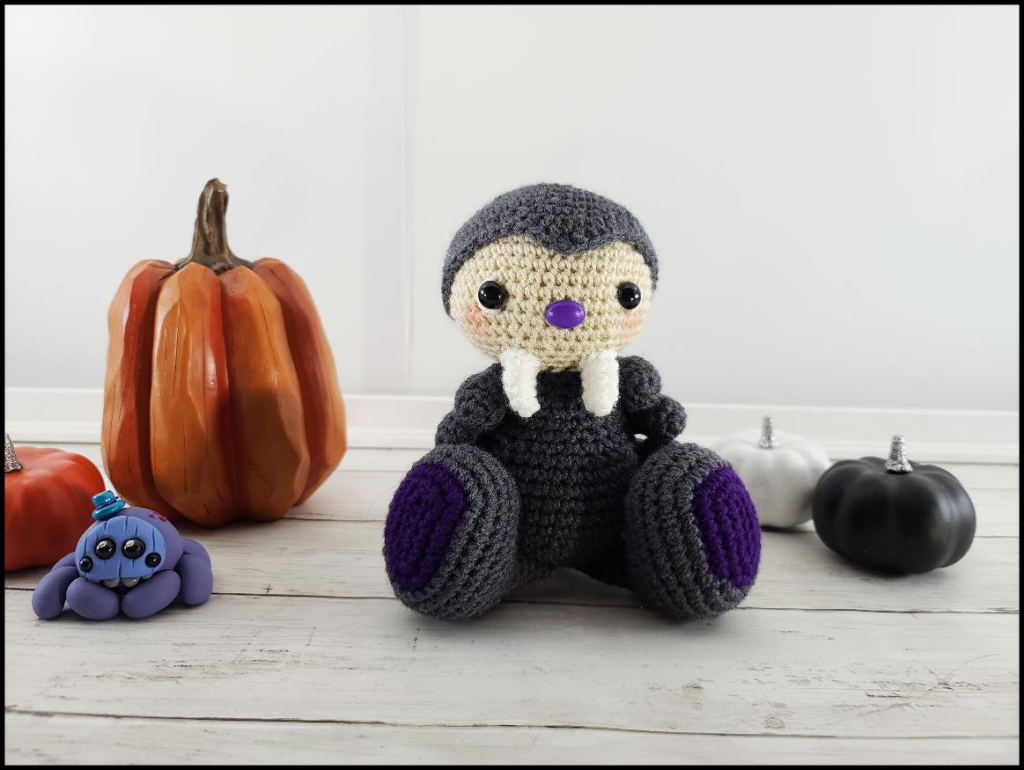
Stella is an upright spider character with a cream face, gray body, six slim arms, two large purple shoes and small fangs. The source places this design inside the Blue the Butterfly collection; use its Stella section for this project.
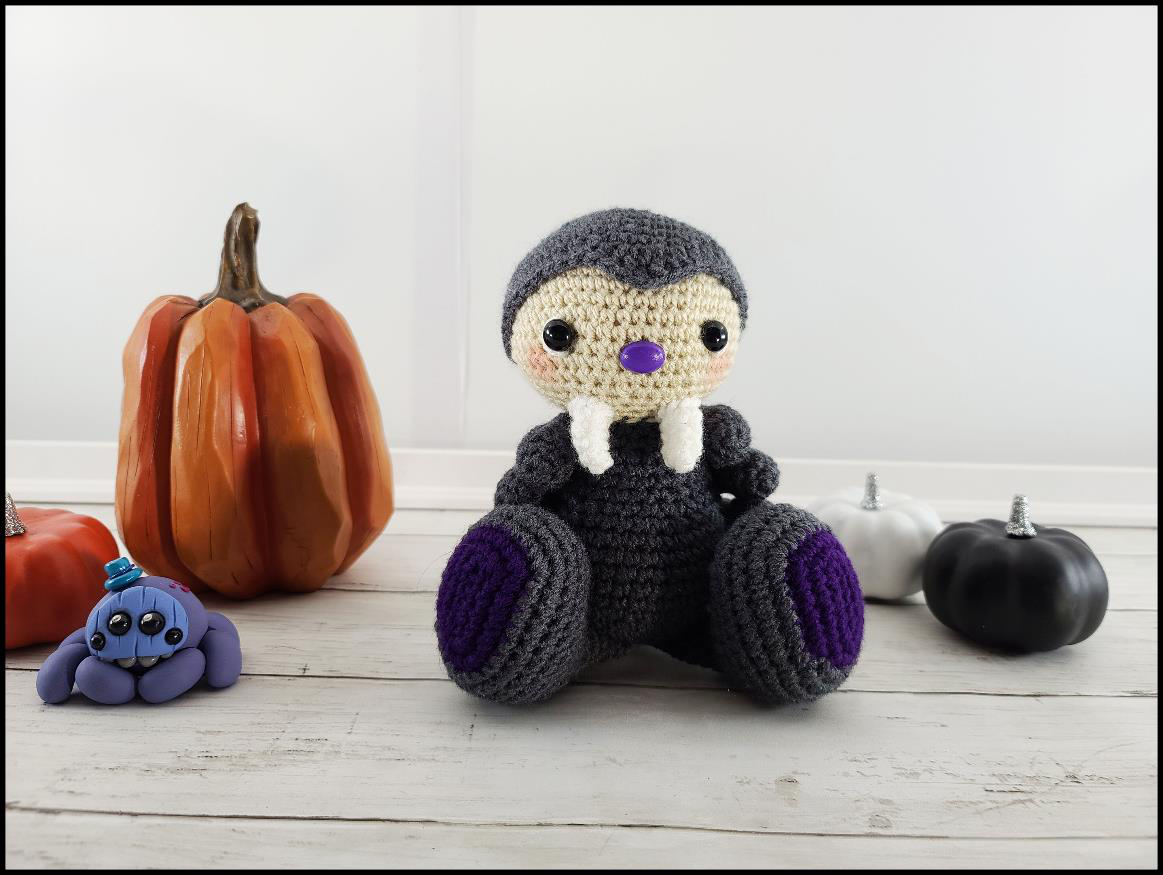
Project at a glance
| Detail | What to expect |
|---|---|
| Skill level | Experienced |
| Finished size | Approximately 11 in tall |
| Pattern language | English; stitch terms explained below |
| Construction | See the component and assembly sections |
Materials and tools
- Worsted yarn: approximately 50 g main color and 25–50 g accents in cream, dark gray, purple and white
- 3.25 mm hook, 12 mm eyes and 14 mm nose
- Stuffing, markers and yarn needle
Stitches and pattern notes
Unless stated otherwise, this article uses US crochet terms. ch = chain; sl st = slip stitch; sc = single crochet; hdc = half double crochet; dc = double crochet; inc = 2 stitches in one stitch; dec = work 2 stitches together; MR = magic ring; BLO/FLO = back/front loop only. Numbers in the final column are the finished stitch counts.
Use a continuous spiral. The head’s increases and decreases may be staggered to soften the corners; the counts below stay unchanged. The cap ends in a partial shaping row. The source omits two arm-round labels and has overlapping tooth instructions; those details are clarified below.
Head and gray cap
For the cream head, start with 6 sc in MR and add six evenly spaced increases on rounds 2–8 to reach 12, 18, 24, 30, 36, 42 and 48. Work rounds 9–14 with 48 sc. Put the eyes between rounds 12 and 13, ten stitch holes apart; put the nose between rounds 13 and 14. Decrease by six evenly on rounds 15–19 to 42, 36, 30, 24 and 18. Stuff firmly without stretching the eye holes.
Make the gray cap with the same increase sequence from 6 to 48 on rounds 1–8. Work rounds 9–13 with 48 sc. Round 14: (6 sc, dec) × 6 = 42. For the front peak, work hdc, dc inc, tr inc, dc inc, hdc, then 23 sc and stop. This is a partial shaping row: it uses 28 of the 42 old stitches and makes 31 new stitches, leaving 14 old stitches unworked. The source’s “42” beside this row is not a full-row output count. Pin the cap around the cream face before sewing.
Body
| Round / row | Instructions | Count |
|---|---|---|
| 1–6 | 6 sc in MR; increase by 6 evenly each round to 36. | 6 → 36 |
| 7–13 | Sc around | 36 |
| 14 | (5 sc, dec) × 4, 8 sc | 32 |
| 15 | (4 sc, dec) × 3, 14 sc | 29 |
| 16 | (dec, 7 sc) × 2, dec, 9 sc | 26 |
| 17 | 3 sc, dec, 16 sc, dec, 3 sc | 24 |
| 18 | Sc around | 24 |
| 19 | 8 sc, dec, 4 sc, dec, 8 sc | 22 |
| 20 | Sc around | 22 |
| 21 | Dec, 8 sc, dec, 10 sc | 20 |
| 22 | Sc around | 20 |
| 23 | (dec, 8 sc) × 2 | 18 |
Make six arms and two fangs
Each arm: 6 sc in MR; round 2, (sc, inc) × 3 = 9; rounds 3–4, 9 sc; round 5, 2 sc, 2 dec, 3 sc = 7. Continue with 7 sc on rounds 6–11. This bridges the source’s missing labels 6 and 7; it is an editorial continuation, not a separately tested revision. Leave tails for attaching three arms to each side.
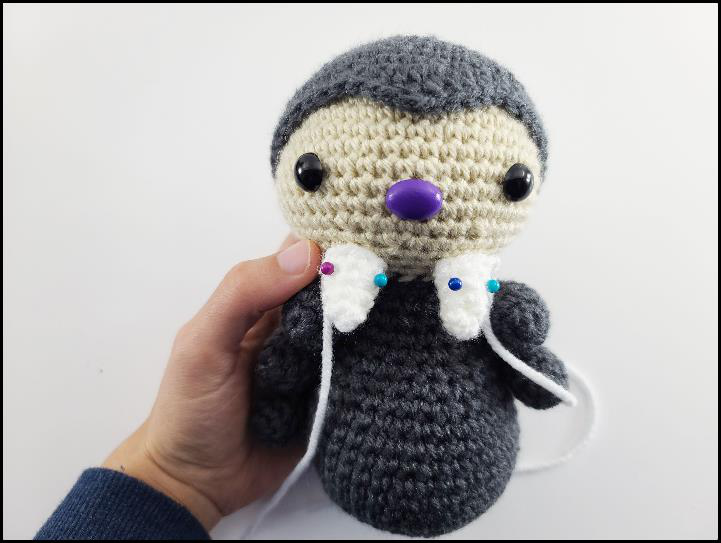
The fang text runs past its tiny starting ring rather than maintaining conventional round boundaries. For each fang, make 3 sc in MR, then work the following continuous short sequence without resetting a round marker: inc, 3 sc; inc, 4 sc; sc, inc, sc, dec, inc. The increases continue into the next available stitches, including newly formed stitches when the original ring has been exhausted. Stop and shape the pointed piece according to the source photo. Make two and leave sewing tails.
Two oversized shoes and legs
| Round / row | Instructions | Count |
|---|---|---|
| 1 | Purple: ch 6. From second chain: inc, 3 sc, 4 sc in end chain; opposite side: 3 sc, inc. | 14 |
| 2 | Inc, 4 sc, inc, 2 sc, inc, 5 sc (each “inc” here means 3 sc in one stitch). | 20 |
| 3 | Inc × 3, 5 sc, 3 sc in next stitch, 4 sc, 3 sc in next stitch, 6 sc. | 27 |
| 4 | Sc, inc × 3, 8 sc, 3 sc in next stitch, 6 sc, 3 sc in next stitch, 7 sc. | 34 |
Here inc × 3 means three ordinary two-stitch increases in three successive stitches, while the source’s inc3 means three sc in a single stitch. Keeping those two notations distinct gives the stated 20, 27 and 34 stitch counts.
| Round / row | Instructions | Count |
|---|---|---|
| 5–7 | Gray: sc around | 34 |
| 8 | 17 sc, 6 dec, 5 sc | 28 |
| 9 | 16 sc, 4 dec, 4 sc | 24 |
| 10 | 15 sc, 4 dec, sc | 20 |
| 11 | 12 sc, 4 dec | 16 |
| 12 | (dec, 6 sc) × 2 | 14 |
| 13 | Sc around | 14 |
| 14 | (dec, 5 sc) × 2 | 12 |
| 15 | Sc around | 12 |
| 16 | (dec, 4 sc) × 2 | 10 |
| 17 | Sc around | 10 |
Assembly
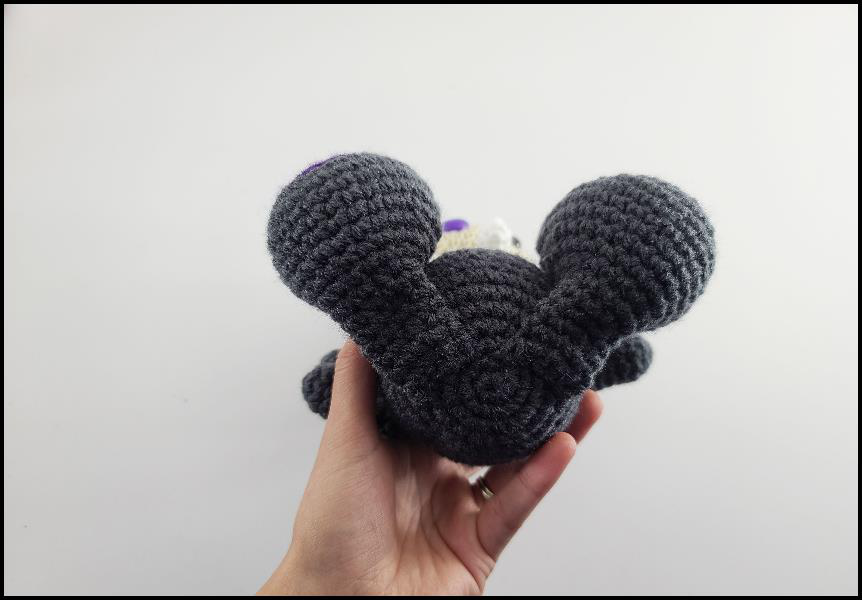
Stuff the feet and lower legs, leaving the upper legs softer. Pin them to the body near rounds 4–5. Attach three arms on each side facing forward, then secure the stuffed head to the neck. Sew the cap edge, place the fangs beneath the face, and embroider white eye highlights. Compare both side views before tightening the final seams.
Tips for a neat finish
- Distinguish three separate increases from three sc in one stitch.
- Keep all six arms equally long.
- Check the face and cap alignment from the front before sewing.
Frequently asked questions
Why does this spider have six arms?
Its other two limbs are the large shoe-wearing legs, giving eight limbs in total.
Is every source row internally consistent?
No. The cap and arm labeling are clarified above; the shoe’s two increase notations are distinguished explicitly. The adaptation has not been physically tested.
More Halloween crochet ideas
Build a coordinated seasonal display with our Halloween crochet collection. For another small project, explore the crochet ghost tutorial or browse these Halloween coaster ideas.
Pattern source and credit
This article is based on Blue the Butterfly.pdf. Sweet Oddity Art. The project photographs come from that source and show its original samples. The text has been organized into an article with additional explanations; any editorial clarification is identified where it matters. This is a document-based adaptation, without a claim that we physically tested the finished project.
Open the original pattern reference for the source photographs and original layout.
Leave a Reply