
Plush Pumpkin Crochet Hat: A Padded Ribbed Halloween Hat
· admin
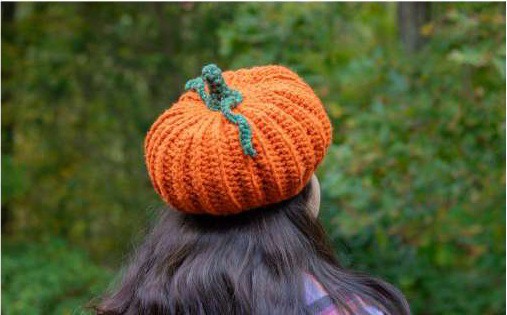
This oversized pumpkin hat has a wearable inner cap and a padded, ribbed outer shell. Eight lobes give it the pumpkin shape while a small green stem and two curling tendrils finish the crown.
Project at a glance
| Detail | What to expect |
|---|---|
| Skill level | Intermediate |
| Finished size | Teen/adult, approximately 22–24 in head circumference |
| Pattern language | English; stitch terms explained below |
| Construction | See the component and assembly sections |
Materials and tools
- Super bulky #6 orange yarn: about 1.5–2 skeins of 106 yd each
- Green yarn: approximately 2–3 yd
- 10 mm hook, markers, tapestry needle
- Four to five handfuls of stuffing, adjusted for fit
Stitches and pattern notes
Unless stated otherwise, this article uses US crochet terms. ch = chain; sl st = slip stitch; sc = single crochet; hdc = half double crochet; dc = double crochet; inc = 2 stitches in one stitch; dec = work 2 stitches together; MR = magic ring; BLO/FLO = back/front loop only. Numbers in the final column are the finished stitch counts.
Source gauge: 10 hdc across and two rows measure approximately 5.25 × 1.75 in. Make a swatch and check the cap on the intended wearer before adding the outer layer. BLO rib rows turn back and forth; the inner cap is worked in rounds. Turning chains do not count as stitches.
Make the inner cap
| Round / row | Instructions | Count |
|---|---|---|
| 1 | 6 sc in MR | 6 |
| 2 | Inc × 6 | 12 |
| 3 | (sc, inc) × 6 | 18 |
| 4 | (inc, 2 sc) × 6 | 24 |
| 5 | (3 sc, inc) × 6 | 30 |
| 6 | (inc, 4 sc) × 6 | 36 |
| 7 | (5 sc, inc) × 6 | 42 |
| 8 | (inc, 6 sc) × 6 | 48 |
| 9–18 | Sc around | 48 |
| 19 | FLO: sc around | 48 |
Check the opening before proceeding. A tighter yarn or smaller hook changes the wearable circumference even if every stitch count matches.
Build the first rib unit
From the cap edge, ch 16 and ch 1 to turn. The outer shell grows perpendicular to the cap brim and attaches as you work.
| Round / row | Instructions | Count |
|---|---|---|
| 1 | 3 sl st, 3 sc, hdc inc, (hdc, hdc inc) × 4; finish with an hdc joined through the last foundation chain and the next cap stitch. | 21 |
| 2 | Sl st into next cap stitch; turn and skip attachment slip stitches. 15 hdc BLO, 3 sc BLO, 3 sl st BLO; ch 1, turn. | 21 |
| 3 | 3 sl st BLO, 3 sc BLO, 14 hdc BLO, final hdc BLO joined to next cap stitch. | 21 |
| 4 | Repeat row 2. | 21 |
| 5 | Repeat row 3. | 21 |
| 6 | Sl st into next cap stitch; turn. (Hdc, hdc dec) × 5, 3 sc, 3 sl st; ch 1, turn. | 16 |
Count clarification: the source wording for row 1 repeats a phrase ambiguously. Four total (hdc, hdc inc) pairs after the first hdc increase produce the stated 21 stitches. Five pairs would exceed that count. Mark the final cap attachment so it is not counted as an extra rib stitch.
Repeat and close the pumpkin shell
Repeat this six-row unit until you have 48 rib rows, forming eight lobes. On the final decrease row, join the unused foundation-chain loops to the current rib as you decrease, matching the appropriate slip-stitch, sc and hdc portions. Pin the seam first to prevent twisting. The inner cap remains inside the outer shell.
Gather the crown edge of the outer shell with a strong yarn tail. Place stuffing only in the space between the two layers; keep the head cavity clear. Spread it evenly into the lobes, try the hat on, and adjust before sewing the gathered outer crown to the top of the cap. Too much filling makes the brim tight and the hat heavy.
Stem and tendrils
| Round / row | Instructions | Count |
|---|---|---|
| 1 | Green: 6 sc in MR | 6 |
| 2–4 | Sc around | 6 |
| 5 | (sc, inc) × 3 | 9 |
| 6 | Sc, (inc, sc) × 4 | 13 |
The source labels the last two stem rounds “5”; they are numbered consecutively here. Sew the wider stem edge over the gathered crown. For each tendril, ch 21 and work 20 sl st back from the second chain. Make two and attach on opposite sides of the stem, allowing the chains to curl naturally.
Tips for a neat finish
- Match the large source gauge before choosing a size.
- Keep the crown-gathering thread clear of the head opening.
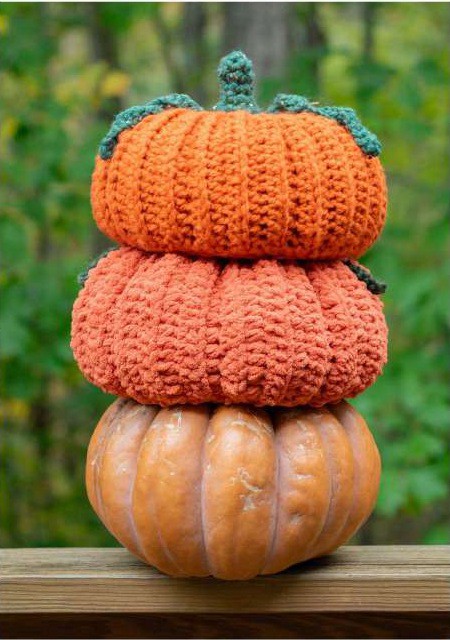
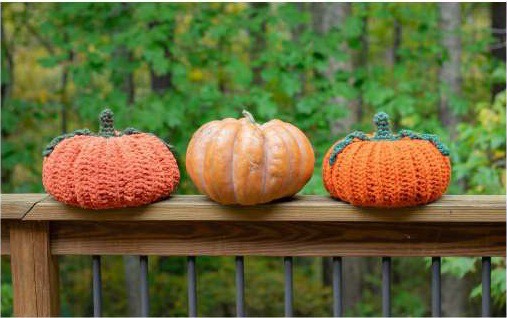
- Use the original three views to check the proportions of the lobes.
Frequently asked questions
Is the stuffing inside the wearable cap?
No. It belongs between the cap and the outer ribbed shell.
Can this be scaled down with a smaller hook?
It changes every dimension. Make a cap fitting sample first; the written source gives the teen/adult version only.
More Halloween crochet ideas
Build a coordinated seasonal display with our Halloween crochet collection. For another small project, explore the crochet ghost tutorial or browse these Halloween coaster ideas.
Pattern source and credit
This article is based on Pumpkin Plush Hat.pdf. Designer not named in the readable source text. The project photographs come from that source and show its original samples. The text has been organized into an article with additional explanations; any editorial clarification is identified where it matters. This is a document-based adaptation, without a claim that we physically tested the finished project.
Open the original pattern reference for the source photographs and original layout.
Leave a Reply