
How to Crochet a Flower Bouquet Blanket: Free Pattern, PDF & Video
· admin
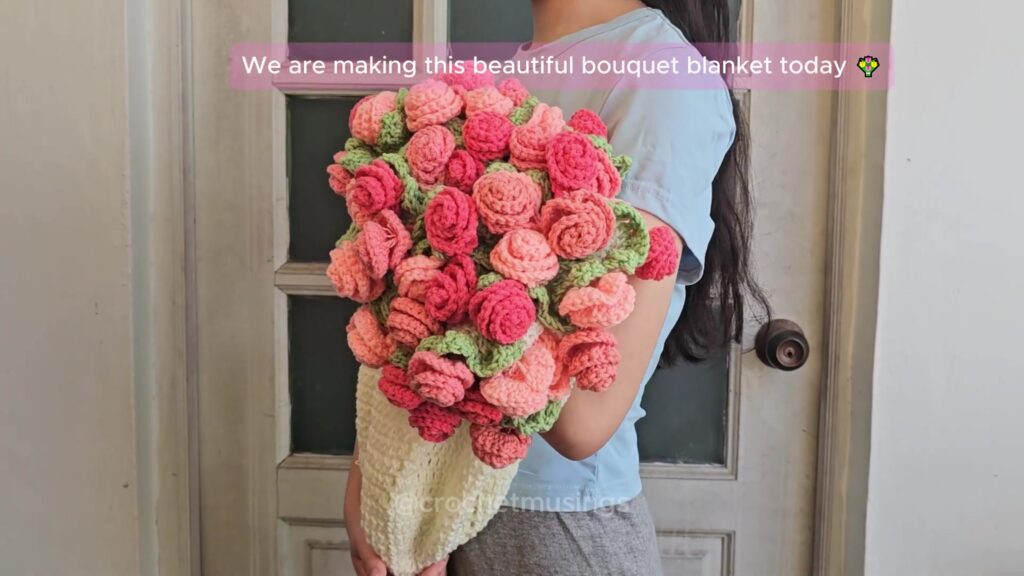
Turn a simple round crochet blanket into a bouquet of roses. This written companion follows Crochet Musings’ Flower Bouquet Blanket video: first you grow a cream circle in 12 sections, then add a green leafy border and sew on curled pink roses. The free illustrated PDF, photo checkpoints, and original video are linked below. Instructions use US crochet terms.
At a glance: adjustable blanket diameter · 12 repeating sections · 3–4 mm hook with suitable yarn · green leaves with picots · roses made from a 21-chain strip. There is no fixed finished measurement or exact yarn quantity for every size.
Materials for the flower bouquet blanket
- Cream or ivory yarn for the circular blanket base
- Green yarn for the leafy border
- Pink, coral, or other rose colors for the flowers
- A 3–4 mm crochet hook that suits your yarn, yarn needle, scissors, and at least 12 stitch markers
The creator suggests at least three skeins in the main color, one green, and two for roses as a starting point, but the amount changes with yarn weight and blanket size. Make a small swatch if you want to estimate your own yardage before starting.
US stitch abbreviations
- MR: magic ring; ch: chain; st: stitch; ch-1 sp: chain-one space
- sl st: slip stitch; sc: single crochet; dc: double crochet; tr: treble crochet
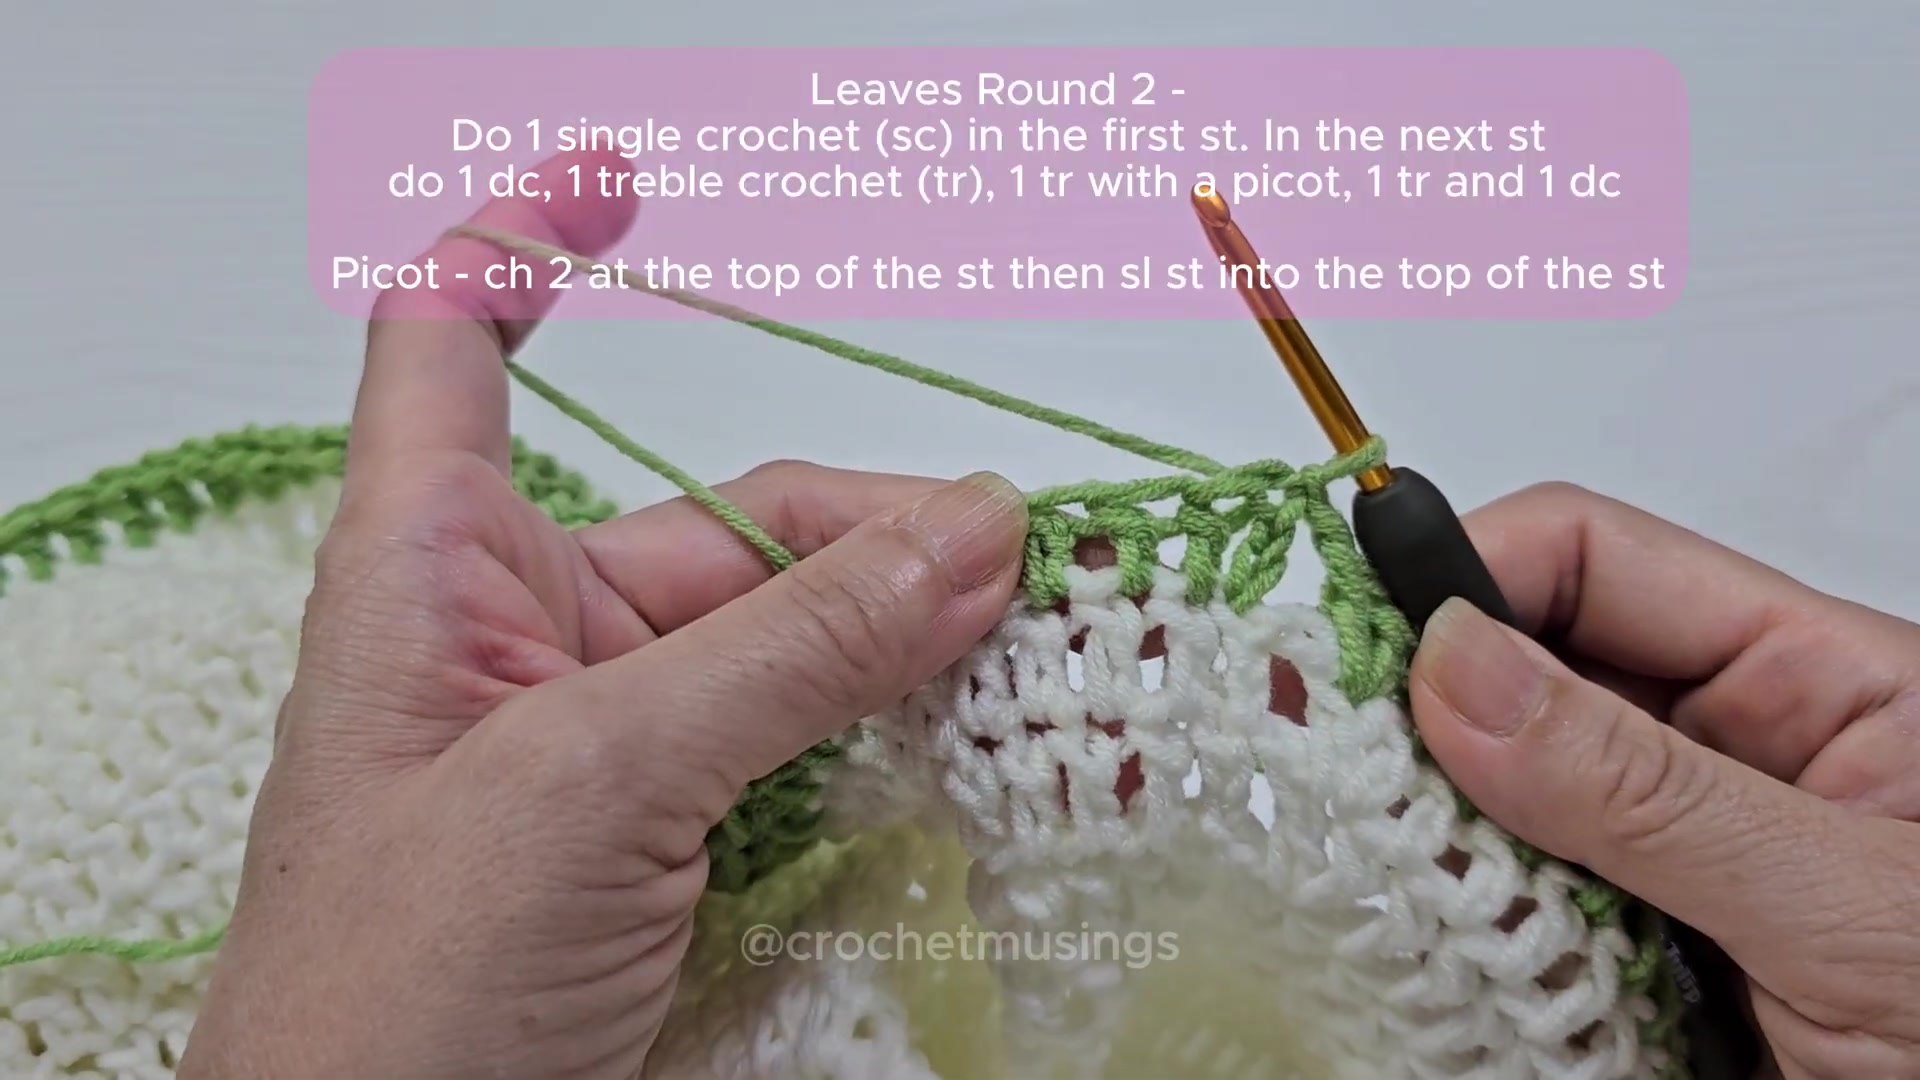
- Picot: ch 2 at the top of the indicated tr, then sl st into the top of that same tr
Step 1: Crochet the round blanket base
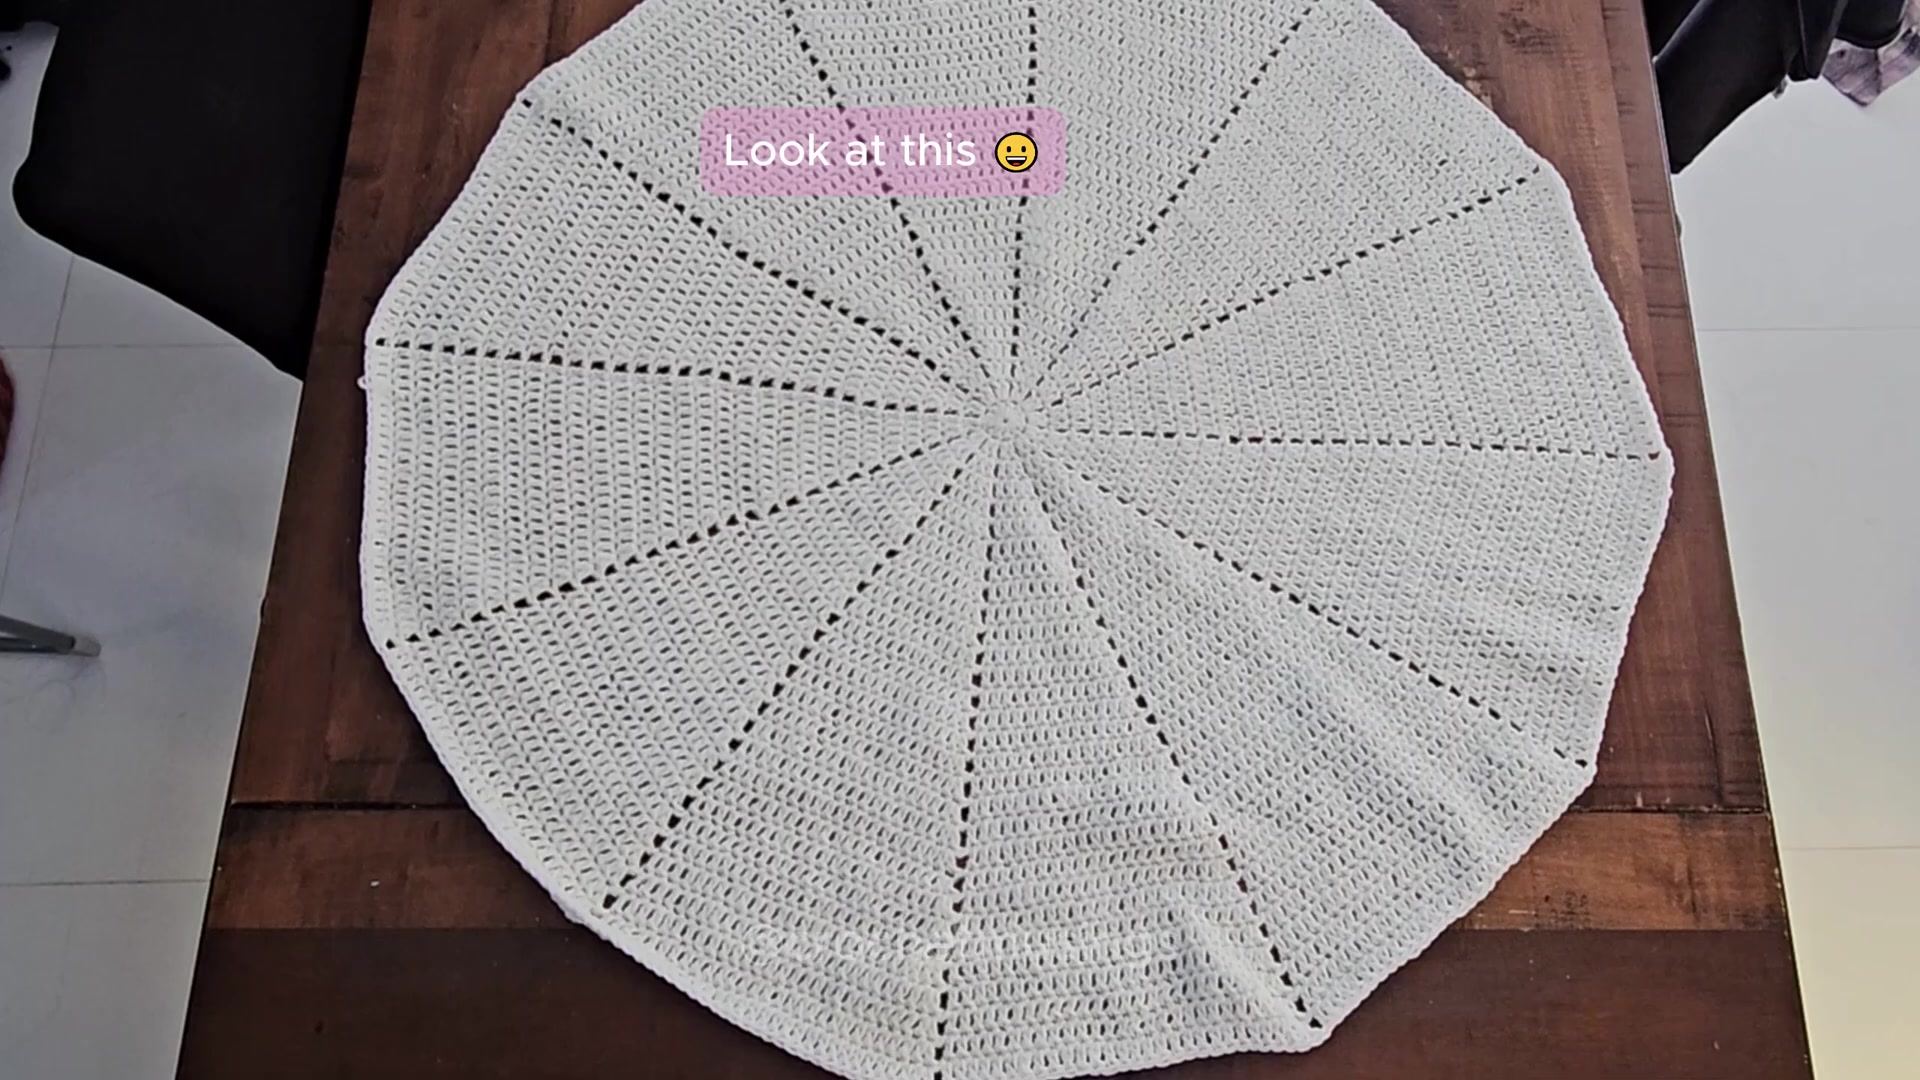
Use cream yarn. The chain-one gaps mark the borders between the 12 sections. Keep those gaps aligned as the blanket grows; each new round adds one dc to each section.
- Round 1: Make a MR. Ch 3 (counts as the first dc), work 11 dc into the ring, pull it closed, and join to the top of the starting ch 3. Count: 12 dc.
- Round 2: Ch 3, dc in the same stitch, ch 1. Work 2 dc in the next stitch, ch 1; repeat around and join to the top of ch 3. You now have 12 groups of 2 dc separated by ch-1 spaces.
- Round 3: Ch 3, 2 dc in the next stitch, ch 1. For each following section, skip the ch-1 space, dc in the first dc, 2 dc in the last dc, ch 1. Join. Each section now has 3 dc.
- Round 4 and onward: Ch 3. In each section, work one dc in every stitch except the final dc; work 2 dc in that last stitch, ch 1, and skip the previous round’s ch-1 space. Repeat around and join. The sections progress 2, 3, 4, 5… dc per round.
Sizing check: Stop when the cream circle reaches the diameter you want. Lay it flat occasionally. If it starts to ruffle or cup, check that each of the 12 sections receives only one increase per round and that the gaps stay aligned.
Step 2: Make the green foundation round
Join green yarn at the beginning of a section and work one more round using the same increase rule: dc in each stitch until the section’s last dc, work 2 dc in that last stitch, ch 1, and skip the ch-1 space. Repeat for all 12 sections and join. The video example has 30 dc per green section; yours can differ if you choose another diameter.
Mark the midpoint of each section. With 30 dc, stitch 15 or 16 is near the middle. Each section gets one pair of leaves near its beginning and another pair near its midpoint.
Step 3: Crochet the pointed leaves
For one leaf, work 1 sc in the next stitch. In the following stitch, work 1 dc, 1 tr, 1 tr with a picot, 1 tr, 1 dc all into that one stitch. Work 1 sc in the next stitch. Make the next leaf in the following stitch to form a pair.
Place a pair near the start of each section and another at the midpoint marker. Work 1 sc into each available stitch between leaf pairs. At the last stitch of a section, work 2 sc and ch 1 before moving into the next section. Continue around, fasten off, and weave in the green tail. Pause the original video around 6:45 for the picot close-up.
Step 4: Make each rolled crochet rose
- Join the rose color near the center of a leaf pair, or work the flower separately for sewing on later. Ch 21.
- Starting in the third chain from the hook, work 3 dc into every chain across. The strip naturally starts to curl.
- Ch 1 at the end, cut the yarn, and leave a long sewing tail.
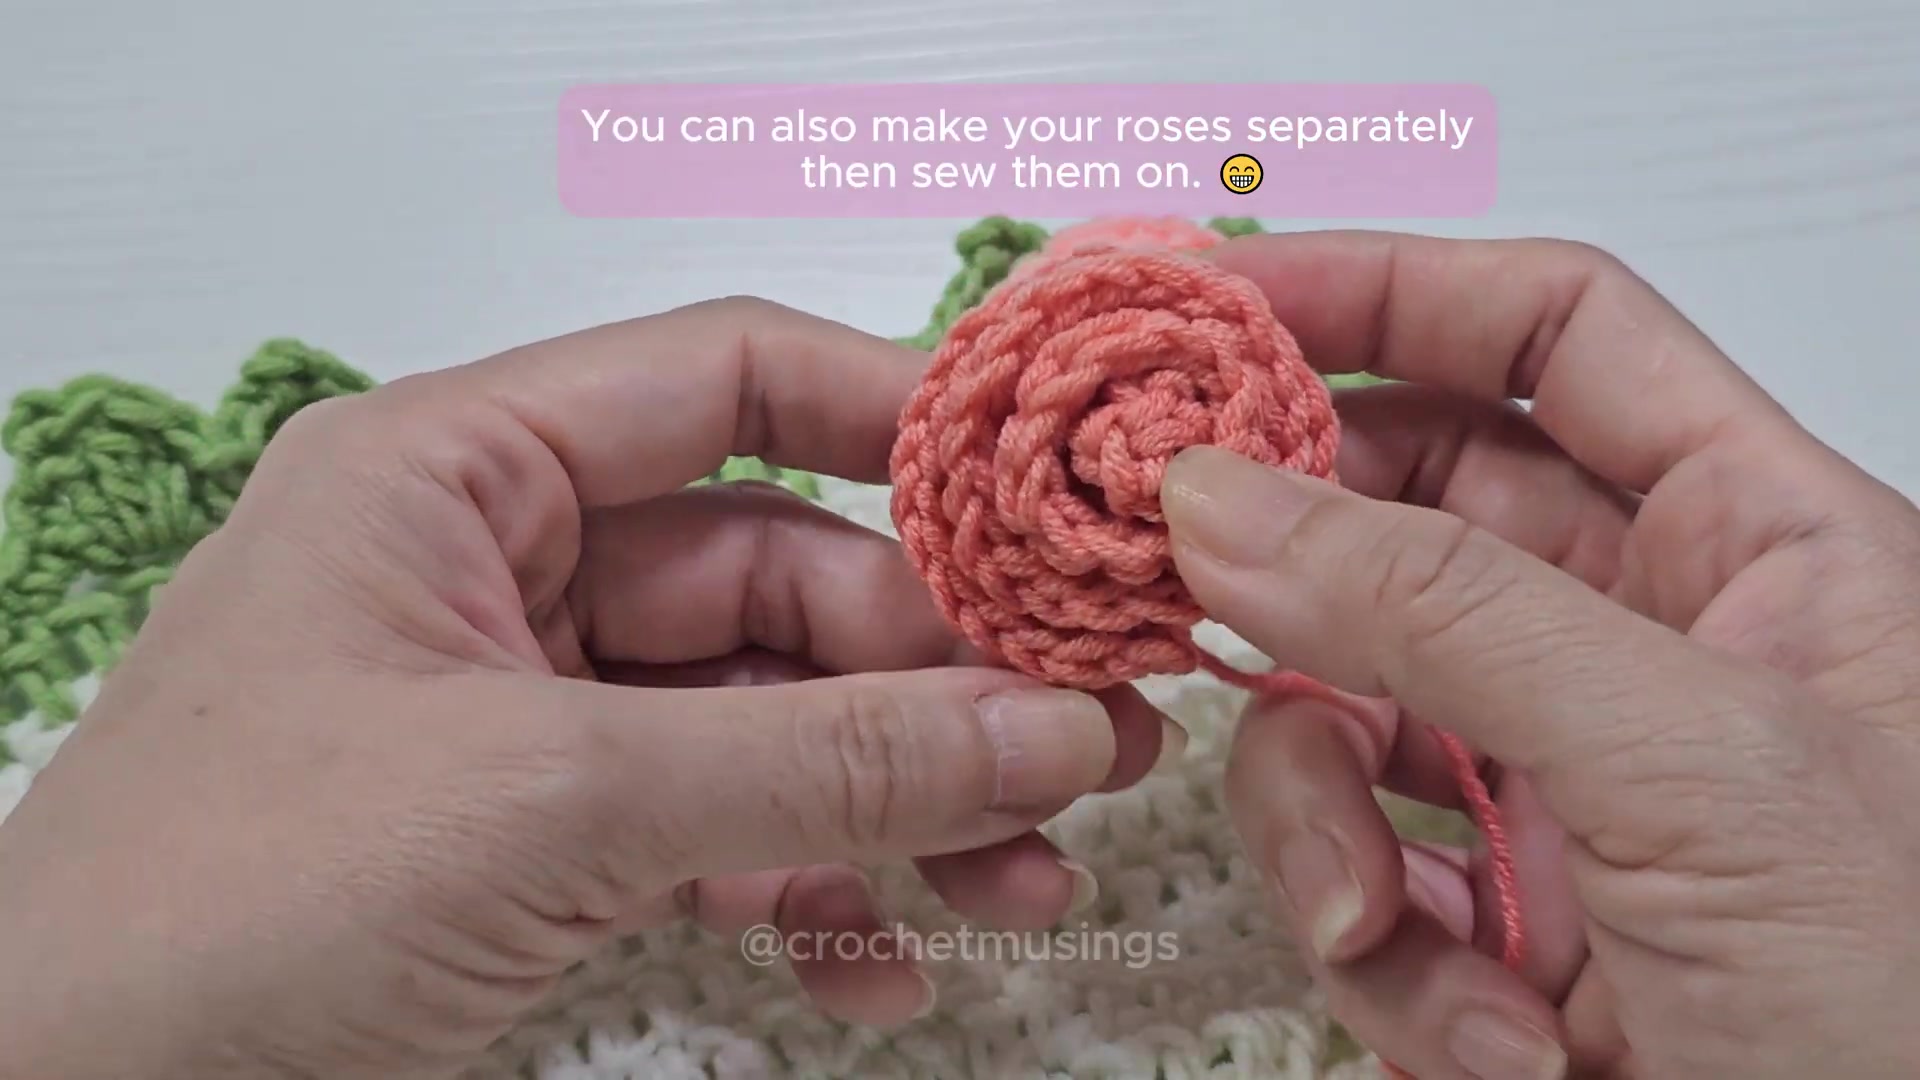
- Roll the curled strip into a rose, keeping the first end at its center. Sew through the underside of the coil to secure the layers.
Repeat in one color or several shades. If you prefer to decide the placement after finishing the border, make the roses separately before sewing them on. The original demonstration begins the 21-chain strip around 12:45.
Step 5: Attach the roses and finish
Arrange roses at the leaf pairs and between them until the border looks like a full bouquet. The spacing is flexible; place the flowers before stitching so you can adjust the color balance. Sew each rose securely through its underside and the green border. Keep knots and yarn tails on the reverse, then weave them into nearby stitches. Check that the blanket can open flat and that the roses hold their shape when it is folded into a bouquet.
Download the free illustrated PDF
Keep the round-by-round steps and selected video screenshots beside you as you crochet. The seven-page illustrated companion PDF covers the 12-section base, green edging, leaf placement, 21-chain roses, and assembly. It is an independent written companion to Crochet Musings’ video, not the creator’s official printable pattern.
You can also view the free pattern product page and download the same PDF there without checkout.
Watch the original Flower Bouquet Blanket video
Watch the full demonstration by Crochet Musings (@crochetmusings) for hand movements, leaf placement, and how the blanket folds into a bouquet. The screenshots above are from the creator’s video. Open the original video on YouTube.
Leave a Reply