
Floral Crochet Headband with Raffia Flowers: Materials and Assembly Guide
· admin
Crochet Pattern Nest / Hair-accessory project guide
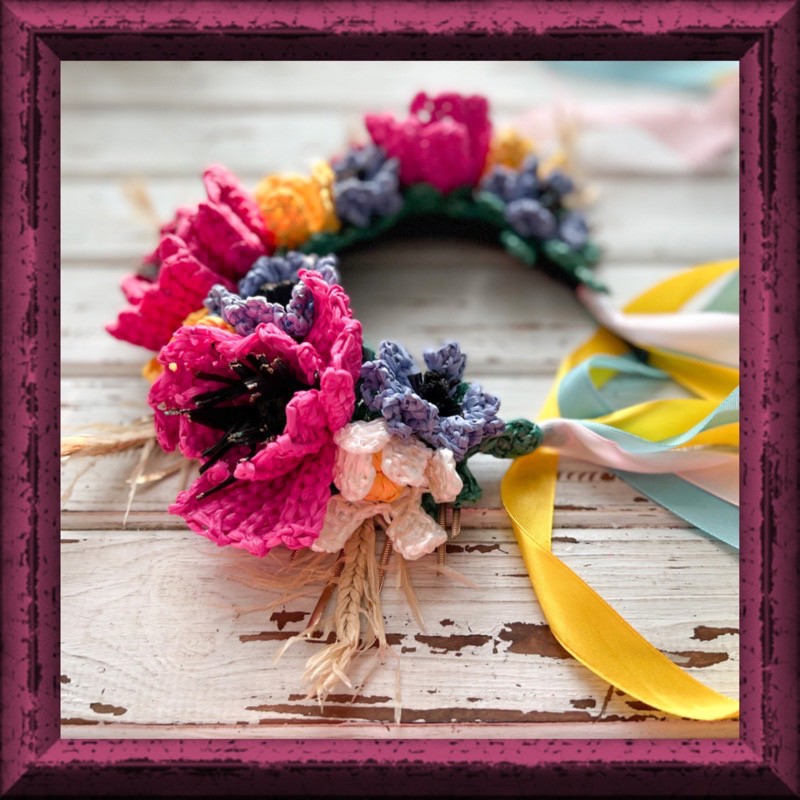
A floral crochet headband is a small arrangement project as much as a crochet project. In the design by @smachna.torba, raffia flowers, leaves and wheat-like accents sit above a narrow rigid headband to create a sculptural accessory. The interest comes from the way the different elements overlap, rather than from a single large flower. This guide helps you read the materials, plan the arrangement and approach the finishing. The designer's original pattern remains the reference for the flower instructions and photographs.
Read the project as a whole
1. Understand the construction
This is a decorated rigid headband, so its fit comes from the purchased base. It is not a triangular bandana and it does not stretch around the head like a crocheted ear warmer. The crocheted elements provide the decoration, while the base and its supports hold the arrangement in place.
Before making all the flowers, try the undecorated base on the intended wearer. Check the pressure behind the ears and the position across the top of the head. An attractive floral arrangement will not correct an uncomfortable base, so make that decision first.
2. Materials to gather
The source uses raffia yarn, a 3 mm crochet hook and a plastic headband approximately 10 mm wide. Its tools include scissors, a yarn needle, adjustable plastic supports, PVA glue and a glue gun. Optional details include ribbon and beads. Use the original PDF for the complete quantities and the precise support arrangement.
Raffia is important to the appearance of this particular design: its flowers hold a different shape from the same motifs made in soft wool. If you want to substitute a fiber, make one complete sample flower and test how it sits on the base before committing to the whole project.
3. Choose a controlled floral palette
Decide which flower will be the visual focus. A strong poppy color can lead the arrangement, with smaller pale flowers and blue accents around it. Alternatively, a quieter palette can make the different petal shapes more noticeable. Lay the yarn colors beside one another before crocheting.
Keep the flower centers and leaves in the plan as well. Small dark centers can give a flower definition, while a repeated leaf color can connect several flower types. A photograph of the yarn palette is a useful reference if you set the project aside and return to it later.
4. Make and finish the components first
The original design includes camomile-style flowers, poppies, cornflowers, leaves and spikelets. Follow the designer's separate instructions for each component. Finish the ends and shape the pieces before attaching them, because it is much easier to work on a loose flower than on one already fixed to a curved base.
Make a first sample of every component before producing multiples. Compare their scale and decide whether the arrangement will be balanced on your chosen headband. Keep the pieces grouped by type in small trays so that the final layout remains easy to adjust.
5. Plan the arrangement before fixing it
Place the components beside the headband in the order you intend to attach them. Begin with the elements that create height and direction, then consider the leaves, larger flowers and smaller fillers. The source photographs are useful for understanding how its arrangement is layered.
View the layout from the front, side and back. A headband is seen in profile when worn, and an arrangement that looks balanced on a flat table can feel top-heavy on a curve. Leave the ends of the base clear enough to remain comfortable behind the ears.
6. Prepare the base and assemble in stages
Follow the source's base-preparation photographs before using any adhesive. The arrangement is built around a prepared support structure, rather than by pressing every flower directly against a bare strip. Check that trimmed support ends will be covered and that the inner surface remains smooth against the head.
Work in small stages and allow the adhesive to set according to its manufacturer's instructions. Let a hot-glued area cool before handling or trying on the headband. Recheck the alignment after each layer instead of waiting until the last flower to discover that the arrangement has shifted.
7. Refine the finish
Use the smaller flowers and leaves to cover visible attachment points without hiding the shape of the larger flowers. Look closely at the back of the arrangement as well as the front. A neat reverse side helps the accessory feel finished and reduces the chance of a loose end catching in the hair.
Ribbon and bead details are optional finishing choices in the source. Add them only after you are happy with the main arrangement. If the accessory is intended for a child, consider a simpler finish without small detachable decorations and assess the suitability of the rigid base for that wearer.
8. Store and care for the finished headband
Because this project combines yarn, a rigid base and adhesives, it should not be treated like a plain washable crochet scarf. Follow the care guidance for the materials you actually use. Test any cleaning method on spare components rather than soaking the completed arrangement without checking the adhesive and raffia first.
Store the headband where the flowers will not be crushed. A shallow box with room around the raised decoration is more useful than hanging a heavy item over the petals. Keep a note of the yarn, adhesive and finishing choices with your project record if you plan to make another version.
Questions before you start
Is this a crochet bandana?
It is a floral headband built on a rigid base. It belongs beside bandanas as a related hair-accessory project, but it has a different construction and fit.
Can I make it without every flower type?
You can plan a simpler arrangement, but test the balance and scale before attaching anything. Keep the original component instructions as your reference and make the arrangement choice deliberately.
Where are the full flower instructions?
The designer's original Floral Headband pattern contains the detailed component instructions and assembly photographs. Use the source link below to consult that reference.
Original source and designer credit
Original project: Floral Headband by @smachna.torba. This is an original materials-and-assembly reading guide; the designer's complete pattern, charts and photographs remain in the linked source.
Consult the original project sourceDesigner’s assembly video
Leave a Reply