
Crochet Yarn Caddy with Tool Pockets and Ring Handles
· admin
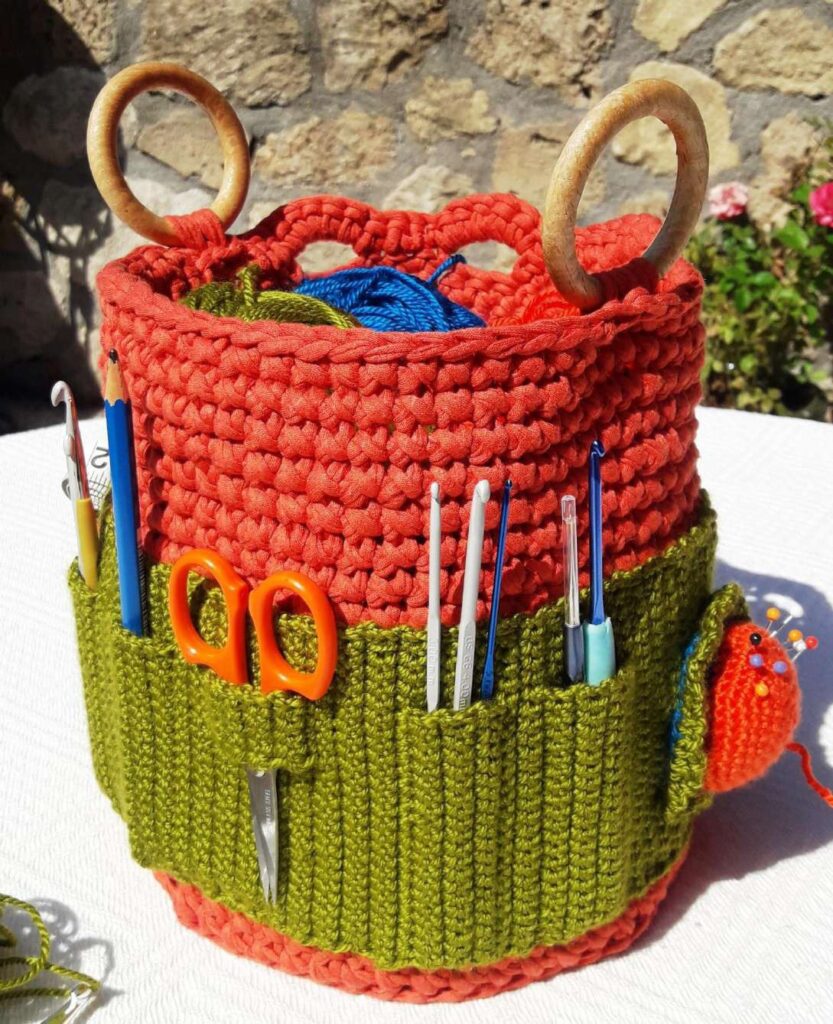
A crochet yarn caddy can organize hooks, scissors, needles and working yarn in one freestanding basket. This source combines a thick T-shirt-yarn container with a finer fitted pocket wrap, two optional wooden ring handles, a small hat-shaped pincushion and a colorful starburst pocket. It is a multi-part project rather than a single quick basket. This guide explains the order of work, the different hook sizes and the fitting checks that keep the outer organizer from sagging.
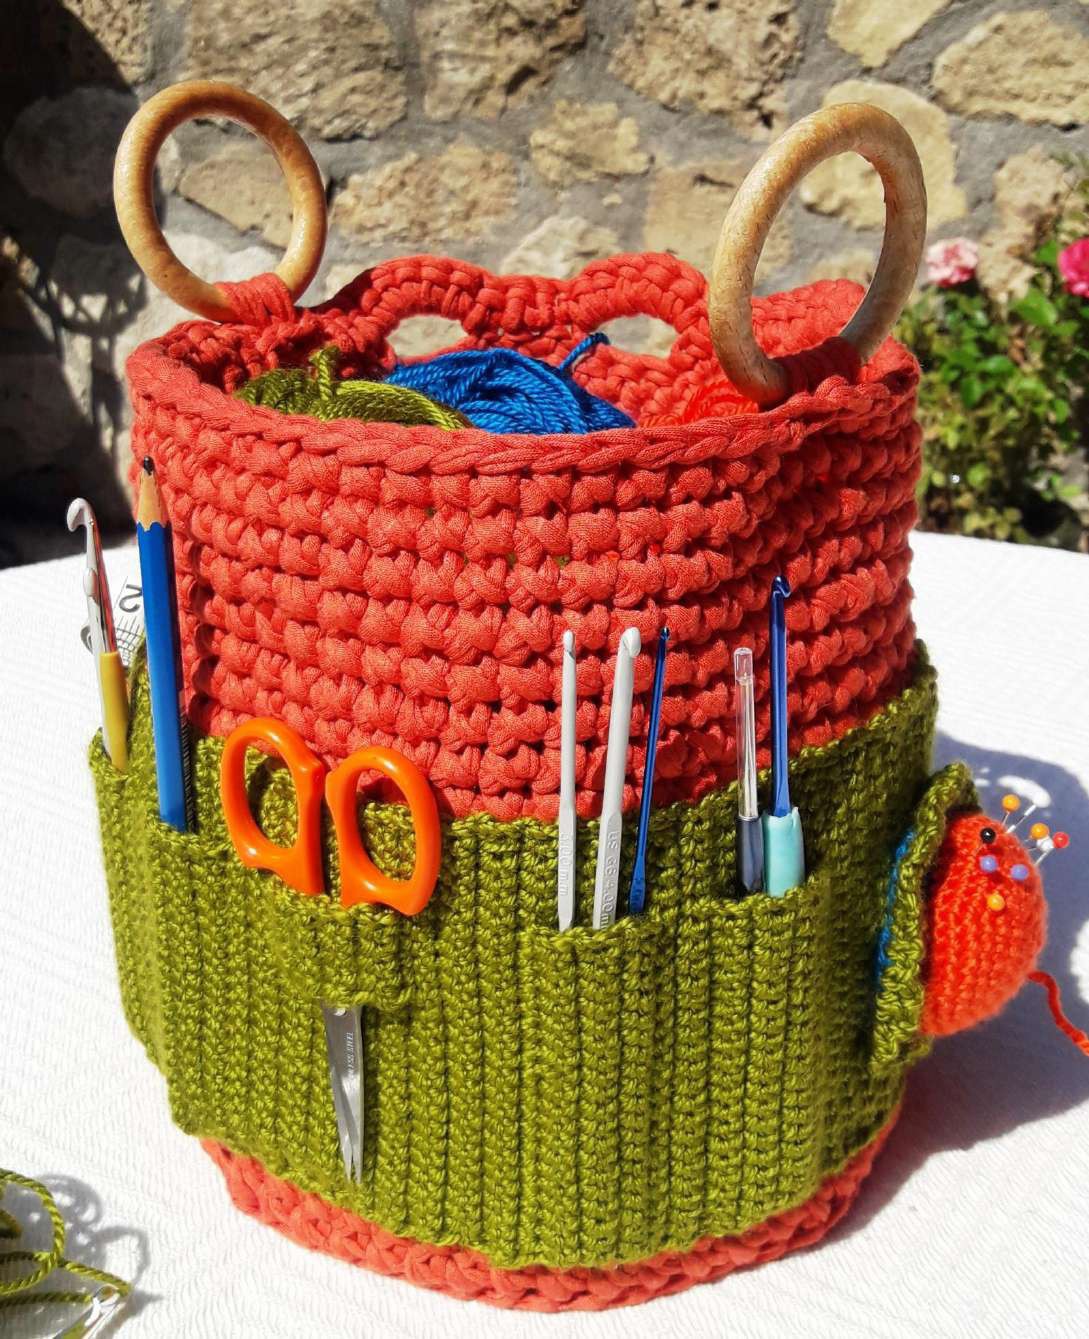
Materials and the four hooks
The source lists 600 g of T-shirt yarn for the basket and one 100 g / 230 m ball of three-ply acrylic for the main organizer wrap. Small amounts of matching-weight acrylic make the pincushion and starburst. You also need a little fiberfill, optional 2½-inch wooden rings, a yarn needle, scissors, pins and stitch markers.
Use a 9 mm hook for the base, a 7 mm hook for the sides, a 3.5 mm hook for the outer wrap and a 2.5 mm hook for the small accessories. Mixing those hooks indiscriminately changes the relative sizes of parts that must fit together.
Understand twisted single crochet
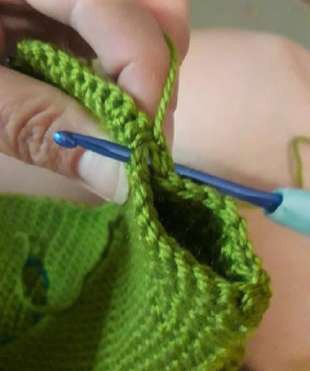
The source uses US terms. Its TSC is a specific single-crochet variation: insert the hook, bring the hook over the working yarn for the first draw-up step, then complete the stitch as illustrated. The PDF contrasts this with its ordinary single crochet in a close-up.
For the acrylic organizer fabric, the stated gauge is 25 stitches and 24 rows per 4 inches with the 3.5 mm hook. Swatch that fabric separately from the T-shirt-yarn basket. The two components use different yarn thicknesses and are fitted together during assembly.
Build the main basket first
With the 9 mm hook, start the chain-five ring and work the base in continuous rounds. The stitch totals rise by eight: 8, 16, 24, 32, 40, 48 and 56. The source expects an approximately 8-inch base at that point.
Finish the base as directed, change to the 7 mm hook and rejoin at the front loops for the first side round. The first rejoining stitch is already part of the 56 total; work the remaining 55 around. Continue the sides in the illustrated twisted single crochet until the wall measures approximately 7 inches from the base.
The top rounds create small tool openings and attach the optional rings. Keep PDF page four open for their exact placement. Mark all three openings and both ring positions before making the final round so that they remain balanced around the basket.
Make and fit the outer organizer
The acrylic wrap begins with ch 26 for a 25-stitch-wide fabric. Its source measurement is approximately 4¼ inches high by 23¾ inches around. The pocket rows split into front- and back-loop paths, creating an extra flap of fabric that is later joined back to the main strip.
Work the pocket repeats in the source order, leaving the planned spaces for the pincushion, scissor flap and starburst pocket. Before sewing the wrap ends together, pin it around the finished basket. The source calls for a snug, slightly tensioned fit. Do not substitute the nominal wrap length for this actual fitting check.
Add the accessory pieces
The small hat pincushion is crocheted separately, sewn around its inner rim and stuffed before its final stitches close. The starburst front is attached along three edges, leaving the top open as a pocket. The long scissor flap is also secured to form a retaining section.
The starburst section’s first and later cluster descriptions do not spell out an identical number of partial dc, and one square-round space label differs from the preceding round. Treat those passages as source ambiguities to clarify with the original pictures, not as a newly verified cluster recipe. This article is a construction guide rather than a replacement for every accessory instruction.
Assemble and inspect
Join the wrap ends, slide it onto the basket and align its top edge evenly all around. Sew the upper and lower wrap edges as directed, hiding tails inside. Test each pocket with its intended tool before trimming the ends. Keep sharp needles and pins secured in the pincushion, and check that the optional ring attachments remain firm when the caddy holds your ordinary supplies.
Frequently asked questions
Why are four hook sizes listed?
The thick basket, finer pocket wrap and small accessories are separate components with different yarn and gauge needs.
What is the basket base count?
Fifty-six stitches after seven expanding rounds, with a source target of approximately eight inches across.
Should I sew the wrap before fitting it?
No. Pin it around the actual basket and adjust its length as the source directs before joining and sewing it in place.
Original source and more crochet projects
Design credit: Crochet Caddy, eleven-page illustrated Drive source. This article explains the supplied source and its construction; it does not claim an independently tested sample. The photographs are from that source, and the checklist is an editorial reading aid.
Open the original pattern in Drive. Source location: Whole PDF. Keep the original instructions and diagrams beside you when working the project.
For another project, explore Anima Floris crochet coasters, or Strand Basket pattern.
Leave a Reply