
Crochet Horse and Unicorn Phone Stand Pattern with Desk Pockets
· admin
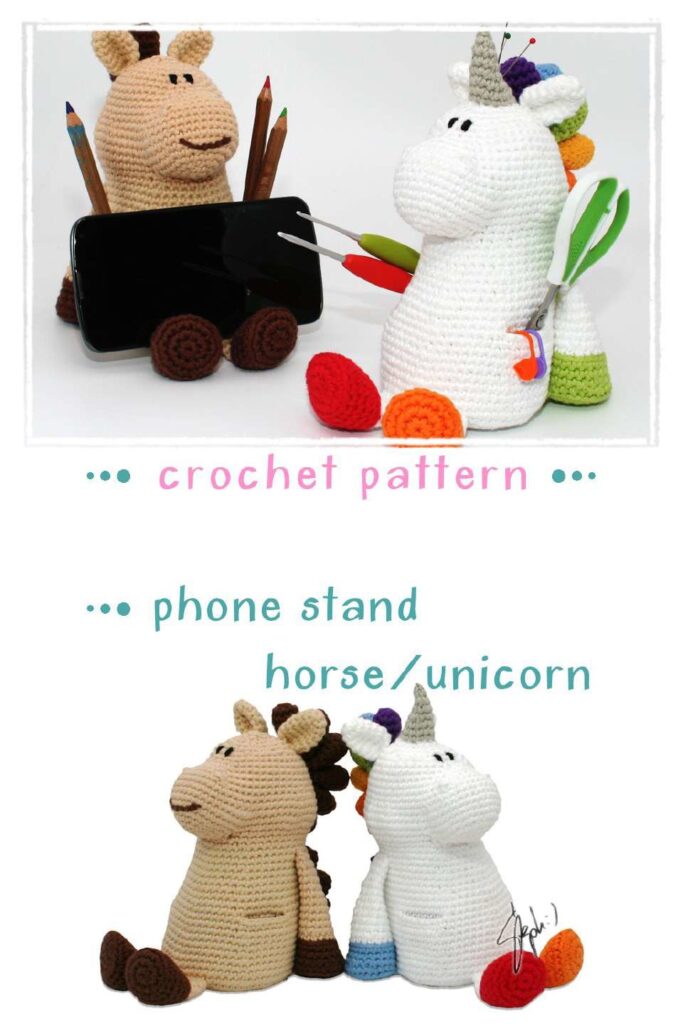
This crochet horse and unicorn phone stand pattern makes a weighted desk accessory with a long face, four hooves and a layered tail. The horse and unicorn share the same construction; the unicorn adds a tapered horn and can use a rainbow palette. Optional little side pockets hold small desk items. Many parts are crocheted into the body as it grows, so make the separate pieces before starting the main base.
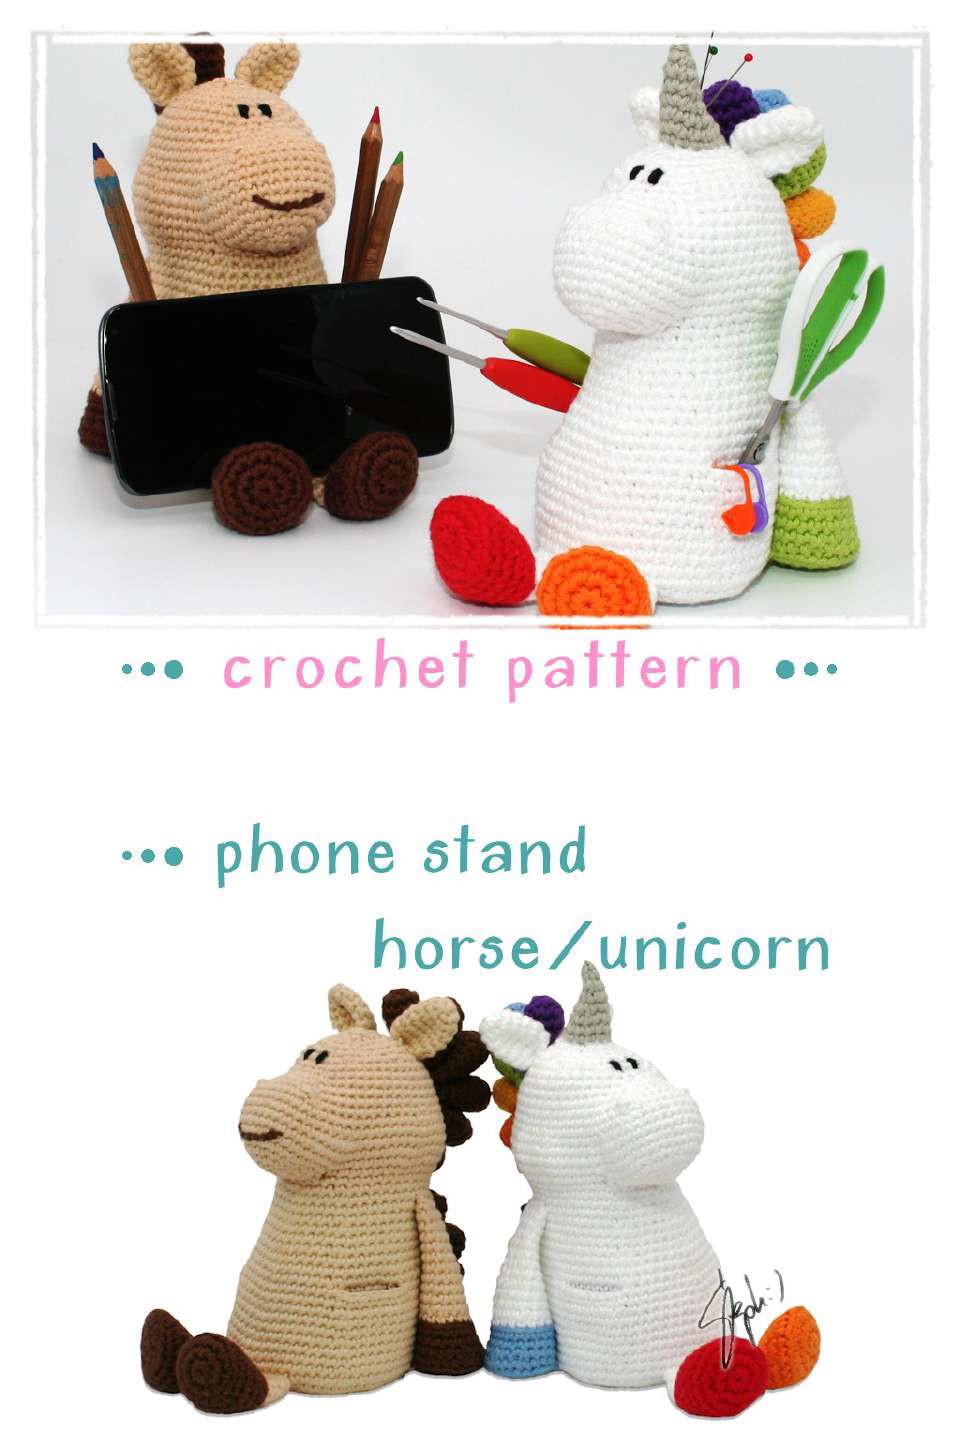
Materials and Reference Size
- DK cotton, or two strands of sport-weight cotton held together, with a 3 mm hook. Keep the yarn weight consistent across one figure.
- Source sample amounts: about 80 g body color, 12 g hoof colors, 12 g tail colors, 7 g optional pocket color, 14 g mane colors and 3 g horn color for the unicorn, plus black for eyes and a mouth accent. These are sample amounts, not a guaranteed shopping total.
- Soft stuffing, a small sealed inner bag with a little heavy filling such as the source’s pea gravel, and a yarn needle.
- Stitch markers in several colors, scissors and optional pins for positioning the facial embroidery.
Reference size: approximately 15 cm wide and 17 cm tall (5.9 × 6.7 in), excluding the horn. The source rates it easy to medium, but the crochet-in attachments require careful counting. Smaller yarn can make the support area too small for a phone. Check your actual device and case rather than assuming one size fits every model.
US Terms and Joining Techniques
Ch = chain; sc = single crochet; sl st = slip stitch; inc = 2 sc in one stitch; inv dec = invisible single-crochet decrease; dec = standard sc2tog; BLO = back loop only; FLO = front loop only; MR = magic ring. Work in continuous rounds except where a flat row or join is specified. Mark the first stitch of each round.
Paired sc: insert the hook through a stitch on the loose part and the corresponding body stitch, then make one sc through the pair. It uses one body position and produces one body stitch. Closing a flattened part works the same way through opposing stitches. As in the source, the two outer side stitches are left out of these flattened closures.
Step 1: Make Two Front Legs / Arms
Begin each arm in the hoof color. The unused front loops from the BLO hoof round are needed for attaching the hoof to the body later.
| Round / step | Instructions | Total |
|---|---|---|
| 1 | 8 sc in MR. | 8 |
| 2 | Inc around. | 16 |
| 3 | Repeat (inc, sc) eight times. | 24 |
| 4 | Sc around in BLO. | 24 |
| 5 | 6 sc, repeat (inv dec, sc) four times, 6 sc. | 20 |
| 6–7 | Sc around; change to body color on the last stitch of Round 7. | 20 each |
| 8 | With body color, sc around in BLO. | 20 |
| 9 | Repeat (inv dec, 3 sc) four times. | 16 |
| 10–12 | Sc around. | 16 each |
| 13 | Repeat (inv dec, 6 sc) twice. | 14 |
| 14 | Sc around. | 14 |
| 15 | Repeat (inv dec, 5 sc) twice. | 12 |
| 16 | Sc around. | 12 |
| 17 | Repeat (inv dec, 4 sc) twice. | 10 |
| 18 | Sc around. | 10 |
| 19 — close | 4 sc to align the opening; flatten it with the last stitch at one side. Leave the two side stitches unworked and close with 4 paired sc. | 4 closure stitches |
Put a little stuffing into the hoof, keeping its underside flat. Lightly stuff the lower arm after Round 12; leave its narrow upper section empty. Finish and hide the end after closing. For the unicorn, the two front hooves can be different colors.
Step 2: Make Two Hind Legs / Feet
| Round / step | Instructions | Total |
|---|---|---|
| 1 | Hoof color: 8 sc in MR. | 8 |
| 2 | Inc around. | 16 |
| 3 | Repeat (inc, sc) eight times. | 24 |
| 4 | Sc around in BLO. | 24 |
| 5 | 6 sc, (inv dec, sc) four times, 6 sc. | 20 |
| 6 | Sc around. | 20 |
| 7 | 7 sc, (inv dec, 2 sc) twice, 5 sc; change to body color on the last stitch. | 18 |
| 8 | In BLO: 5 sc, 4 standard dec, 5 sc. | 14 |
| 9 | 5 sc, 2 inv dec, 5 sc. | 12 |
| 10 | Sc around. | 12 |
| 11 — close | 4 sc to align; flatten and close with 5 paired sc, leaving the two side stitches unworked. | 5 closure stitches |
Stuff only the hoof lightly and leave the rest of each leg empty. Keep the bottoms flat so the figure can sit evenly. Finish both feet before starting the body.
Step 3: Prepare the Four Tail Pieces
All four pieces begin the same way: Round 1 is 8 sc in MR; Round 2 is (inc, sc) repeated four times, giving twelve stitches. Keep the pieces unstuffed. Their different numbers of straight rounds create the graduated tail.
| Round / step | Instructions | Total |
|---|---|---|
| Tail 1 — shortest | Rounds 3–4: 12 sc. Round 5: (inv dec, 4 sc) twice = 10. Round 6: 2 sc, flatten, close with 4 paired sc. Row 7: ch 1, turn and work 4 sc. Finish. | 4 attachment stitches |
| Tail 2 | Rounds 3–6: 12 sc. Round 7: (inv dec, 4 sc) twice = 10. Round 8: 2 sc, flatten, close with 4 paired sc. Row 9: ch 1, turn, 4 sc. Finish. | 4 attachment stitches |
| Tail 3 | Rounds 3–8: 12 sc. Round 9: (inv dec, 4 sc) twice = 10. Round 10: 2 sc, flatten, close with 4 paired sc. Row 11: ch 1, turn, 4 sc. Finish. | 4 attachment stitches |
| Tail 4 — longest | Rounds 3–10: 12 sc. Round 11: (inv dec, 4 sc) twice = 10. Round 12: 2 sc, flatten, close with 4 paired sc. Row 13: ch 1, turn, 4 sc. Finish. | 4 attachment stitches |
Step 4: Make the Optional Pockets and Jaw
Two Optional Side Pockets
For each pocket, work 7 sc in MR for Round 1, increase around for Round 2 (14), then work fourteen sc in every Round 3–9. Sl st in the last stitch of Round 9 and finish the end on the outside. Keep each pocket empty. Move the starting tail out through the MR center as the source shows; the pocket will sit inside the body while it is joined.
Jaw Piece
| Round / step | Instructions | Total |
|---|---|---|
| 1 | Body color: 6 sc in MR. | 6 |
| 2 | Sc, 3 sc in the next stitch, sc, inc, sc, 3 sc in the next stitch. | 11 |
| 3 | 2 sc, 3 sc in the next st, sc, inc, 2 sc, inc, sc, 3 sc in the next st, sc. | 17 |
| 4 | 3 sc, 3 sc in the next st (mark the first of these three), 2 sc, inc, 4 sc, inc, 2 sc, 3 sc in the next st (mark the third of these three), 2 sc. | 23 |
| 5 | Sl st in the first stitch only, then finish and hide the end on the reverse. |
Leave both jaw markers in place. Its marked straight edge is joined to the body first; the remaining curved edge becomes part of the muzzle on the following round. The final slip stitch is not an extra stitch to use during attachment.
Step 5: Make the Six Mane Pieces and Two Ears
Make two pieces of each mane size. Every mane piece starts with 8 sc in MR, then (inc, sc) four times for twelve stitches. They remain unstuffed in the source. Their attachment order is small, medium, large, large, medium, small.
| Round / step | Instructions | Total |
|---|---|---|
| Small — mane 1 and 6 | Rounds 3–4: 12 sc. Round 5: (inv dec, 4 sc) twice = 10. Round 6: (inv dec, 3 sc) twice = 8. Round 7: sc once to align, flatten and close with 3 paired sc. | 3 attachment stitches |
| Medium — mane 2 and 5 | Rounds 3–5: 12 sc. Round 6: (inv dec, 4 sc) twice = 10. Round 7: (inv dec, 3 sc) twice = 8. Round 8: sc once, flatten and close with 3 paired sc. | 3 attachment stitches |
| Large — mane 3 and 4 | Rounds 3–6: 12 sc. Round 7: (inv dec, 4 sc) twice = 10. Round 8: (inv dec, 3 sc) twice = 8. Round 9: sc once, flatten and close with 3 paired sc. | 3 attachment stitches |
Finish and hide the ends. For each ear, use body color: Round 1, 6 sc in MR; Round 2, (inc, 2 sc) twice = 8; Round 3, (inc, 3 sc) twice = 10; Round 4, (inc, 4 sc) twice = 12; Rounds 5–6, twelve sc. Flatten the opening and close it with five paired sc, leaving its two side stitches unworked. Finish. The five closure stitches are the ear edge used during the final head rounds.
Step 6: Crochet the Body and Join the Parts
In the tables below, “attach with 4 paired sc,” for example, means four sc through matching part-and-body stitches. Those four positions are already included in the body’s total. Do not add four extra stitches afterward. Lay the prepared pieces out in attachment order before starting.
| Round / step | Instructions | Total |
|---|---|---|
| 1 | Body color: 6 sc in MR. | 6 |
| 2 | Inc around. | 12 |
| 3 | Repeat (inc, sc) six times. | 18 |
| 4 | Repeat (inc, 2 sc) six times. | 24 |
| 5 | Repeat (inc, 2 sc) eight times. | 32 |
| 6 | Repeat (inc, 3 sc) eight times. | 40 |
| 7 | 3 sc, (inc, 4 sc) seven times, inc, sc. | 48 |
| 8 | 3 sc, (inc, 5 sc) seven times, inc, 2 sc. | 56 |
| 9 | Repeat (inc, 6 sc) eight times. | 64 |
Round 10: Attach the Hooves, Feet and First Tail Piece
Keep the underside of the body facing down. The first front leg is positioned with its hoof underside against the body and its toes toward the MR. Use the unused front loops around that hoof’s lower BLO round: the last two and first two loops around the start/end gap. Begin at the second-to-last loop. The hind feet join through their five closed-edge stitches, with their toes facing outward.
| Round / step | Instructions | Total |
|---|---|---|
| 10 | 2 sc; attach front hoof 1 with 4 paired sc; 16 sc; attach hind foot 1 with 5 paired sc; 2 sc; attach hind foot 2 with 5 paired sc; 15 sc; attach front hoof 2 with 4 paired sc; 5 sc; attach tail 1 with 4 paired sc; 2 sc. | 64 |
| 11 | 16 sc, inv dec, 9 sc, inv dec, 9 sc, inv dec, 18 sc; attach tail 2 with 4 paired sc; 2 sc. | 61 |
| 12 | 55 sc; attach tail 3 with 4 paired sc; 2 sc. | 61 |
| 13 | 55 sc; attach tail 4 with 4 paired sc; 2 sc. | 61 |
| 14 | 16 sc, inv dec, 8 sc, inv dec, 8 sc, inv dec, 23 sc. | 58 |
| 15–16 | Sc around. | 58 each |
| 17 | 16 sc, inv dec, 7 sc, inv dec, 7 sc, inv dec, 22 sc. | 55 |
After attaching tail 1, thread a separate piece of yarn about 30 cm long through two stitches of that tail between its fourth and fifth rounds, counted from its attachment base. Leave the ends hanging. As tails 2 and 3 are added, pass those ends into their undersides between Rounds 3–4 and out between Rounds 4–5. On tail 4, enter between Rounds 3–4 and bring the ends out between Rounds 8–9. Leave this thread loose until after body Round 28; it will draw the graduated tail upright.
Rounds 18–19: Optional Pocket Openings
Place each small pocket inside the body, with its opening toward the working round. In Round 18, join seven of its fourteen opening stitches to the body; in Round 19, work along the pocket’s remaining seven free stitches instead of the previously joined body segment. This keeps a small pocket opening in the side of the figure. To omit both pockets, work fifty-five ordinary sc in each of these two rounds.
| Round / step | Instructions | Total |
|---|---|---|
| 18 | 10 sc; attach pocket 1 with 7 paired sc; 16 sc; attach pocket 2 with 7 paired sc; 15 sc. | 55 |
| 19 | 10 sc; 7 sc along pocket 1’s free half; 16 sc on the body; 7 sc along pocket 2’s free half; 15 sc on the body. | 55 |
| 20 | 16 sc, inv dec, 6 sc, inv dec, 6 sc, inv dec, 21 sc. | 52 |
| 21–22 | Sc around. | 52 each |
| 23 | 16 sc, inv dec, 5 sc, inv dec, 5 sc, inv dec, 20 sc. | 49 |
| 24–25 | Sc around. | 49 each |
| 26 | 16 sc, inv dec, 4 sc, inv dec, 4 sc, inv dec, 19 sc. | 46 |
| 27 | 36 sc; attach the closed upper end of front leg 1 with 4 paired sc; 6 sc. | 46 |
| 28 | 5 sc; attach the closed upper end of front leg 2 with 4 paired sc; 37 sc. | 46 |
| 29 | 16 sc, inv dec, 3 sc, inv dec, 3 sc, inv dec, 18 sc. | 43 |
After Round 28, bring the prepared tail-thread ends through two body stitches six to seven rounds down from the current opening, centered between the arms as in the source. Pull gently until the tail stands upright, check the position from outside, then secure the ends inside. Avoid pulling the body into a deep dent.
Rounds 30–31: Join the Jaw and Shape the Muzzle
Position the jaw with its reverse facing you and its marked straight edge aligned with the body. Start at the nearer marker. Join seven jaw stitches in Round 30, using the stitch beneath its finishing sl st rather than treating that sl st as an extra stitch. Keep the markers until the next round is completed.
| Round / step | Instructions | Total |
|---|---|---|
| 30 | 18 sc; attach the jaw with 7 paired sc; 5 sc; (inc, 2 sc) three times; 4 sc. | 46 |
| 31 | On the body: 6 sc, (inc, 2 sc) three times, 3 sc. Along the jaw’s free curve: inc, 3 sc, (inc, sc) twice, (sc, inc) twice, 3 sc, inc. Return to the nearest free body stitch: 6 sc, (inc, 3 sc) three times, 3 sc. | 67 |
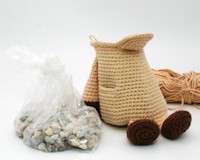
After Round 31, place a little heavy filling in a small sealed inner bag and position it toward the front inside the figure. Keep the front and base flat rather than forcing them to bulge. Add soft stuffing around and behind it, filling dents near the tail attachment. The ballast is part of this desk stand’s construction; a completely lightweight stuffed figure can behave differently when a phone is placed on it.
Step 7: Shape the Head and Add the Mane
| Round / step | Instructions | Total |
|---|---|---|
| 32 | 6 sc, (inc, 3 sc) three times, 49 sc. | 70 |
| 33–34 | Sc around. | 70 each |
| 35 | 23 sc, 2 inv dec, 16 sc, 2 inv dec, 5 sc, (inv dec, 3 sc) three times, 2 sc. Leave the final old stitch unworked and remove the marker. | 63 positions including the carried stitch |
| 36 | Set the marker in the first new stitch: 5 sc, (inv dec, 3 sc) three times, 29 sc (mark the 10th and 20th stitches within this 29-sc run), (inv dec, 2 sc) twice, 6 sc. | 58 |
| 37 | Attach small mane 1 with 3 paired sc; 5 sc, (inv dec, 2 sc) twice, 9 sc, inv dec, 9 sc (mark its 2nd and 9th stitches), inv dec, 20 sc. | 54 |
| 38 | Attach medium mane 2 with 3 paired sc; 20 sc, inv dec, 7 sc, inv dec, 20 sc. | 52 |
| 39 | Attach large mane 3 with 3 paired sc; 20 sc, inv dec, 5 sc, inv dec, 20 sc. | 50 |
Marker shift in Round 35: stopping one old stitch early is intentional. The worked sequence makes sixty-two new stitches, while the one carried old stitch remains in the round; together there are sixty-three positions for Round 36. Begin Round 36 at that unworked position and mark its first new stitch. Do not add another sc to “finish” Round 35, because that would shift the later face and mane placement.
Embroider the Nostrils and Optional Mouth
The four additional markers from Rounds 36–37 form the two nostril positions. With a doubled strand of body-color yarn, come out at one marked position and return through its nearby partner, leaving a little loop. Bring the needle through the neighboring stitch toward the side of the head, pass through the loop and return through that same neighboring stitch. Pull gently to shape the nostril, then secure the ends inside. Repeat for the other nostril.
For the source’s optional curved mouth, mark two stitches between the seventh and eighth rounds counted down from the current opening, six stitches apart and centered below the nostrils. Mark two lower stitches between the eighth and ninth rounds, one stitch apart and centered below the upper pair. Embroider a line between the upper marks, then use a small anchoring loop through each lower mark to draw that line into a curve. Adjust the tension before securing the yarn inside.
| Round / step | Instructions | Total |
|---|---|---|
| 40 | Attach large mane 4 with 3 paired sc; 20 sc, (inv dec, sc) three times, 18 sc. | 47 |
| 41 | Attach medium mane 5 with 3 paired sc; 2 sc, inv dec, 15 sc, 3 inv dec, 15 sc, inv dec, 2 sc. | 42 |
| 42 | Attach small mane 6 with 3 paired sc; sc through the remaining 39 body stitches. Mark the 20th and 22nd stitches in this remaining sc run for the embroidered eyes. | 42 |
Step 8: Crochet in the Ears and Finish the Face
The closed edge of each ear has five stitches. Each ear is attached in two stages and folded toward the front, with its middle closure stitch left free. Keep the ear labels and working direction clear rather than sewing them on at random after closing the head.
| Round / step | Instructions | Total |
|---|---|---|
| 43 | (Inv dec, 4 sc) six times, inv dec; attach the first 2 closure stitches of ear 1 with 2 paired sc; 2 sc. Leave the rest of that ear free for now. | 35 |
| 44 | 2 sc, inv dec, sc; attach ear 2 with 2 paired sc beginning at its 4th closure stitch. Continue (inv dec, 3 sc) four times, inv dec, 2 sc. Fold ear 1 toward the front and attach its last two edge stitches with 2 paired sc, beginning at closure stitch 5; inv dec. | 28 |
| 45 | 2 sc, inv dec. Fold ear 2 toward the front and attach the two free outer stitches at the other end of its five-stitch closure edge with 2 paired sc; its middle stitch stays free. Continue sc, (inv dec, 2 sc) four times, inv dec, sc, inv dec. | 21 |
| 46 | Repeat (sc, inv dec) seven times. | 14 |
After Round 44, embroider each eye at its marked position with black yarn: come out at the marker, return through the stitch directly one row above, and repeat once for a more visible eye. Secure the ends inside. The source also offers safety eyes as an alternative; establish their position while the inside is still accessible. Stuff and shape the head after the face is finished, adding small amounts at a time. Top up before finishing Round 46.
Step 9: Choose the Horse or Unicorn Finish
Horse
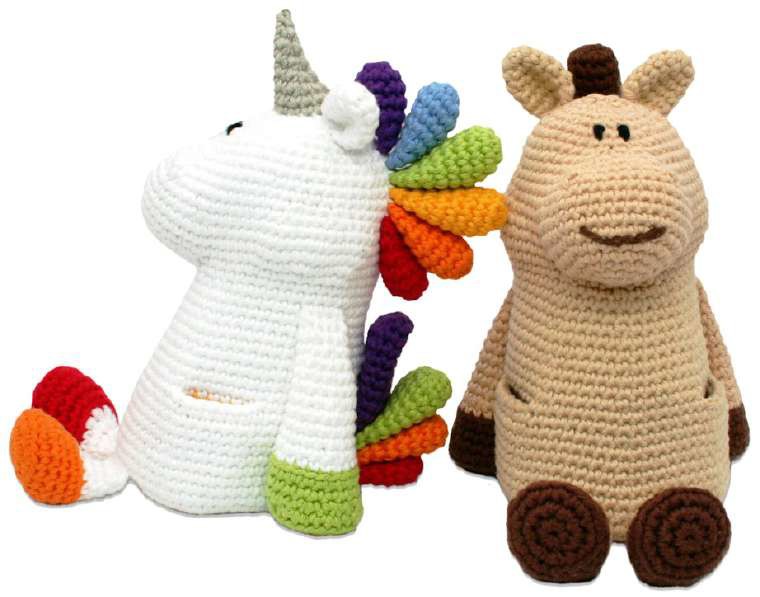
For Round 47a, decrease around the fourteen-stitch opening until approximately seven stitches remain. Fasten off, sew the opening closed and hide the yarn end without pulling the head out of shape. Arrange the mane pieces so their graduated sizes remain visible.
Unicorn Horn
For Round 47b, sl st in the back loop of the first body stitch, then fasten off the body color. Join the horn color in the front loop of that same body stitch. Begin the horn in the same front loop, secure the two color ends inside and place the marker in the first new horn stitch. Do not crochet into the fastening slip stitch as an extra stitch.
| Round / step | Instructions | Total |
|---|---|---|
| 47b | In FLO of the body opening, 14 sc. | 14 |
| 48 | Inv dec, 6 sc, inc, 5 sc. | 14 |
| 49 | Inv dec, 2 sc, inv dec, 2 sc, inc, 2 sc, inv dec, sc. | 12 |
| 50 | (Inv dec, sc) twice, inc, sc, inv dec, 2 sc. | 10 |
| 51 | 2 inv dec, sc, inc, sc, inv dec, sc. | 8 |
| 52 | 2 inv dec, inc, inv dec, sc. | 6 |
| 53 | 3 inv dec if the opening allows; fasten off and sew any remaining opening closed. | 3 before sewing |
Add tiny amounts of stuffing after Round 49 and as the horn narrows. The increases and decreases shift within the rounds to shape the horn; do not replace them with evenly spaced decreases. Keep the tip pointed while hiding the last yarn end.
Check the Finished Stand
Place the figure on a level desk and check that its flat base and hooves sit evenly. Test with your phone and case while keeping a hand on the device until the support is stable. The reference shows the phone resting horizontally across the front support area. The optional side pockets stay open for small desk items; do not fill them with body stuffing.
Frequently Asked Questions
Do I need to sew every separate piece onto the finished figure?
Most pieces are attached with paired sc during specific body rounds. Make them first and follow the attachment order; the tail also uses a securing thread.
Can I leave out the side pockets?
Yes. Work fifty-five ordinary sc in each of Rounds 18–19 instead of joining and following the pocket openings.
Why is one stitch left unworked in Round 35?
It deliberately moves the start of the following round back by one position. The carried stitch is included in the next round’s sixty-three available positions.
Are the horse and unicorn different body patterns?
They share the same body through Round 46. The horse closes its head; the unicorn continues into the horn. The rainbow color scheme is optional.
More Crochet Phone Accessories
Browse our crochet phone cases and covers, try a phone wristlet with a back pocket, or make a cat phone pouch with a striped fish.
Pattern and Photo Credits
Written adaptation of Patterns by Steph, Phone Stand Horse/Unicorn (41-page supplied PDF). Reference photographs show the original source project. The written instructions have been checked against the supplied pages; the project has not been physically crocheted or maker-tested for this article.
Leave a Reply