
Crochet Bunny Baby Blanket with 25 Joined Squares
· admin
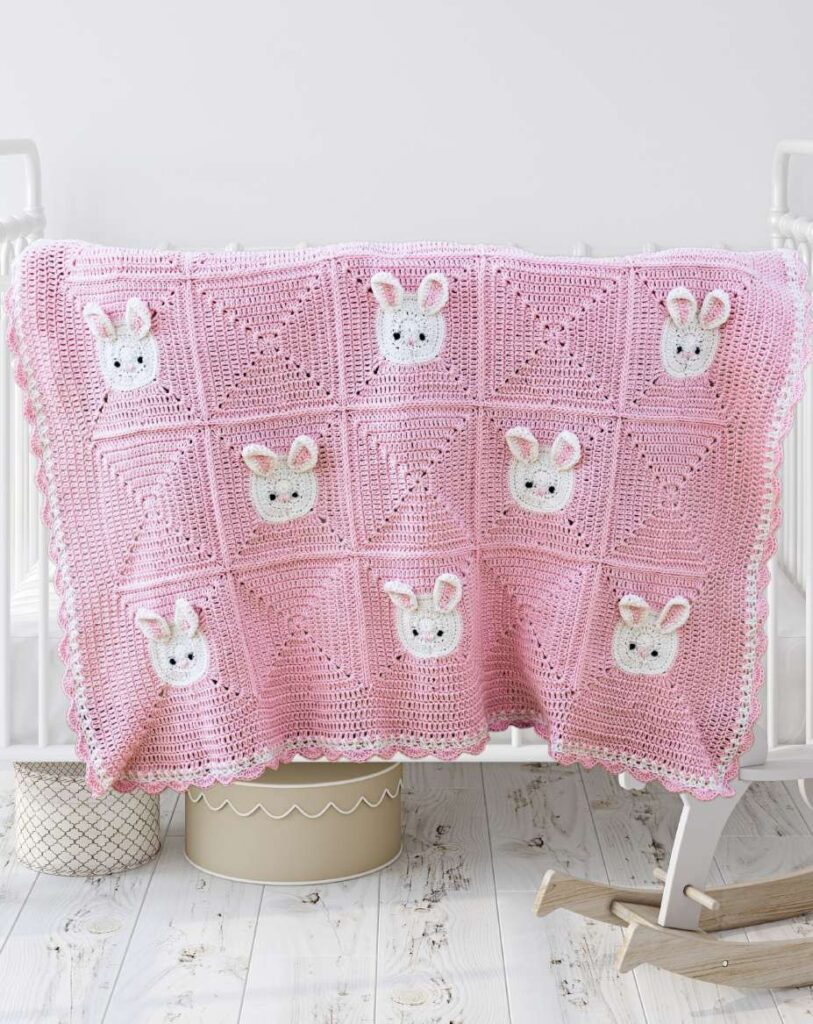
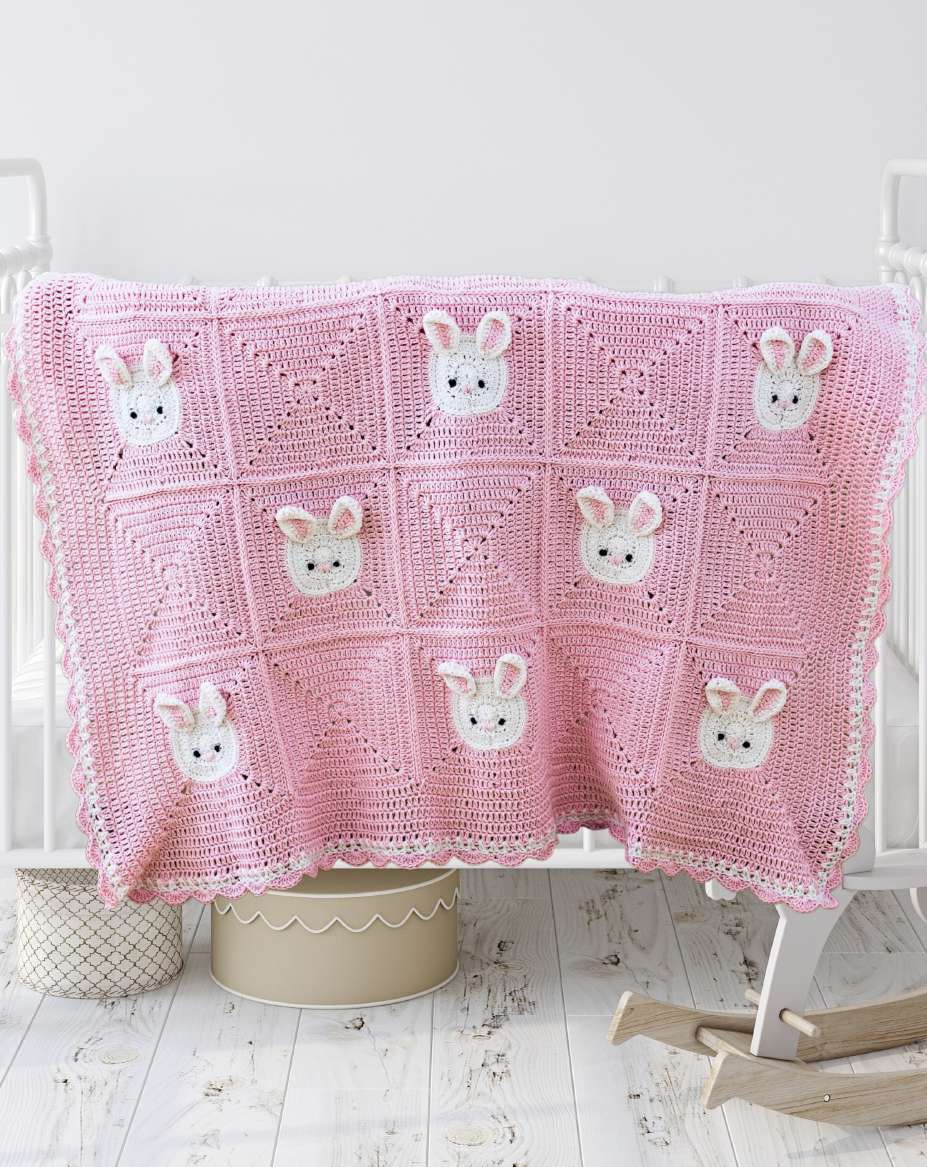
These crochet bunny baby blanket squares alternate across a five-by-five layout. Thirteen squares have round bunny faces and sewn ears; twelve are solid pink. Both motifs finish with 27 stitches along each side plus corner spaces, which makes joining much easier. Make and measure one of each before committing to all twenty-five.
Materials, Gauge and Size
Category 3 / DK yarn: source sample uses Stylecraft Naturals Bamboo and Cotton, 250 m / 100 g, two balls Chalk and five Pale Pink, plus a little black yarn for embroidered eyes. Use a 3 mm hook, needle, scissors and markers. Each square is approximately 14 cm / 5.5 in; the source finished blanket is about 86 × 86 cm / 34 in square including its border. Tension and joining method affect the result. Block every motif to the same measurement.
Stitches and Pattern Notes
US crochet terms: ch = chain; sc = single crochet; hdc = half double crochet; dc = double crochet; tr = treble crochet; sl st = slip stitch; st = stitch; sp = space; BLO = back loop only; inc = 2 stitches in one stitch. Sc2tog, hdc2tog and dc2tog combine two neighboring stitches into one. A number before a stitch tells you how many consecutive stitches to work. Parentheses followed by a repeat number describe one complete group repeated that many times.
Step 1: Learn the Extended Double Crochet
For EXdc, yarn over, insert the hook and draw up a loop. Yarn over and pull through just one loop, then yarn over and pull through two loops twice. This extra initial pull-through makes it taller than an ordinary dc. A shell in this pattern means seven dc in one stitch; a corner shell means nine dc.
Ch 2 counts as the first dc in the face circle; ch 3 counts as the first dc in the square rounds. Ch 1 before a sc round does not count. When changing from pink to white on an ear, complete the last pull-through with white so the next stitch starts cleanly. Leave tails long enough to secure after sewing.
Step 2: Crochet Thirteen Bunny Squares
| Row / round | Instructions | Count / note |
|---|---|---|
| 1 | In white: magic ring, ch 2 and 11 dc; join. | 12 |
| 2 | Ch 2 and dc in its base; 2 dc in each remaining stitch; join. | 24 |
| 3 | Ch 2 and dc in its base; 2 dc in BLO of each remaining stitch; join. | 48 |
| 4 | Ch 1 and sc in each stitch; join, fasten off. | 48 |
| 5 | In pink, work BLO: repeat (2 tr, ch 2, 2 tr in one stitch; 2 EXdc; 7 dc; 2 EXdc) four times; join. | 15 stitches per side; 4 corners |
| 6 | Dc in each stitch; (2 dc, ch 2, 2 dc) in each corner; join. | 19 per side |
| 7 | Repeat square growth round. | 23 per side |
| 8 | Repeat square growth round, finishing with an invisible join. | 27 per side |
The source’s expanded Round 5 line repeats one corner too many. The four-repeat formulation above consumes all 48 circle stitches and produces exactly four corners, matching the printed square totals. Mark those corners before Round 6. Keep the exposed front loops of the white face available for attaching the ears.
Step 3: Make Twenty-Six Ears and Embroider
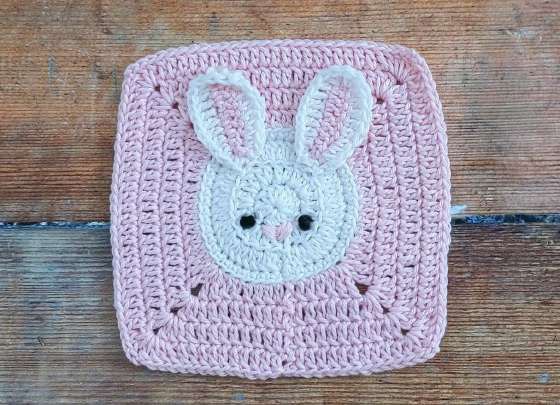
With pink, ch 10. From the second chain work sc, five dc and three hdc; change to white on the final hdc pull-through and turn. With white, ch 2, hdc in the same stitch, two hdc, five dc and two dc in the last stitch. Continue down the opposite edge: two dc in the next position, five dc and three hdc, then sc2tog across the lower end. Leave about 25 cm / 10 in for sewing.
Make two ears per face square. Sew their bases through the exposed front loops of face Round 3. Embroider black eyes and a pink nose, placing the face details consistently on all thirteen squares. Keep the ears pointing toward the same square edge so the checkerboard layout will have a clear top.
Step 4: Crochet Twelve Solid Squares
| Row / round | Instructions | Count / note |
|---|---|---|
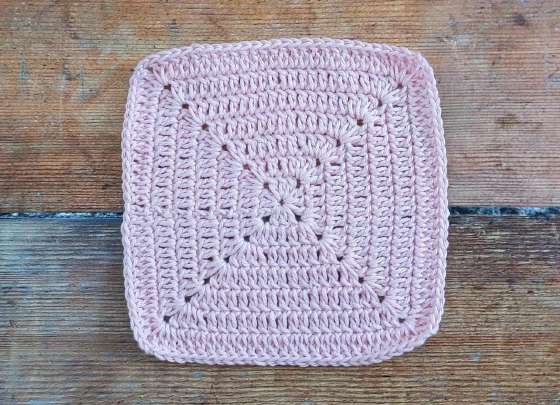
| 1 | In pink: magic ring, ch 5 as dc plus ch 2; (3 dc, ch 2) three times, 2 dc; join to third chain. | 3 dc per side |
| 2 | Dc in each existing dc; (2 dc, ch 2, 2 dc) in corners. | 7 per side |
| 3 | Repeat dc growth round. | 11 per side |
| 4 | Repeat dc growth round. | 15 per side |
| 5 | Repeat dc growth round. | 19 per side |
| 6 | Repeat dc growth round. | 23 per side |
| 7 | Use EXdc across sides and (2 EXdc, ch 2, 2 EXdc) in corners. | 27 per side |
Use the appropriate starting chain as the first stitch in each round and join to its top. The taller final EXdc round helps match the bunny squares, which contain an extra round. Secure every magic-ring tail before assembly.
Step 5: Arrange and Join the Checkerboard
Arrange five rows of five squares. Rows 1, 3 and 5: bunny, solid, bunny, solid, bunny. Rows 2 and 4: solid, bunny, solid, bunny, solid. That uses thirteen faces and twelve solids. Check the ear direction before joining.
For a flat slip-stitch seam, lay two squares side by side with right sides up, matching their corner spaces and twenty-seven side stitches. Work through the facing inner loops of the two squares with the yarn below the seam, drawing each slip stitch through both loops. Keep the slip stitches loose enough to lie flat. Join the rows and columns consistently, securing ends at crossings rather than making tight knots.
Step 6: Work the Seven-Round Border
Border Round 1, pink: at each outer corner work (three dc, ch 2, three dc), dc across the square edges and work one dc2tog over each pair of meeting corner spaces at a seam. Join. Rounds 2–5: dc in each stitch with (three dc, ch 2, three dc) at the four outer corners. The seam-bridging decreases apply to the first pickup round; later rounds work in the resulting stitch tops, because no open square seams remain.
Round 6, white: use (three dc, ch 2, three dc) in every corner. Across a side, skip two stitches and place two dc in the space before the following stitch. Repeat toward the next corner, leaving the final three positions unworked as in the source. Distribute any small spacing adjustment symmetrically at the side ends and check that the edge lies flat.
Round 7, pink: begin a corner with ch 3 and four dc. Along a side repeat skip two, sc, skip two, seven dc in the next stitch. Near the next corner, finish the last four positions with skip two, sc, skip one, then nine dc in the corner space. Work around all four sides and complete the starting corner with four dc before joining to ch 3. The source specifies twenty-six shell repeats per side, but its earlier edge counts do not establish that total consistently. Fit complete shell repeats to the measured edge, using matching spacing adjustments at both ends of every side rather than forcing twenty-six. Weave ends and gently block flat.
Frequently Asked Questions
How many squares are needed? Twenty-five: thirteen bunny faces and twelve solid squares.
Why are the two square patterns different lengths? The solid square uses a taller final EXdc round to match the bunny motif.
Is the final border repeat count fixed? Check it against your joined edge; the source’s stated twenty-six repeats conflicts with its preceding counts, so the placement method and caveat are given above.
More Baby Crochet Ideas
Browse our Crochet Baby collection, compare baby bootie patterns, or explore baby cardigan ideas. Save the project to Pinterest before gathering your yarn.
Pattern and Photo Credits
Adapted from the supplied Bunny Blanket.pdf. Pattern and photographs: supplied Bunny Blanket PDF, Bunny Baby Blanket. Source photographs show the reference samples; captions identify any detail crops. This written adaptation has been reviewed against the supplied pattern pages but has not been physically crocheted or maker-tested. Yarn substitutions and tension can change the result.
Leave a Reply