
Patriotic Granny Crochet Bandana: Free Pattern & PDF
· admin
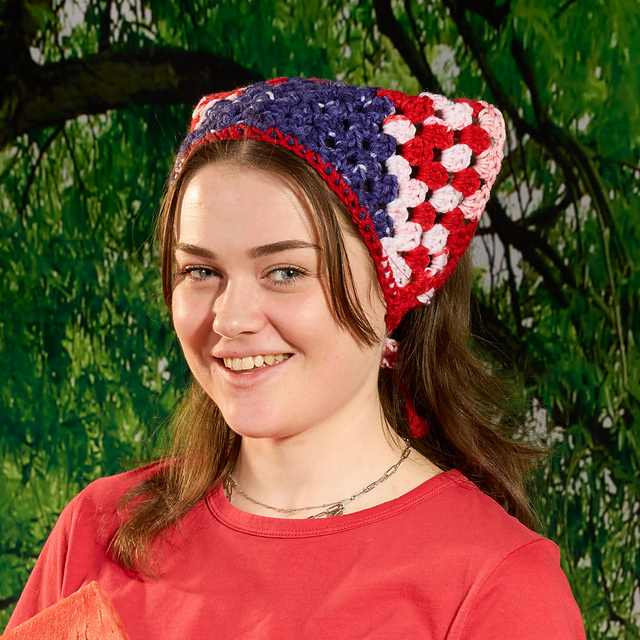
This Patriotic Granny Crochet Bandana brings red, white and navy color to a simple triangular head scarf. Work from the point upward in classic three-double-crochet groups, stop when the top edge fits, and add two ties. The free six-page PDF is available below for printing.
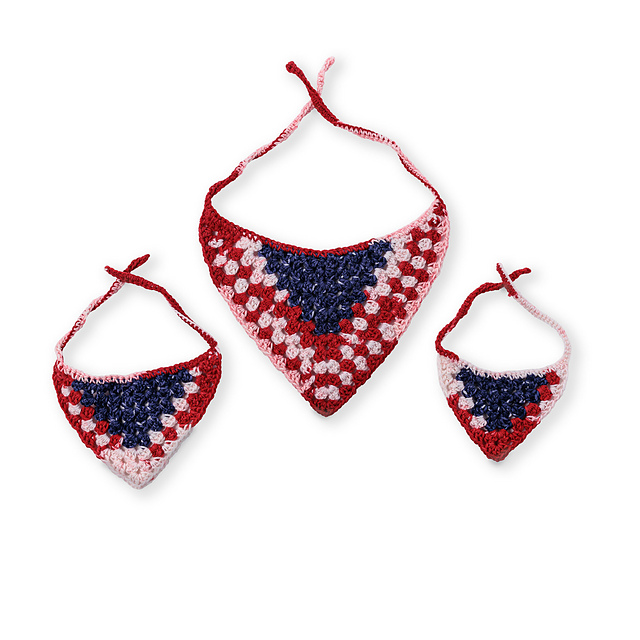
At a glance: Easy level · US crochet terms · medium-weight yarn · 5 mm (US H/8) hook · three suggested top widths of about 22, 33 and 46 cm (8.5, 13 and 18 in). The ties can be adjusted for a comfortable fit.
Materials and sizes
- Medium-weight yarn in navy or blue (color A), red-and-white variegated yarn or separate red and white shades (color B), and a little red for an optional edge.
- 5 mm (US H/8) crochet hook, tapestry needle, scissors and measuring tape.
- Allow roughly 70 yd for small, 110 yd for medium or 170 yd for large. Actual yardage varies with yarn and tension.
Measure the straight top edge while the bandana lies flat. Aim for approximately 22 cm (8.5 in) for small, 33 cm (13 in) for medium, or 46 cm (18 in) for large. Gauge is flexible here: a comfortable width matters more than a fixed row count.
US crochet abbreviations
ch = chain; dc = double crochet; sc = single crochet; sl st = slip stitch; sp = space; RS/WS = right/wrong side; rep = repeat. A group means three double crochets. Separate neighboring groups with ch 1, and work ch 2 at the center point.
Step 1: Make the point
With color A, ch 4 and sl st in the first chain to form a ring. Leave a tail that you can secure later. Turn at the end of each row.
- Row 1: Ch 3 (counts as the first dc), 2 dc in the ring, ch 2, 3 dc in the ring. Turn. There are two groups around the center ch-2 opening.
- Row 2: Ch 3, 2 dc in the first stitch, ch 1; (3 dc, ch 2, 3 dc) in the center opening; ch 1, 3 dc in the top of the turning chain at the far edge. Turn. Four groups.
- Row 3: Ch 3, 2 dc in the first stitch, ch 1, 3 dc in the next ch-1 space, ch 1; (3 dc, ch 2, 3 dc) in the center; ch 1, 3 dc in the next ch-1 space, ch 1, 3 dc in the top of the far turning chain. Turn. Six groups.
Mark the top of the turning chain if you find it difficult to see. Working the final group into that chain keeps the sloping edges even.
Step 2: Grow the granny triangle
From row 4 onward, start with ch 3 and 2 dc in the first stitch, then ch 1. Work 3 dc in each ch-1 space up to the center, with ch 1 between groups. In the center ch-2 space, work (3 dc, ch 2, 3 dc). Ch 1, work 3 dc in each ch-1 space on the second side, with ch 1 between groups, and finish with 3 dc in the top of the far turning chain. Turn.
Each completed row adds one three-dc group on either side of the center, so row 4 has eight groups. Repeat this row until the straight top edge reaches the width you want. Lay the piece flat and measure after a full row; you can stop at any comfortable size.
Step 3: Choose your colors
For a navy center area, use A for about two rows for small, three for medium, or four for large, then switch to B. A variegated red-and-white yarn gives an organic mix of color. With separate skeins, alternate red and white every one or two rows.
For a clean change, work the last dc of the old color until two loops remain on the hook. Yarn over with the new color and draw through both loops. Leave short tails to weave in securely later.
Step 4: Crochet the ties and top edge
Fasten off the triangle. With the RS facing, join the edging yarn at one top corner. Chain until the first tie measures about 25 cm (small), 30 cm (medium), or 35 cm (large). At the sample tension, that is roughly 45, 55 or 65 chains; measure your own chain before continuing. Sl st back along the chain to the starting corner.
Work sc evenly across the straight top edge, placing stitches into the row ends without pulling the fabric tight. At the opposite top corner, chain a second tie of the same length. Sl st back along it, sl st into the corner and fasten off.
Step 5: Add an optional contrast edge and finish
For a slim red outline, join red at one top corner and sc evenly down the sloping side. Work 2 sc at the point, then sc up the second sloping side. Fasten off. Weave in all tails, lightly block the triangle and check that the center point and two ties sit evenly.
If the top edge puckers, work the sc a little more loosely. Try the bandana on before trimming the last tail so you can adjust the ties if needed.
Download the free Patriotic Granny Bandana PDF
The printable six-page guide keeps the materials, first rows, repeating row, three sizes and tie instructions together.
Or visit the free product page for the same direct PDF download without checkout.
For more handmade ideas, follow Crochet Pattern Nest on Pinterest.
Leave a Reply