
Lacy Shell-Edged Shawl Crochet Pattern: Triangle and Fan Border
· admin
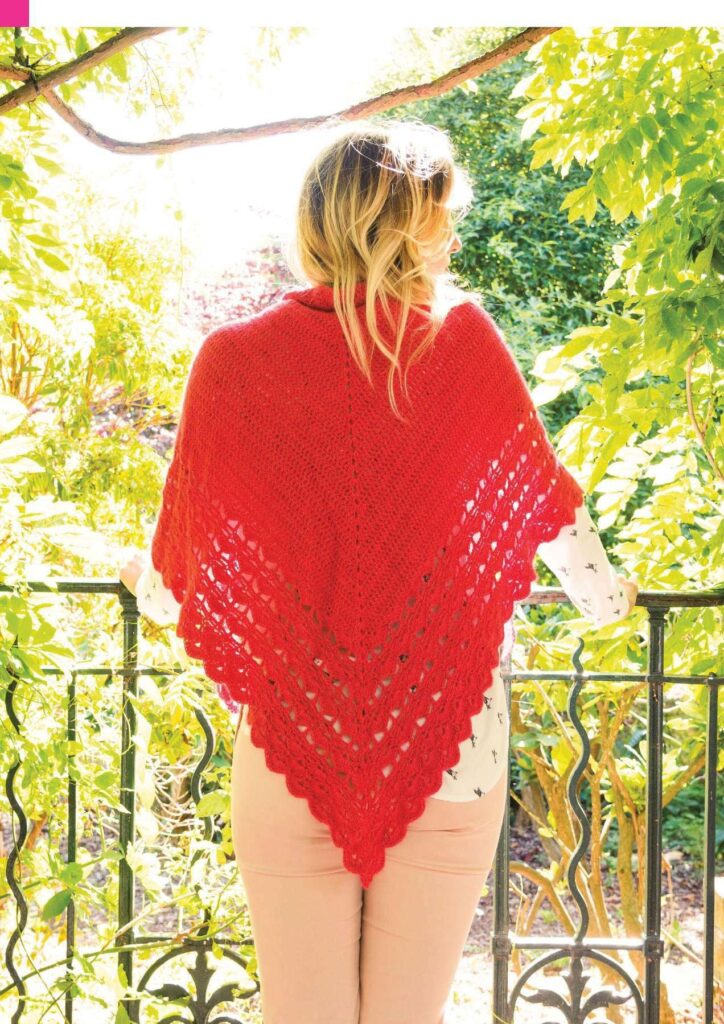
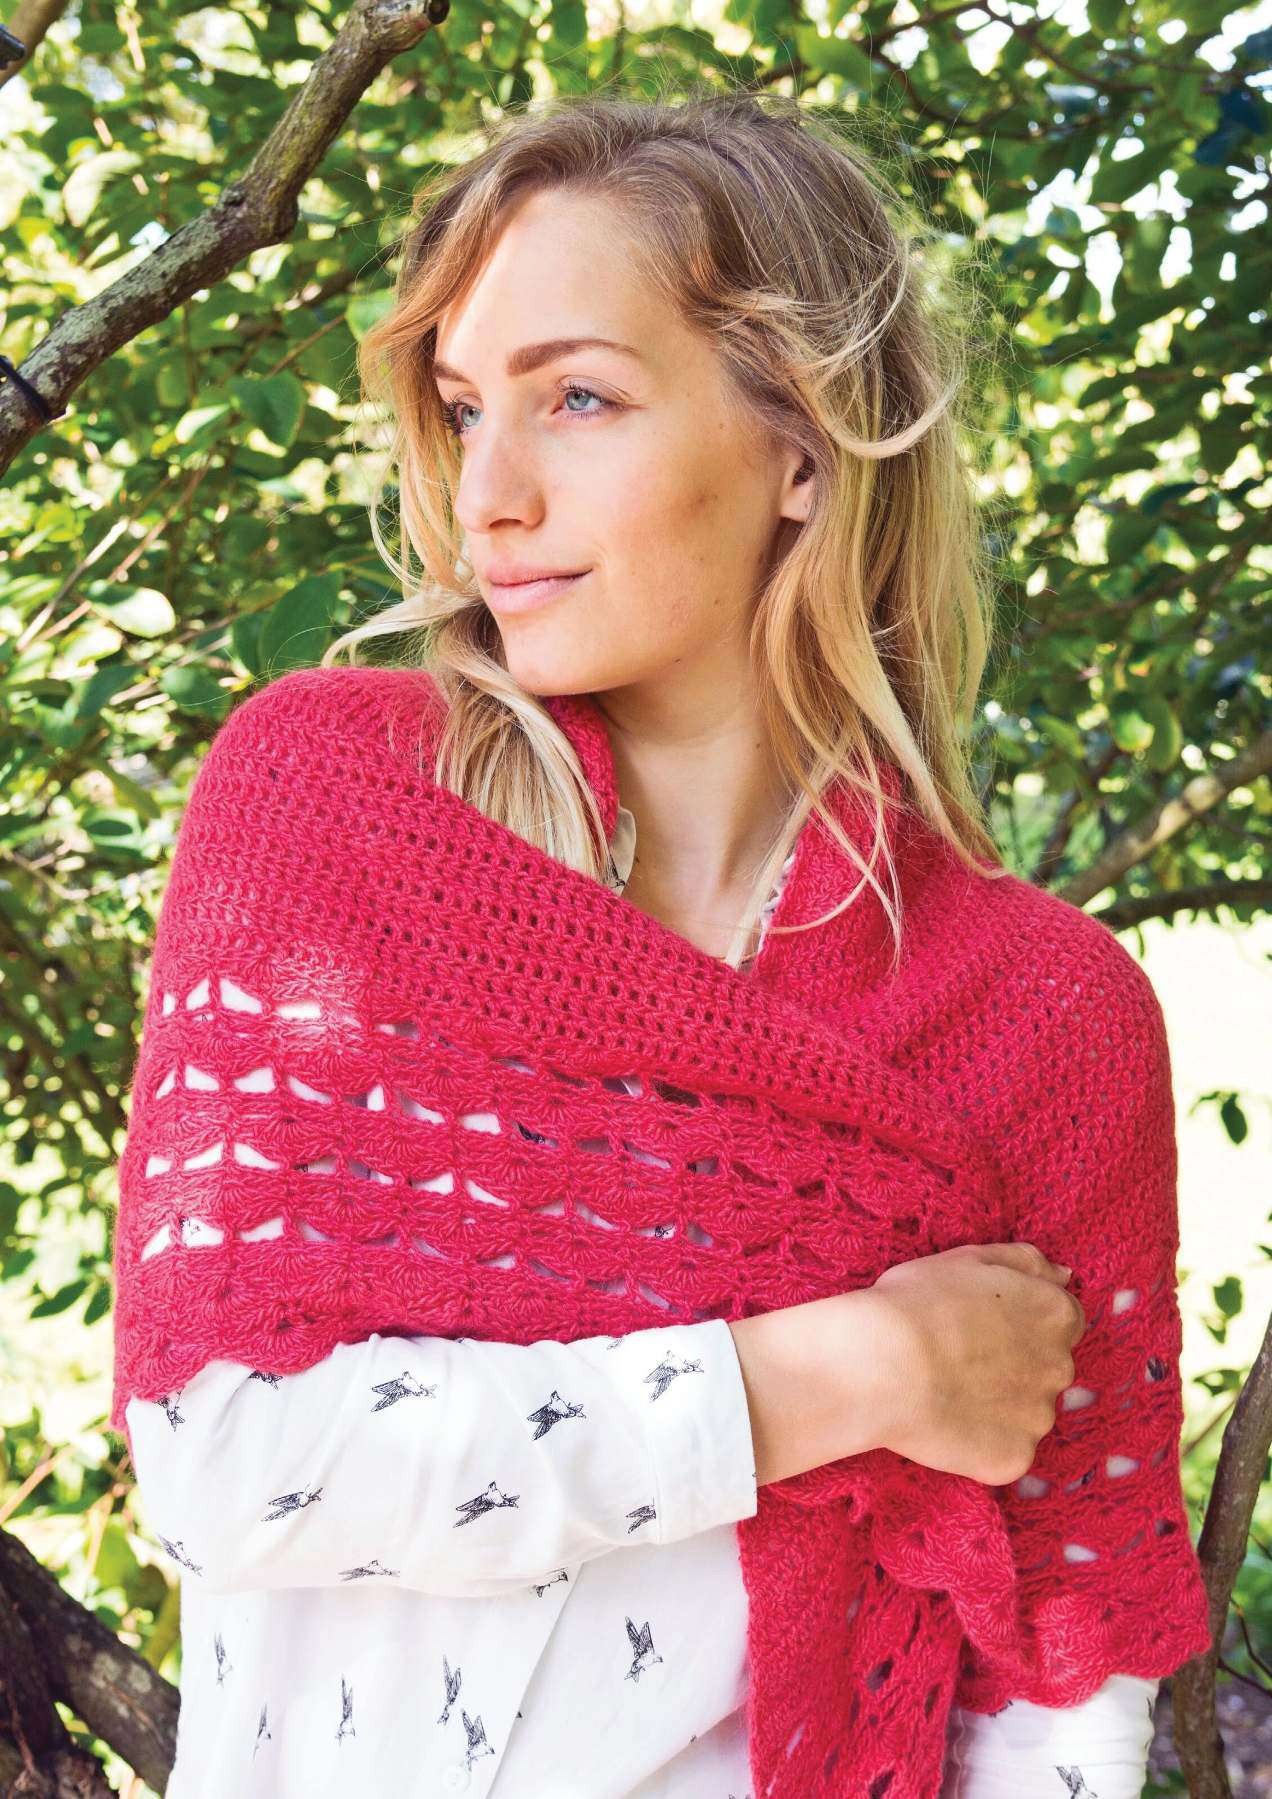
This lacy shell-edged shawl crochet pattern combines a solid triangular center with a deep openwork border. Increases at both outer edges and the central spine create two balanced halves. The lace then changes from leaf-like shells to larger fans. The source is a scanned UK-terms pattern; the main-body explanation here uses US terms and the complete border pages are included below for close reference.
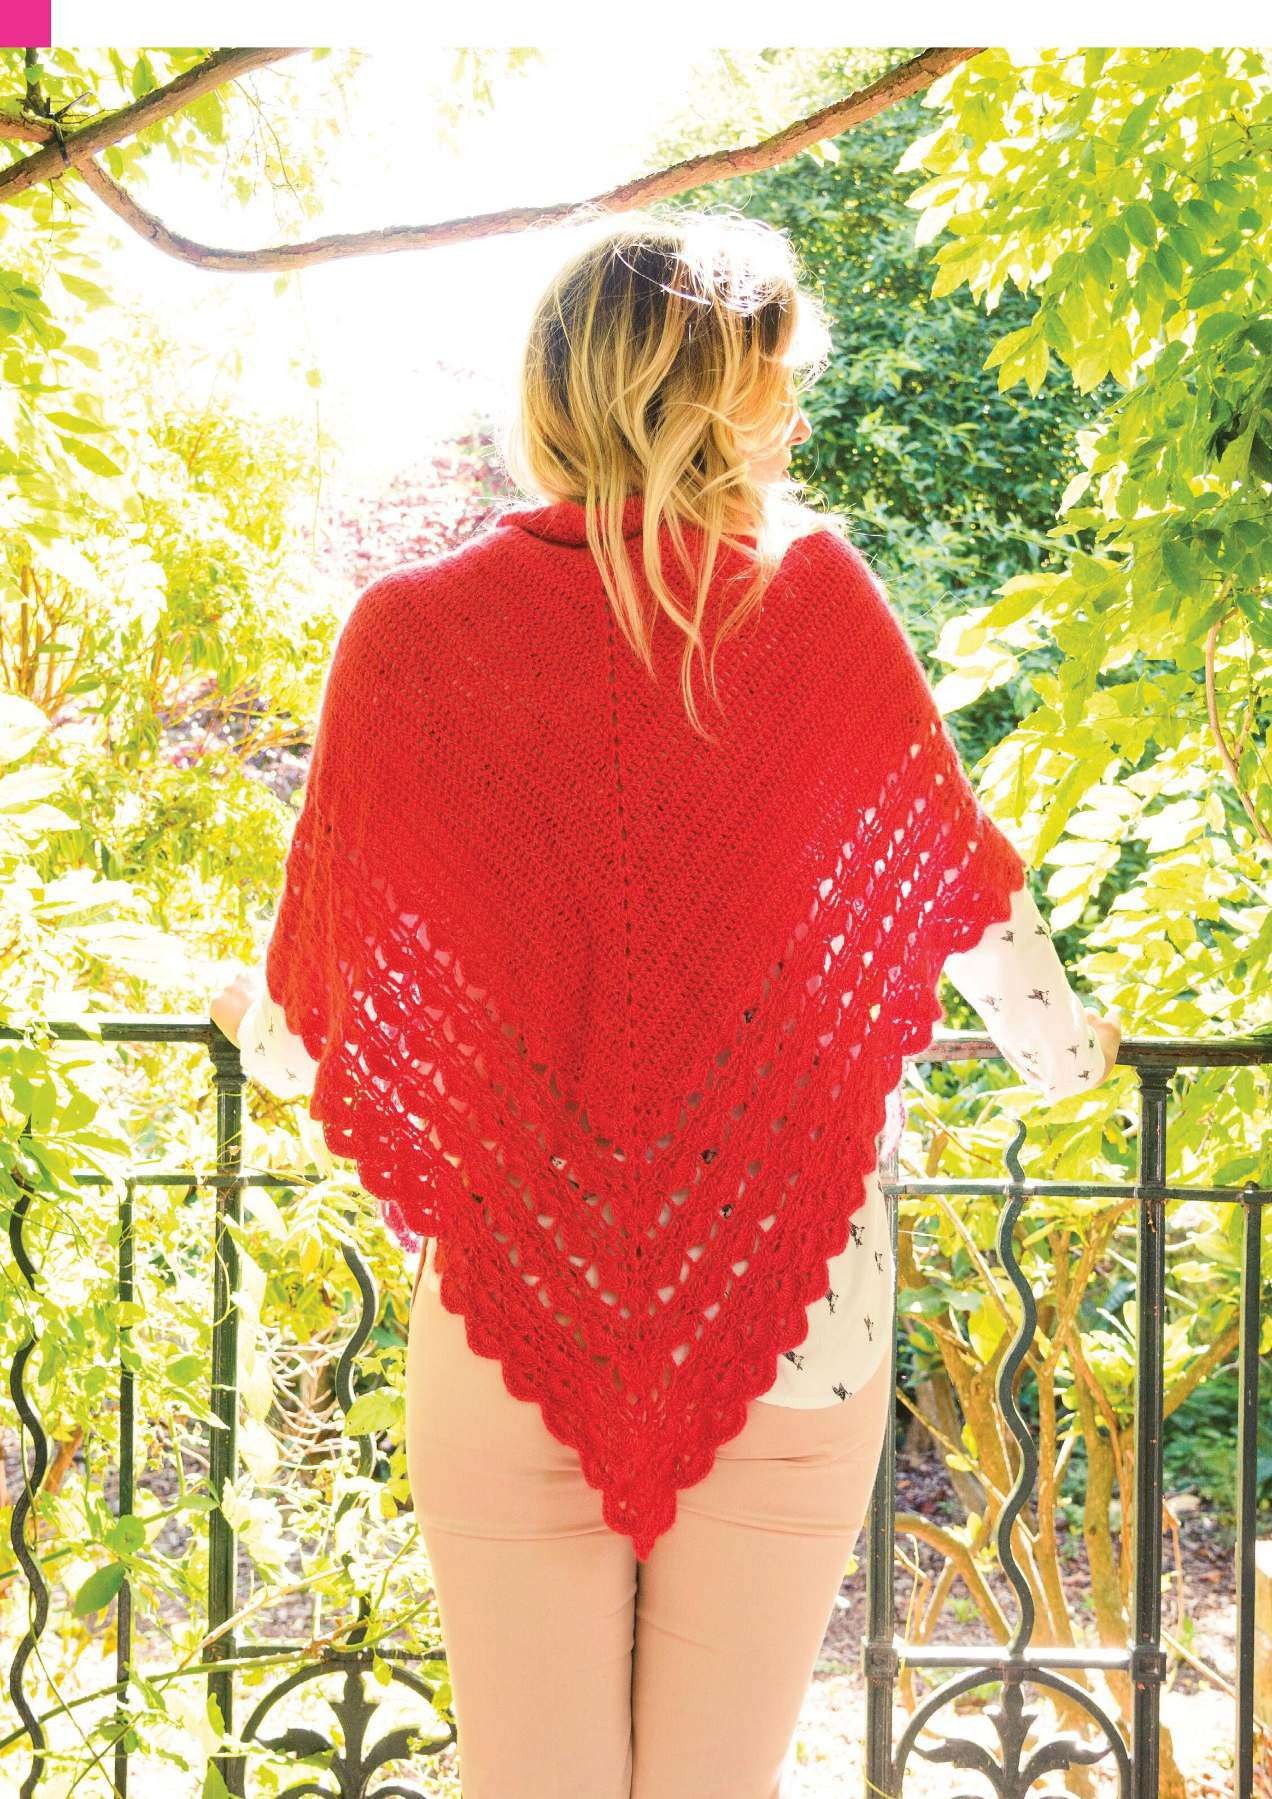
Project at a glance
| Detail | Project information |
|---|---|
| Skill level | Intermediate lace crochet |
| Finished size | Blocked size approximately 160 cm across the top × 81 cm deep |
| Technique | Crochet; US stitch terms in this article unless a source image is labeled otherwise |
| Construction | Follow the project stages below |
Materials and tools
- 6 × 50 g balls Mirasol Sulka Nina DK, Coral 7113; 150 m / 164 yd per ball
- Source project requirement approximately 870 m / 951 yd
- 5 mm hook or size required for gauge
- Tapestry needle, markers and rustproof blocking pins
Stitches and pattern notes
ch = chain; sl st = slip stitch; sc = single crochet; hdc = half double crochet; dc = double crochet; tr = treble crochet; st = stitch; sp = space; RS/WS = right/wrong side. A bracket followed by × 3 means repeat the entire bracket three times.
UK tr = US dc, and UK dc = US sc. The original instruction images below retain UK terminology: do not switch meanings halfway through a row. The listed source gauge is 15 stitches and 20 rows per 10 cm over UK treble; because that row gauge is unusual, check your own swatch and the finished dimensions rather than assuming an exact row height. A V stitch in the border is (US dc, ch 1, dc) in one stitch.
Work the solid triangular body in US terms
| Step | Instructions | Checkpoint |
|---|---|---|
| Setup | Make a magic ring. Ch 3 counts as dc; work 2 dc, ch 2, 3 dc into the ring. Close the ring and turn. | 6 dc, center ch-2 space |
| Body Row 1 | Ch 3 and 2 dc in its base stitch; dc across to the center. Work (2 dc, ch 2, 2 dc) in the center space. Dc to the last stitch, then 3 dc in the top of its turning chain. Turn. | 14 dc: 7 each side |
| Body Row 2 | Ch 3 and dc in its base stitch; dc to center. Work (2 dc, ch 2, 2 dc) in the center space. Dc to the last stitch, then 2 dc in the top of its turning chain. Turn. | 20 dc: 10 each side |
| Continue | Repeat Body Row 2 another 34 times. Every repeat adds six dc overall. | 224 dc: 112 each side |
Do not fasten off at the end of the solid section. Mark the center ch-2 space and check both halves separately. If they differ, correct the body before beginning the border; the shells rely on the 112-stitch sides for their placement.
Leaf and fan border: follow the original illustrated sequence
Border Row 1 establishes four-dc half shells at the ends, seven-dc shells along each side and a (2 dc, ch 2, 2 dc) center, all expressed here in US terms. Source Rows 2 and 3 create the open chain-space framework and increases; Row 4 fills it with shells again. Repeat Rows 2–4 three more times to complete Border Row 13. The source then begins the larger fan edging on Row 14.
Row 14 places V stitches and five-chain bridges between shell anchors. Row 15 fills the V openings with nine-dc fans and anchors the bridges into the preceding shell row. Row 16 creates the next V-and-chain framework, and Row 17 completes the final fans. The central increases remain important throughout. Use the two complete source pages below for the exact edge, center and anchoring sequence; they are part of this article’s instructions, not decorative photographs.
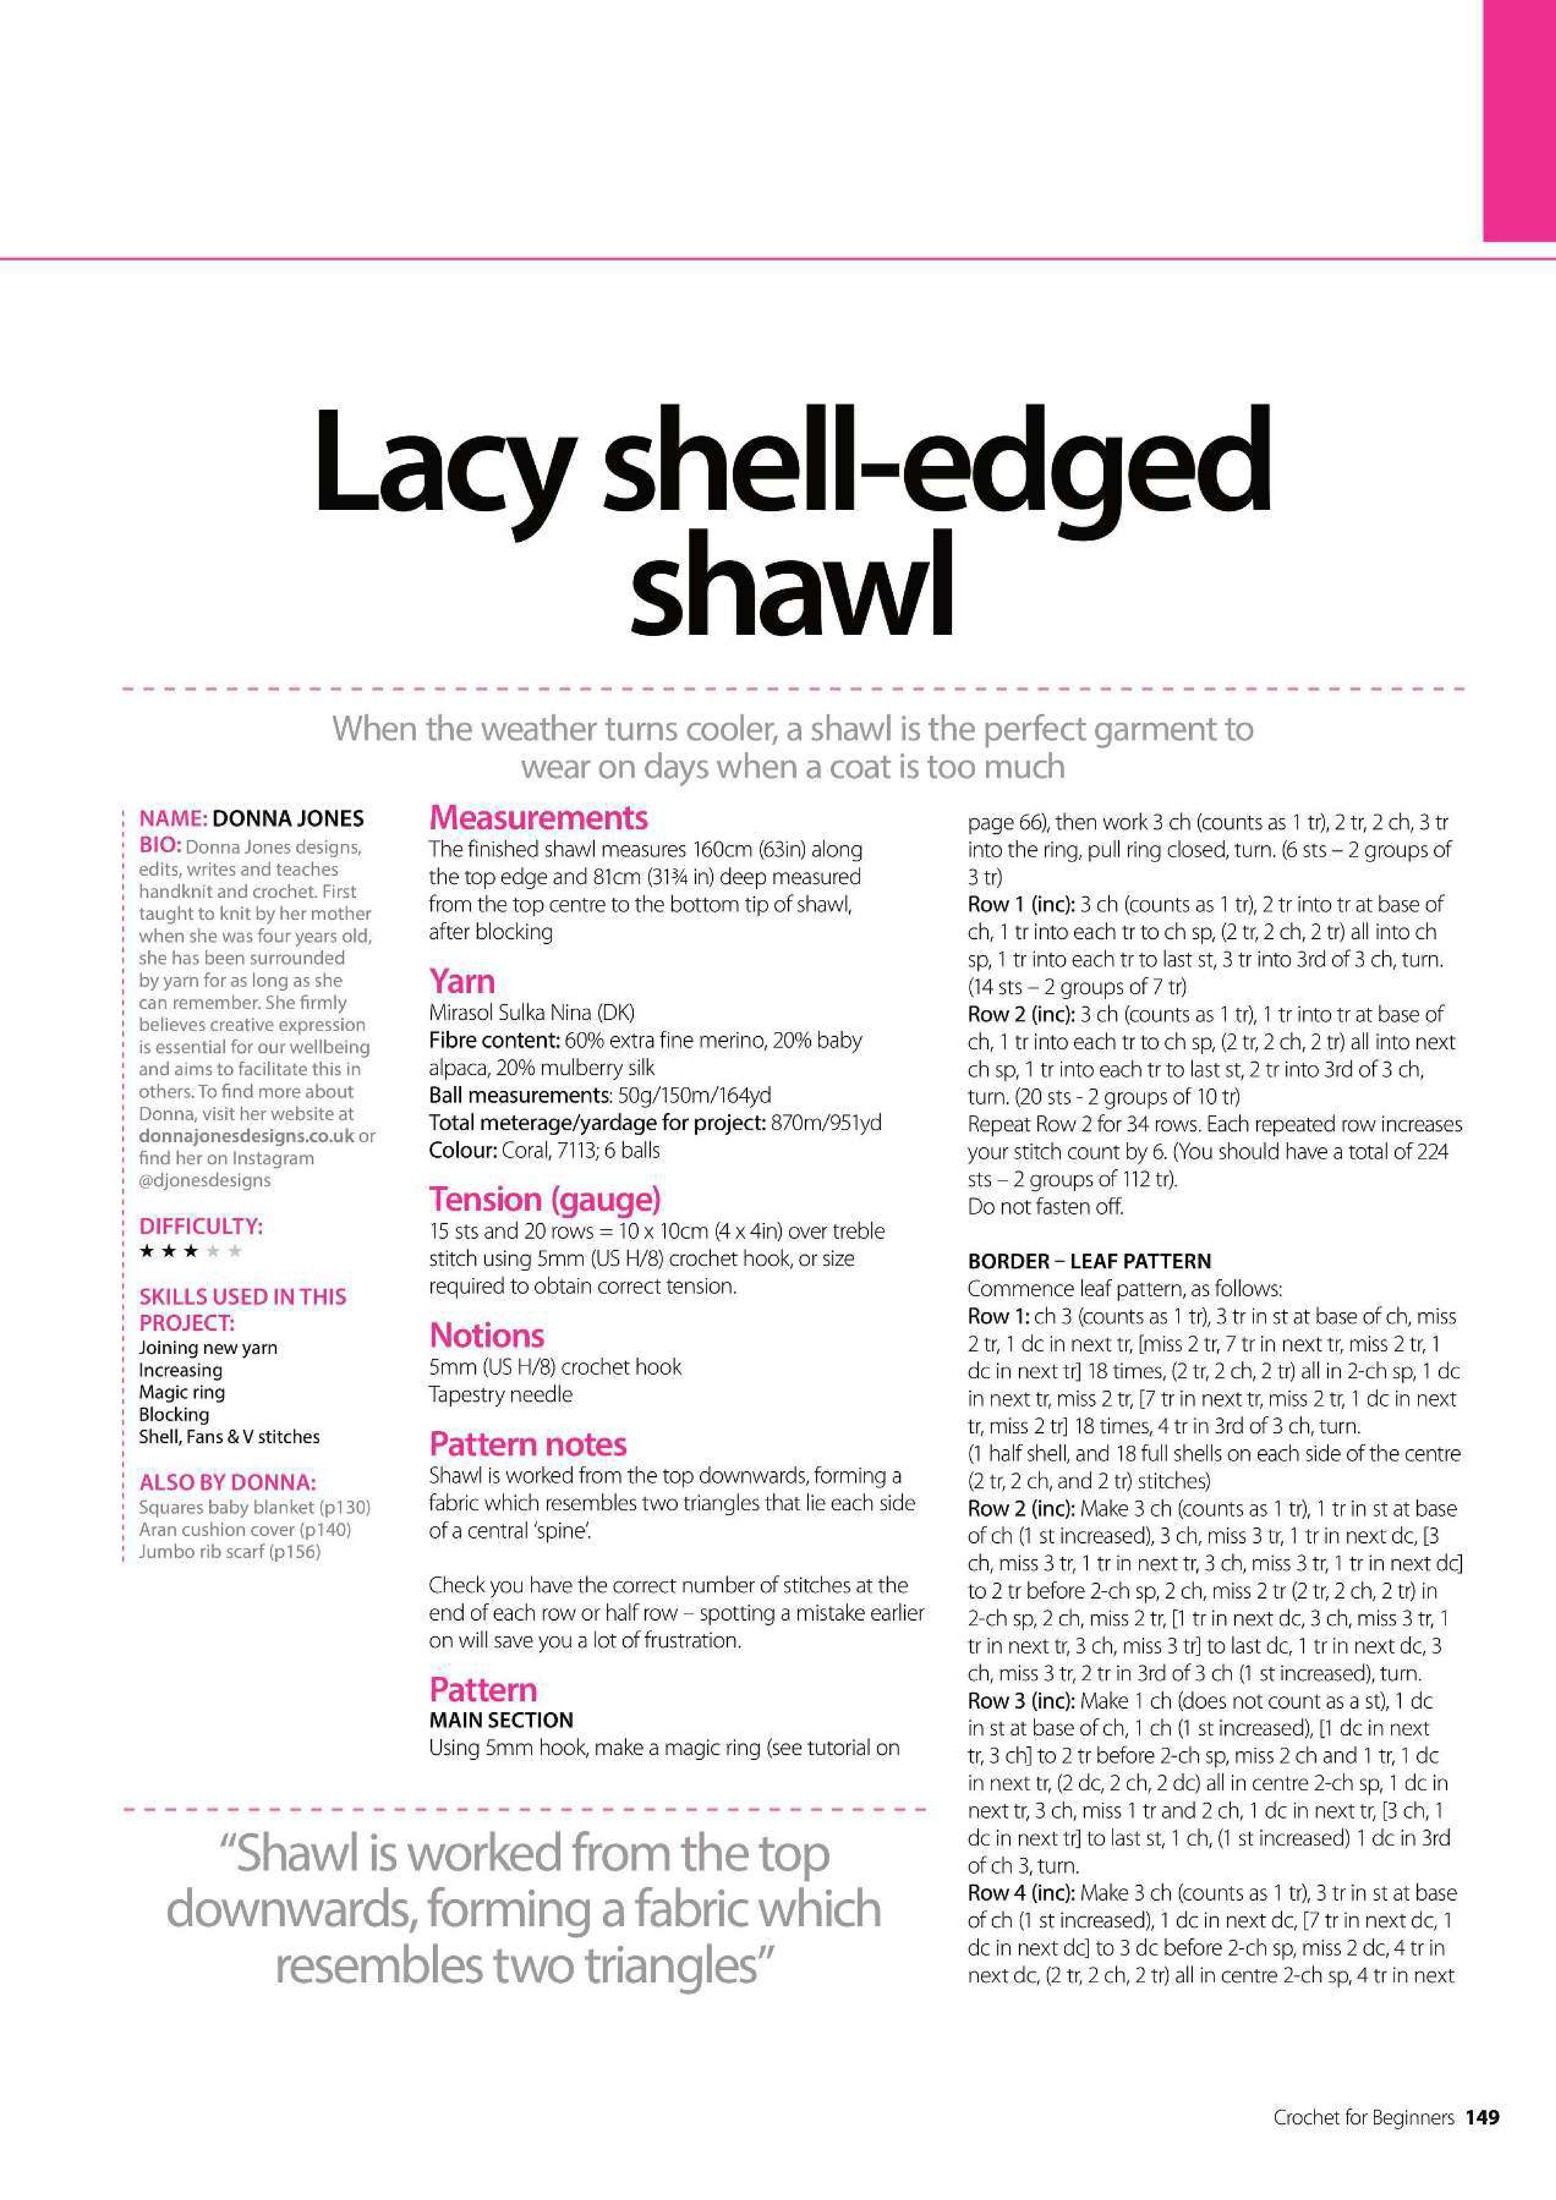
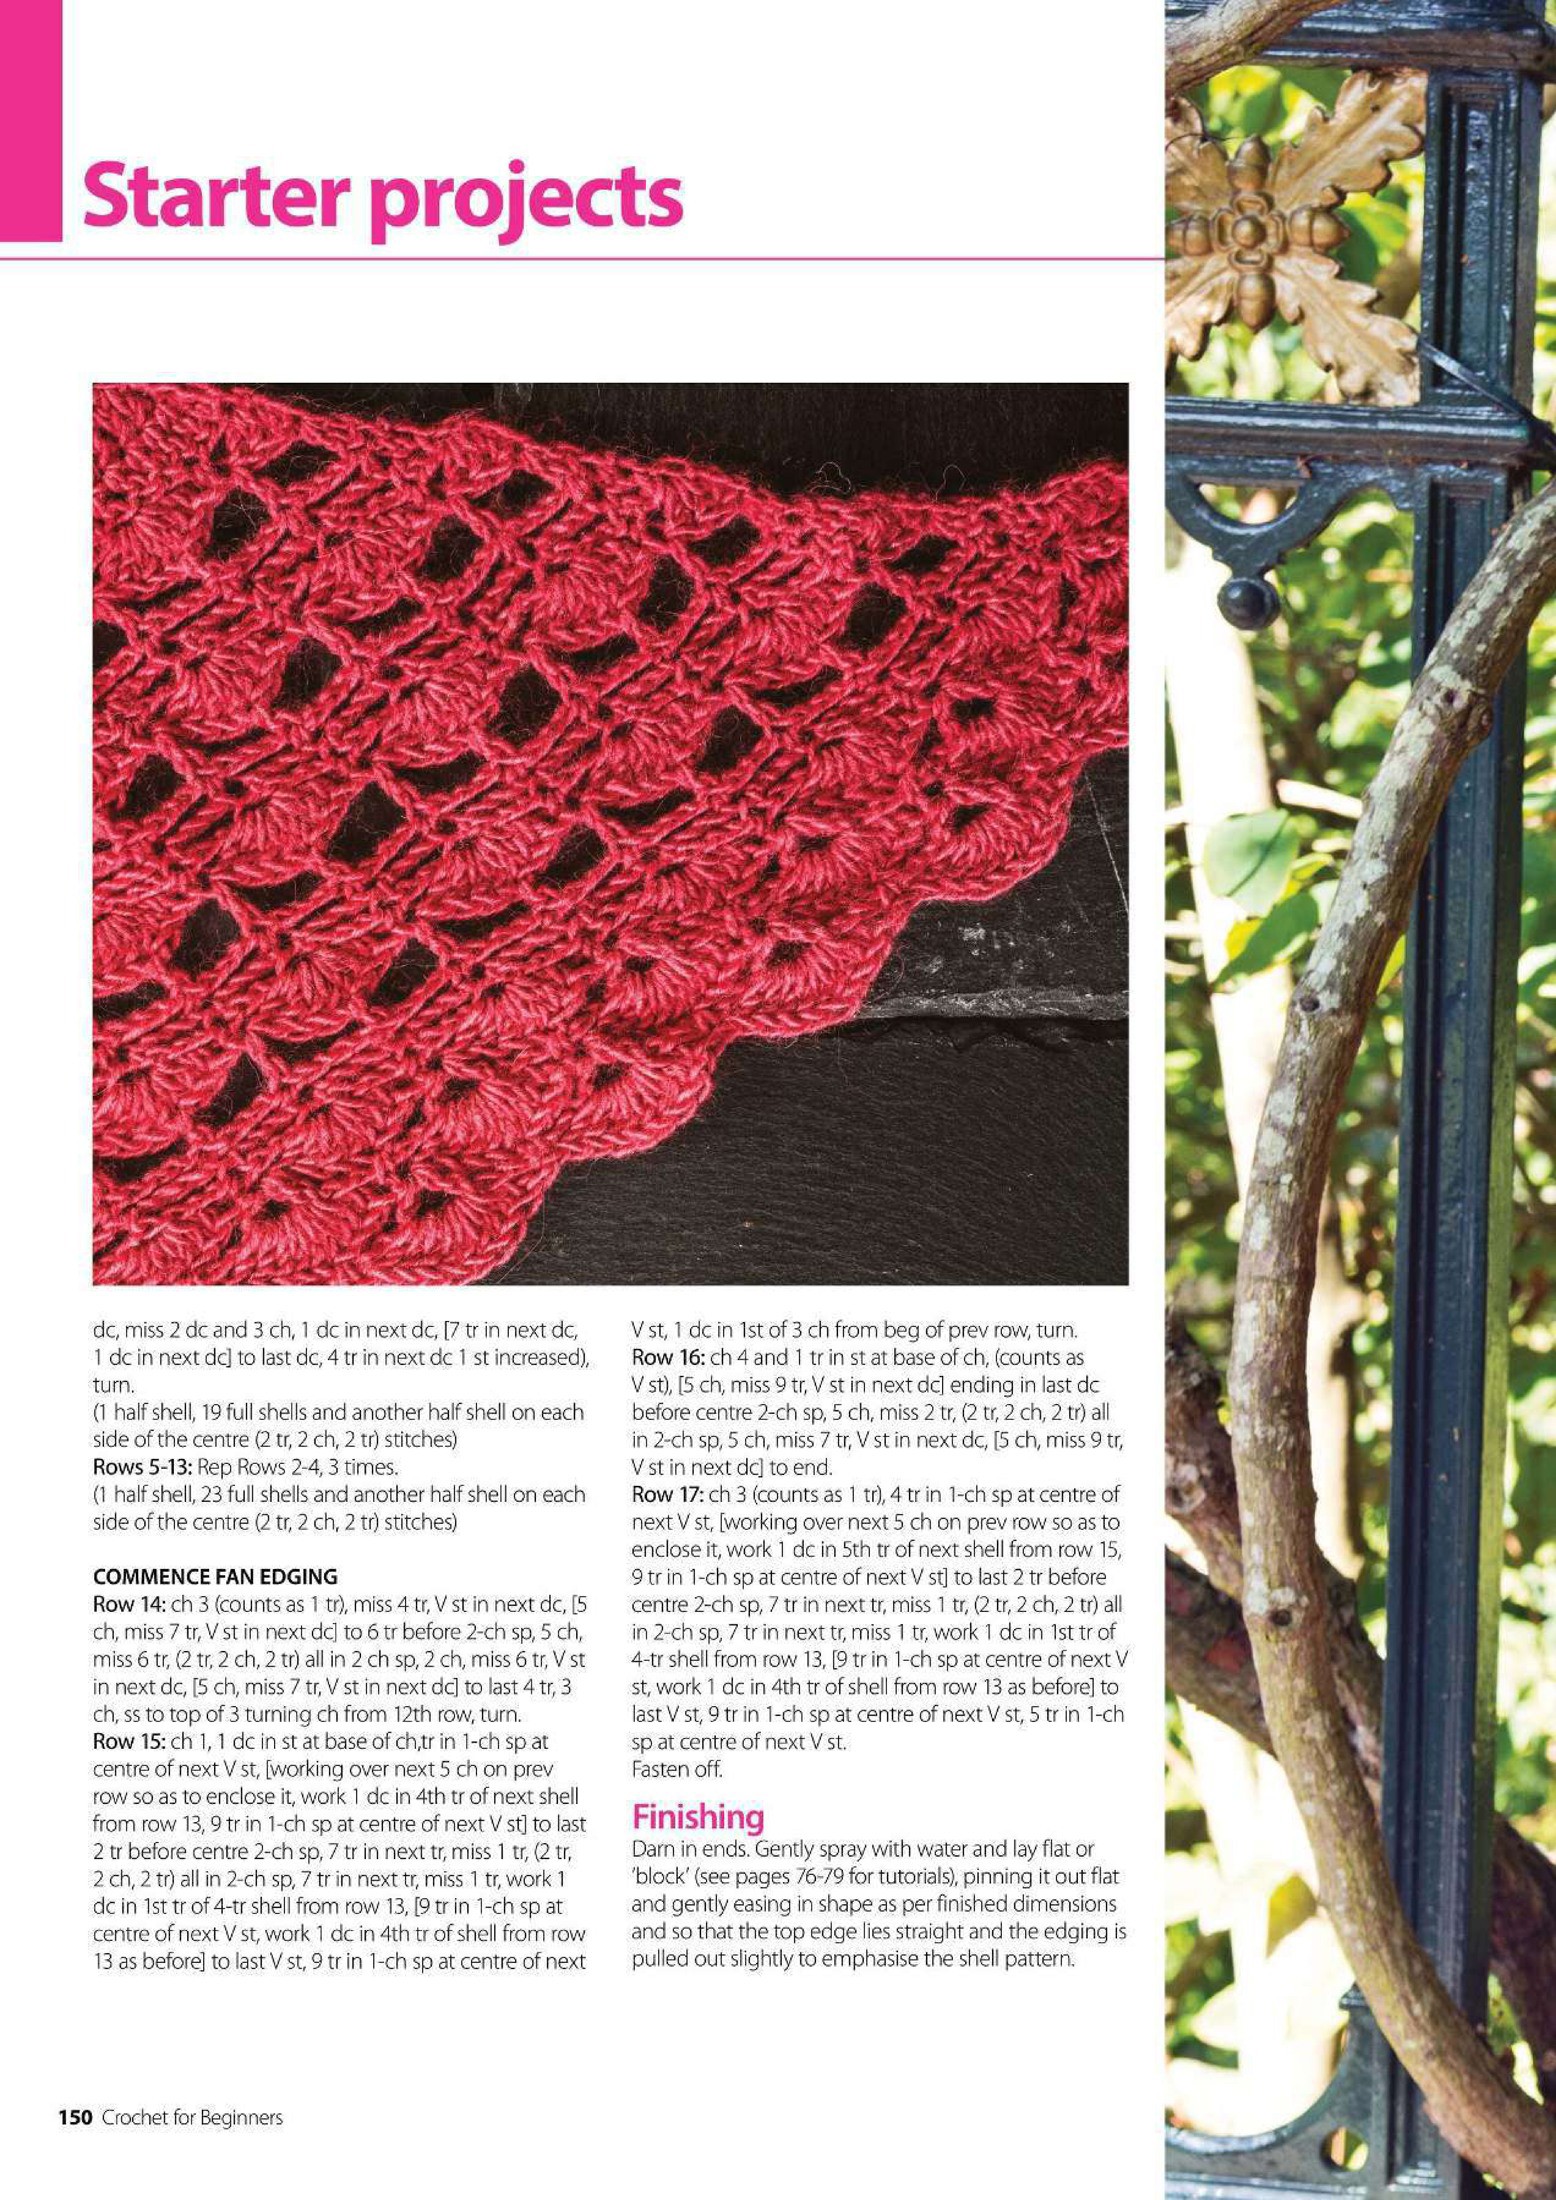
Source clarification: the scanned border has a few inconsistent-looking stitch labels and references, especially near the final center and edge anchors. Keep UK meanings while following these images, compare the repeated side sections for symmetry, and do not replace a seven-stitch shell with seven anchoring sc merely because of a doubtful scanned label. The source images preserve the original wording so it can be checked before continuing.
Block the lace
Darn in ends. Gently dampen the shawl and pin it to an even triangular shape, keeping the top edge straight. Open the shells and fans without pulling the solid body out of proportion. Let it dry fully before removing pins. Blocking reveals the leaf and fan structure; it should not compensate for missing center increases or an unequal stitch count.
Tips for a clean finish
- Use one marker at the spine and one near each outside edge.
- After every lace row, compare the first and second halves before turning.
- Open the instruction images at full size; small preview images are unsuitable for reading detailed lace directions.
Frequently asked questions
Are the original border images in US terms?
No. They use UK terms: their tr is US dc, and their dc is US sc. The body table above has already been converted.
Can I stop after the solid triangle?
You can customize it that way, but it changes both the finished dimensions and the distinctive shell-edged source design.
More scarf and shawl ideas
Explore the Scarves & Shawls collection for more neckwear projects. Compare the yarn weight, width and construction before choosing your next pattern: an airy lace wrap and a dense winter scarf need different fabrics even when they use similar stitches.
Pattern source and credit
Based on [BONUS 5]Crochet For Beginners Over 45 Techniques Inside.pdf, Printed pages 148-151; PDF pages 144-147. Designed by Donna Jones in Crochet for Beginners. Photographs show the original source samples; construction checklists are editorial illustrations. The article reorganizes the source and adds practical explanations. Source ambiguities are identified where relevant; this is a document-based adaptation, not a claim of physical testing.
Open the original pattern in Drive to compare the instructions, source photographs and original layout.
Leave a Reply