
Crochet Purple Baby Bat Pattern with Embroidered Wings
· admin
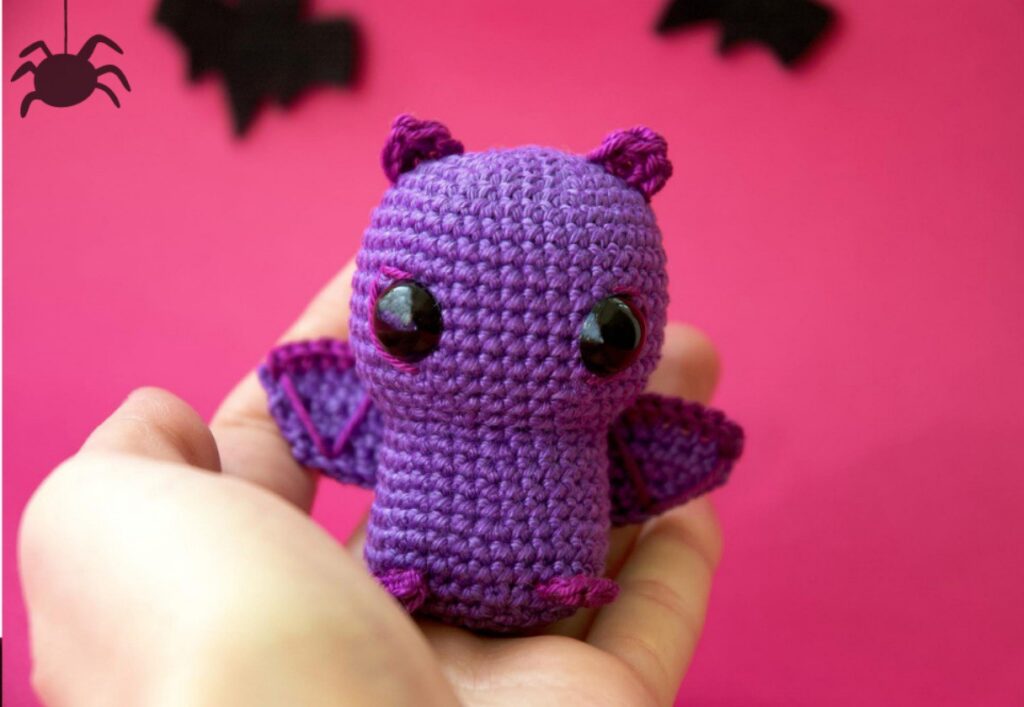
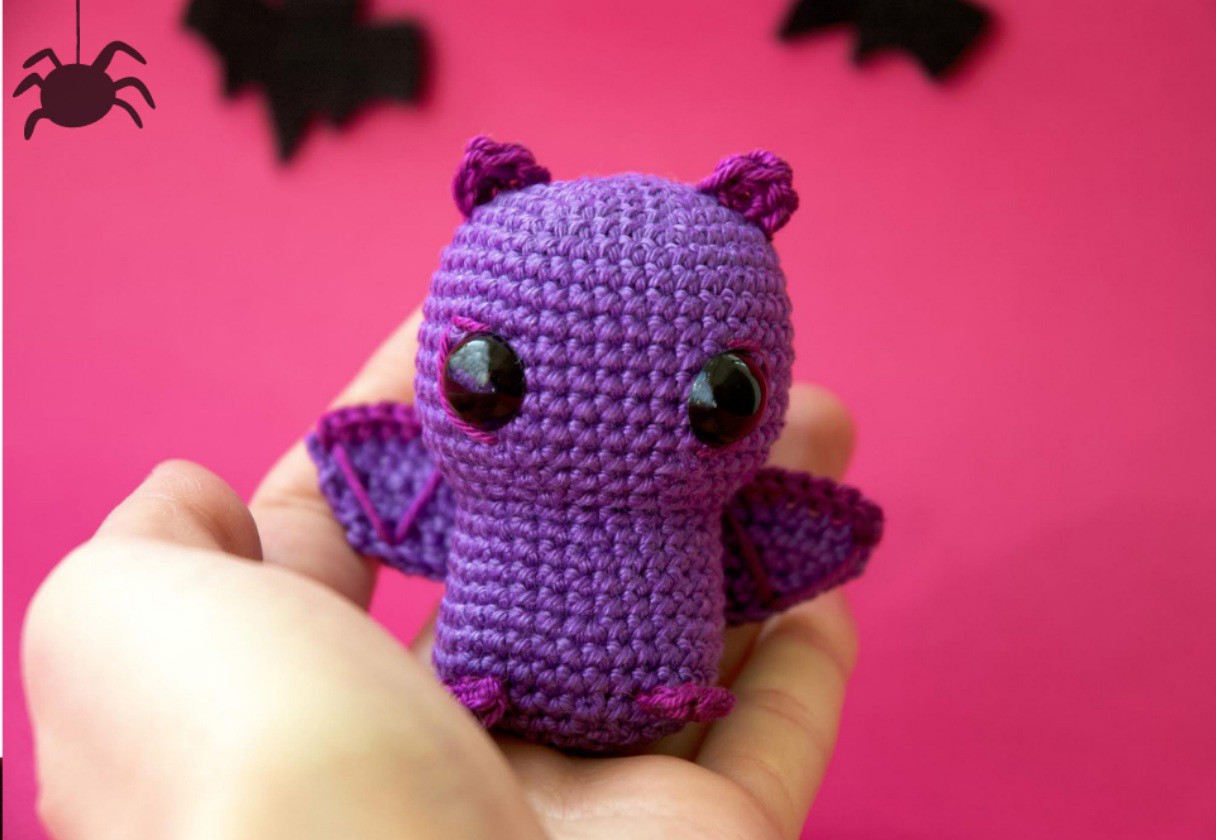
This purple baby bat has a head and body crocheted together, tiny contrast-colored ears and two short feet. Its wing panel is worked flat, edged in a brighter shade and embroidered with triangles before attachment. It is a different construction from the folded-wing baby bat: there is no separate neck seam and no bow tie.
Project at a glance
| Detail | What to expect |
|---|---|
| Skill level | Confident beginner with simple sewing |
| Finished size | No fixed finished measurement is given |
| Pattern language | English; stitch terms explained below |
| Construction | See the component and assembly sections |
Materials and tools
- Schachenmayr Catania cotton, purple 0113 for A and phlox 0282 for B, or matching-weight cotton
- 2.5 mm hook
- 11 mm safety eyes or embroidered alternatives
- Fiberfill, marker, tapestry needle, embroidery needle and scissors
Stitches and pattern notes
Unless stated otherwise, this article uses US crochet terms. ch = chain; sl st = slip stitch; sc = single crochet; hdc = half double crochet; dc = double crochet; inc = 2 stitches in one stitch; dec = work 2 stitches together; MR = magic ring; BLO/FLO = back/front loop only. Numbers in the final column are the finished stitch counts.
The original is in German; this article converts its stitches into US terms. fM = sc, hStb = hdc, Stb = dc, Zun = inc and uns Abn = invisible decrease. Work the head and body in a continuous spiral. The wing rows are turned without adding a turning chain, as the source specifically instructs. Do not heat plastic safety-eye parts; fit them according to their manufacturer’s instructions, or embroider the eyes.
Head and body in one piece
Main piece in color A
| Round / row | Instructions | Count |
|---|---|---|
| 1 | 6 sc in MR. | 6 |
| 2 | 6 inc. | 12 |
| 3 | (sc, inc) × 6. | 18 |
| 4 | (2 sc, inc) × 6. | 24 |
| 5 | (3 sc, inc) × 6. | 30 |
| 6 | (4 sc, inc) × 6. | 36 |
| 7 | (5 sc, inc) × 6. | 42 |
| 8–14 | Sc around for 7 rounds. | 42 |
| 15 | (5 sc, dec) × 6. | 36 |
| 16 | (4 sc, dec) × 6. | 30 |
| 17 | (3 sc, dec) × 6; stuff the head firmly. | 24 |
| 18 | FLO sc around. | 24 |
| 19 | (3 sc, inc) × 6. | 30 |
| 20–22 | Sc around. | 30 |
| 23 | (4 sc, inc) × 6. | 36 |
| 24–25 | Sc around. | 36 |
| 26 | (4 sc, dec) × 6. | 30 |
| 27 | (3 sc, dec) × 6. | 24 |
| 28 | (2 sc, dec) × 6; fill the body. | 18 |
| 29 | (sc, dec) × 6. | 12 |
| 30 | 6 dec; close the opening. | 6 |
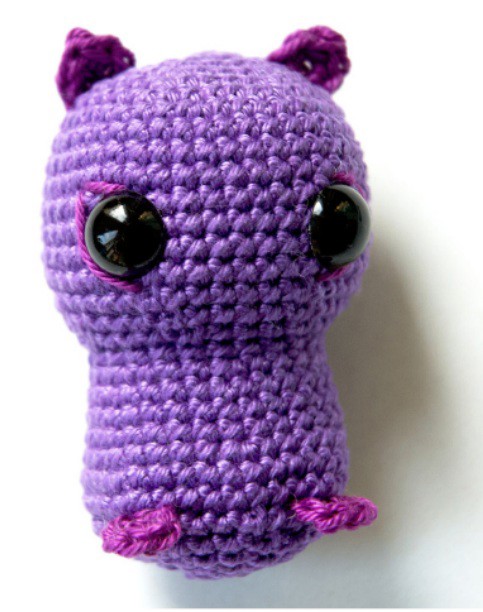
Position the eyes between Rounds 12 and 13, nine stitches apart, before the opening becomes too narrow. Check the face from the front and secure the backs. Round 18 is the transition into the body; do not fasten off at the neck. Keep the stuffing even so the head is rounded and the torso remains upright.
Wing panel in color A
| Round / row | Instructions | Count |
|---|---|---|
| Foundation | Ch 25 and turn. | 25 chains |
| 1 | From second chain, sc across; turn without a turning chain. | 24 |
| 2 | Dec, 20 sc, dec; turn. | 22 |
| 3 | Dec, 18 sc, dec; turn. | 20 |
| 4 | Dec, 16 sc, dec; turn. | 18 |
| 5 | Dec, 14 sc, dec; fasten off with a long tail. | 16 |
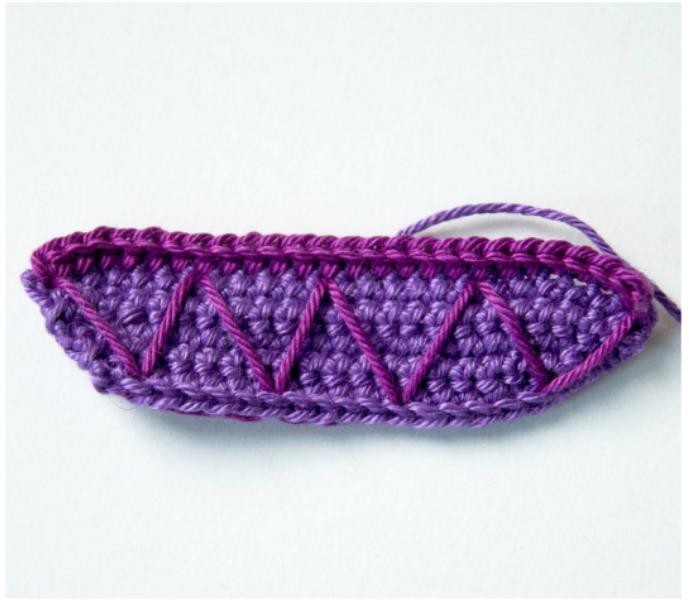
Weave the long tail through the panel so it exits nearer its center. Join color B along the first row and work 24 sc across that edge. Leave a long contrast tail and embroider triangles across the panel, as shown in the source. The panel forms both sides of the bat’s wings when its center is attached at the back of the body.
Tiny ears and feet
Make two ears in color B. Chain 2 and work hdc, dc, hdc and sc into the second chain from the hook. Fasten off with a sewing tail. For each of the two feet, chain 2 and work 4 sc into the second chain; fasten off with a tail. These are small flat components and do not need filling.
Assemble the bat
Pin the center of the wing panel to the back of the body with the decorative edge horizontal. Compare the two exposed sides from the front, then sew through the central section so both wings remain free. Pin the ears to the top sides of the head and the feet beneath the body. The source uses photographs rather than exact attachment-round numbers for these parts, so check their positions on the finished face before stitching. Add a small embroidered outline around each eye in the contrast color, then secure and hide the ends.
Tips for a neat finish
- Count the 24-stitch wing foundation before decreasing either end.
- Embroider the wing panel while it is still flat and easy to handle.
- Do not add an extra ch 1 to the wing turns; the source intentionally omits it.
- Attach the wing center before sewing the tiny feet so the bat’s balance is easier to judge.
Frequently asked questions
Is the body sewn to the head?
No. The source works both in one continuous piece, with FLO Round 18 marking the transition.
Do I crochet two separate wings?
The source describes one long wing panel, attached at its center to form both sides.
Can I make a pastel version?
Yes. Use two contrasting cotton colors of the same weight, keeping eye size and hook appropriate to the new yarn.
More Halloween crochet ideas
Build a coordinated seasonal display with our Halloween crochet collection. For another small project, explore the crochet ghost tutorial or browse these Halloween coaster ideas.
Pattern source and credit
This article is based on Halloween – Baby Fledermaus.pdf. Baby Fledermaus by Roxy’s Crochet, Roxane Huy. The project photographs come from that source and show its original samples. The text has been organized into an article with additional explanations; any editorial clarification is identified where it matters. This is a document-based adaptation, without a claim that we physically tested the finished project.
Open the original pattern reference for the source photographs and original layout.
Leave a Reply