Crochet Pumpkin Stitch Cup Cozy Pattern
· admin
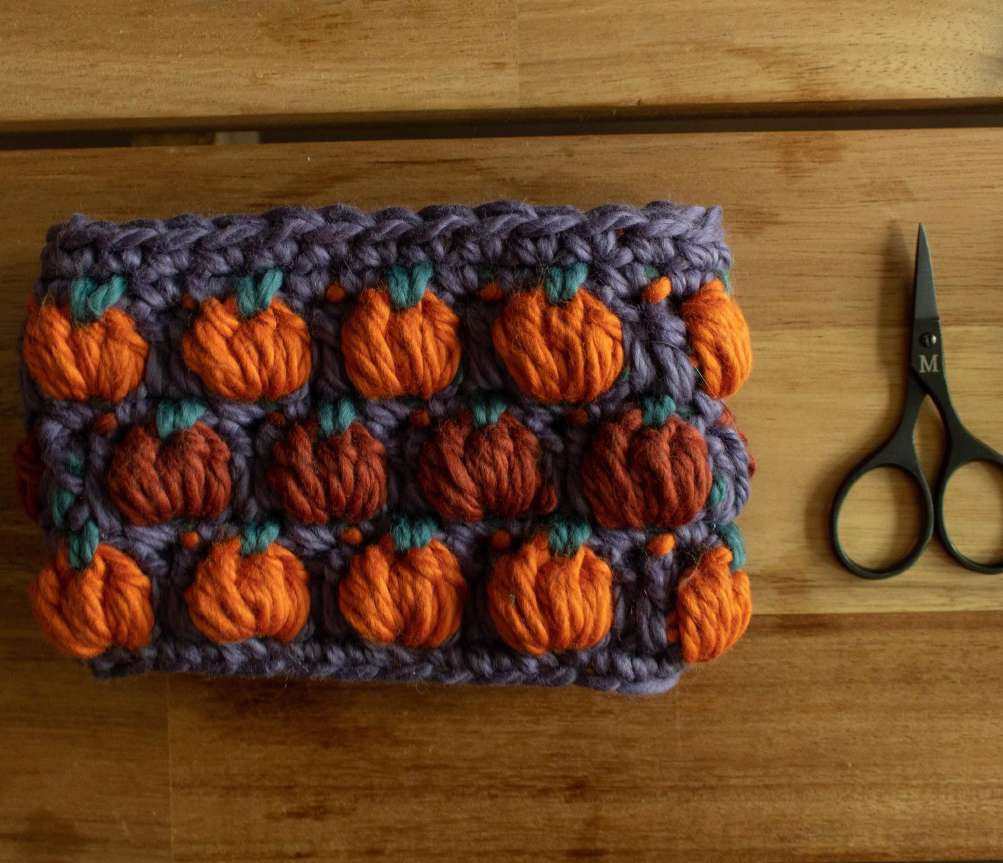
Tiny puff-stitch pumpkins wrap around this cotton cup cozy in alternating rows. A green stitch forms each stem and the darker background frames the orange texture. Work the cozy as a joined tube, then push the pumpkin clusters outward before weaving in the ends. The source’s stitch photos show a stacked sample; the written cozy uses staggered pumpkin placement.
Project at a glance
| Detail | What to expect |
|---|---|
| Skill level | Advanced beginner: special puff and color changes |
| Finished size | Designed for an average 12–16 oz cup; adjust circumference in multiples of 3 |
| Pattern language | English; stitch terms explained below |
| Construction | See the component and assembly sections |
Materials and tools
- Worsted cotton, such as Blue Sky Fibers Organic Cotton
- A: dark background, about 10.25 yd / 9.35 m in the source
- B: orange pumpkin color, about 10.5 yd / 9.6 m; D: second orange, about 5.3 yd / 4.8 m
- C: green stem yarn, about 3.4 yd / 3.1 m
- 5 mm hook, tapestry needle, scissors and optional marker
Stitches and pattern notes
Unless stated otherwise, this article uses US crochet terms. ch = chain; sl st = slip stitch; sc = single crochet; hdc = half double crochet; dc = double crochet; inc = 2 stitches in one stitch; dec = work 2 stitches together; MR = magic ring; BLO/FLO = back/front loop only. Numbers in the final column are the finished stitch counts.
Use US terms. Colors are named before the stitches that use them. Ch 3 counts as the first dc in the straight-start pumpkin rounds. The cozy has limited stretch because of its clusters, so test the foundation around the intended empty cup. Changing by three stitches adds or removes one pumpkin repeat; the source estimates about one inch, but your yarn and tension determine the actual difference.
Learn the pumpkin and stem stitches
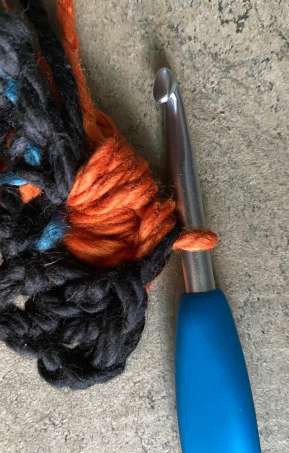
Partial puff: yarn over, insert into the target stitch and draw up a loop; repeat twice more. With seven loops on the hook including the existing loop, yarn over and draw through the six newest loops, leaving the puff unfinished beside the existing loop. Make three of these partial puffs in the same target stitch, retaining each final loop. You now have four loops. Draw the nearest working loop through the others to close the pumpkin, following the original photo sequence.
Stem: insert into the middle of the pumpkin under its three upper stitches, six loops altogether. Pull up green C, then yarn over with background A and draw through to finish. Carry the green along as directed. Each finished pumpkin or stem occupies one position in the 24-stitch round, even though the cluster contains many loops.
Crochet the cozy tube
| Round | Instructions |
|---|---|
| Foundation | With A, loosely ch 24 and join without twisting. |
| 1 | Sc in each chain, join to first sc: 24 sc. |
| 2 | With A, ch 3 and dc in next position. Work eight orange-B pumpkins around, separated by 2 A dc. The last pumpkin completes the round just before the starting ch-3. Join with A: 8 pumpkins / 24 positions. |
| 3 | Align a green stem above each of the eight pumpkins from Round 2, working A sc in the two background positions between stems. At the seam, one A sc lies before the first stem and one after the final stem. Join: 24 positions. |
| 4 | Ch 2 in A; shift the pumpkin positions into the background positions between the previous pumpkins. Work 8 D pumpkins with 2 A dc between them, ending with the remaining A dc at the seam; join to the starting chain. |
| 5 | Work a C stem above each of Round 4’s pumpkins and 2 A sc between each pair. Join: 24 positions. |
| 6 | Repeat Round 2 with B: ch 3 and one A dc at the start, then 8 pumpkins separated by 2 A dc, with the last pumpkin at the seam. |
| 7 | Repeat Round 3, aligning exactly one C stem to each Round 6 pumpkin. |
| 8 | In A, sc evenly around and join to the first sc. Fasten off. |
Repeat clarification: the source’s literal wording in some stem rounds can be read as nine stems. A round with eight pumpkins needs eight stems, and the source specifies 24 positions. Work one stem above each actual pumpkin and two background stitches between them, splitting that background pair across the seam where needed. This keeps eight complete three-position repeats. The shifted Round 4 beginning chain and final dc together fill its seam background pair.
Manage the yarn colors
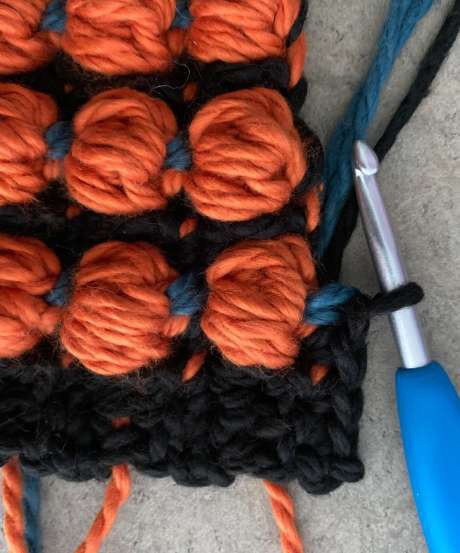
Change to the pumpkin color before drawing up its puff loops, keeping the background strand available alongside the work. Return to A for the two dc between pumpkins. On stem rounds, pull up C through the center loops of the pumpkin but complete the stitch with A. Keep carried strands relaxed: pulling them tightly can make the cozy narrower even when the stitch count is correct.
Fit and finish
Push every pumpkin outward with a fingertip. At first they may invert while you work the stem round; that is normal and can be corrected before the top edge is finished. Test the cozy on an empty, cool cup. If the base is too tight, remake the foundation more loosely, use a larger hook for the chain or add a full three-stitch repeat. If a taller sleeve is needed, add complete paired pumpkin-and-stem rounds before the final sc edge.
Weave each color end through stitches of the same color without restricting the tube. Leave the cozy removable for cleaning and follow the cotton yarn’s washing instructions. Keep it clear of the drinking rim. A crochet sleeve is a decorative hand-comfort accessory and does not make a hot cup safe to grip indefinitely.
Tips for a neat finish
- Practice one three-puff pumpkin before starting the full tube.
- Count eight pumpkins and eight stems in every pattern round.
- Split the background pair at the joining seam instead of adding another stem.
- Check fit early because the textured fabric has little positive ease.
Frequently asked questions
Why do the demonstration photos look stacked?
The source says they were photographed on a different sample. The written cozy shifts the middle pumpkin round.
How do I change its circumference?
Add or remove whole three-stitch repeats, keeping one pumpkin plus two background positions per repeat.
Do all puff loops close separately?
No. Each puff retains a final loop; all three puffs are closed together into one pumpkin.
More Halloween crochet ideas
Build a coordinated seasonal display with our Halloween crochet collection. For another small project, explore the crochet ghost tutorial or browse these Halloween coaster ideas.
Pattern source and credit
This article is based on Pumpkin Cup Cozy.pdf. Designer not named in the readable source text. The project photographs come from that source and show its original samples. The text has been organized into an article with additional explanations; any editorial clarification is identified where it matters. This is a document-based adaptation, without a claim that we physically tested the finished project.
Open the original pattern reference for the source photographs and original layout.
Leave a Reply