Crochet Bunny Handle Rattle with a Shaped Cotton Grip
· admin
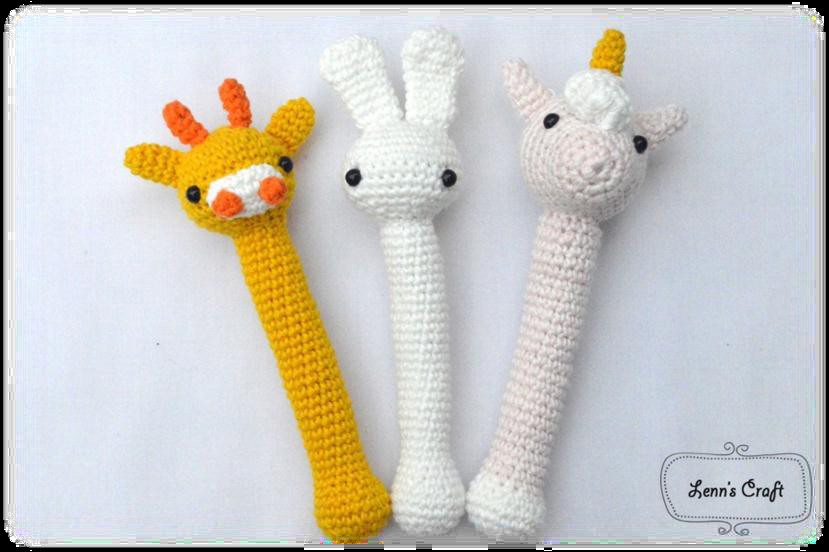
This crochet bunny handle rattle uses a stuffed cotton handle in place of a wooden ring. The handle widens at its base, narrows gradually and ends in a small opening for attaching the head. The supplied collection also shows giraffe and unicorn versions; the complete instructions here follow the white bunny variant only.
Materials, Gauge and Size
Soft white cotton, a small amount of pink and black embroidery yarn, 2.25 mm hook, fiberfill, needle, pins, scissors and marker. The source gives an approximate 14 cm height excluding ears and a 1.5–2 cm rattle component. No numerical gauge or yarn allowance is supplied. Make a dense fabric with no visible filling gaps. The reference photographs show 6 mm plastic eyes; embroidered eyes are used in this written version.
Stitches and Pattern Notes
US crochet terms: ch = chain; sc = single crochet; hdc = half double crochet; dc = double crochet; tr = treble crochet; sl st = slip stitch; st = stitch; sp = space; BLO = back loop only; inc = 2 stitches in one stitch. Sc2tog, hdc2tog and dc2tog combine two neighboring stitches into one. A number before a stitch tells you how many consecutive stitches to work. Parentheses followed by a repeat number describe one complete group repeated that many times.
Step 1: Shape the Bunny Head
| Row / round | Instructions | Count / note |
|---|---|---|
| 1 | 6 sc in magic ring. | 6 |
| 2 | Inc in every stitch. | 12 |
| 3 | (Sc, inc) six times. | 18 |
| 4 | (2 sc, inc) six times. | 24 |
| 5 | (3 sc, inc) six times. | 30 |
| 6 | (5 sc, inc) five times. | 35 |
| 7–10 | Sc around for four rounds. | 35 |
| 11 | (3 sc, dec) seven times. | 28 |
| 12 | (2 sc, dec) seven times. | 21 |
| 13 | (Sc, dec) seven times. | 14 |
Work continuously in white and move the marker every round. After Round 13, leave the opening available for filling and the neck join. This head grows by five increases on Round 6, then decreases by seven per round; keep those different repeat numbers rather than assuming six throughout.
Step 2: Embroider and Fill the Head
Mark the eye positions between Rounds 8 and 9, about eight stitches apart, and embroider matching eyes with black yarn or floss. Place a small pink nose centrally below them and add the mouth shown in the reference view. Secure the thread ends inside before filling.
Fill evenly and enclose the rattle insert within the head so it cannot contact an opening directly. Keep enough room near the neck to sew neatly. The source does not specify a locking system or test procedure for the insert; use a purpose-made enclosed component and inspect the finished seam rather than relying on the crochet fabric alone.
Step 3: Crochet the Cotton Handle
| Row / round | Instructions | Count / note |
|---|---|---|
| 1 | 6 sc in a white magic ring. | 6 |
| 2 | Inc around. | 12 |
| 3 | (Sc, inc) six times. | 18 |
| 4 | (2 sc, inc) six times. | 24 |
| 5 | Sc around. | 24 |
| 6 | (3 sc, dec) four times, 4 sc. | 20 |
| 7 | (2 sc, dec) five times. | 15 |
| 8 | Sc around. | 15 |
| 9 | (4 sc, dec) twice, 3 sc. | 13 |
| 10–33 | Sc around for twenty-four rounds. | 13 |
Fill the base and shaft gradually as the tube grows. Small amounts pushed gently into place give a smoother handle than one large lump added at the end. Stop adding filling before the final attachment edge becomes stretched. Leave a long sewing tail after Round 33.
Step 4: Make Two Short Bunny Ears
In white, begin with six sc in a magic ring, then increase around to twelve. Round 3: (sc, inc) six times = eighteen. Round 4: (sc, dec) six times = twelve. Rounds 5–10: twelve sc each. Fasten off with a sewing tail.
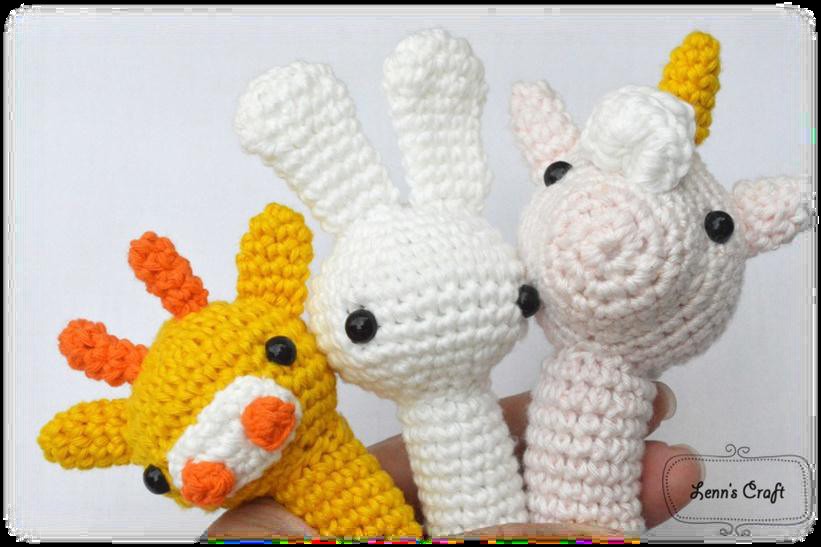
Leave the ears unstuffed and flatten their bases. Pin them at the top sides of the head, using the assembled-bunny source photograph to judge the angle. Make the second ear with the same tension and compare the pair before sewing. Their rounded tips distinguish this bunny from the longer-eared ring rattle patterns.
Step 5: Sew and Inspect the Finished Rattle
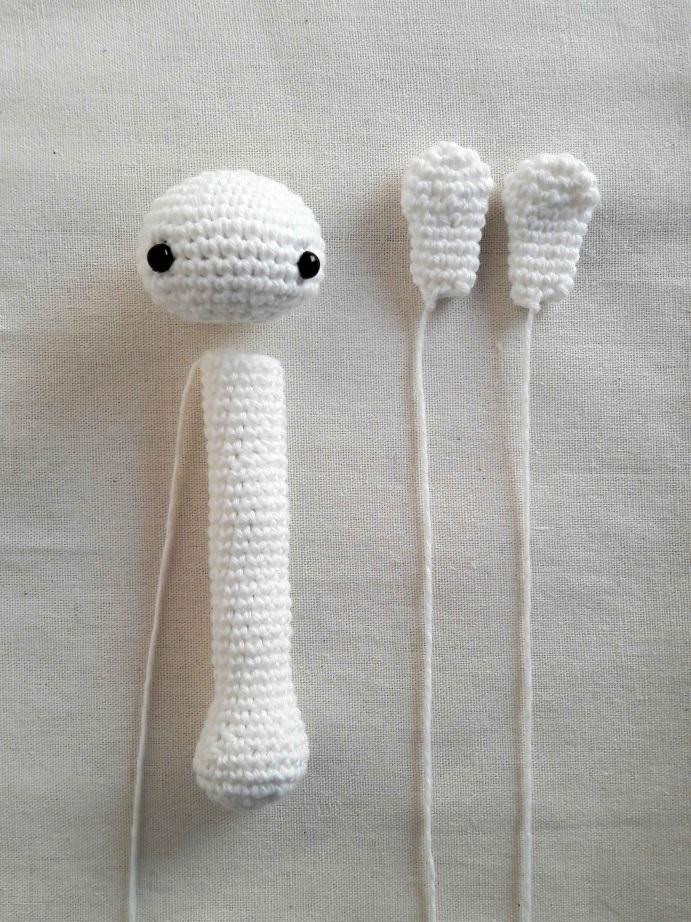
Pin the thirteen-stitch handle opening centrally against the fourteen-stitch head opening. Sew evenly around the join, easing the one-stitch difference over the whole seam rather than bunching it in one place. Make a second secure pass and hide the tail through several stitches inside the handle. Sew the ears with a similarly complete attachment across their bases.
Check the head sits directly above the handle, the base remains rounded and no filling can be pulled through a gap. Compare both eyes and ears after removing the pins. The extra source photos show the collection and the bunny parts before assembly; the giraffe and unicorn in those photos use different head features and are not additional variants of the written instructions above.
Frequently Asked Questions
Does this version need a wooden ring? No. Its crocheted and filled handle is part of the pattern.
Are all three animals in the cover written out here? No. This article follows only the bunny, with its own head and ear counts.
Why do the head and handle openings differ by one stitch? The source ends them at fourteen and thirteen; distribute that small difference evenly when sewing.
More Baby Crochet Ideas
Browse our Crochet Baby collection, compare baby bootie patterns, or explore baby cardigan ideas. Save the project to Pinterest before gathering your yarn.
Pattern and Photo Credits
Adapted from the supplied Baby Rattle Toy.pdf. Design and reference photographs: Lenn’s Craft, Baby Rattle Toy. Source photographs show the reference samples; captions identify any detail crops. This written adaptation has been reviewed against the supplied pattern pages but has not been physically crocheted or maker-tested. Yarn substitutions and tension can change the result.
Leave a Reply