
Crochet Phone Pouch with a Back Pocket and Flower Wristlet
· admin
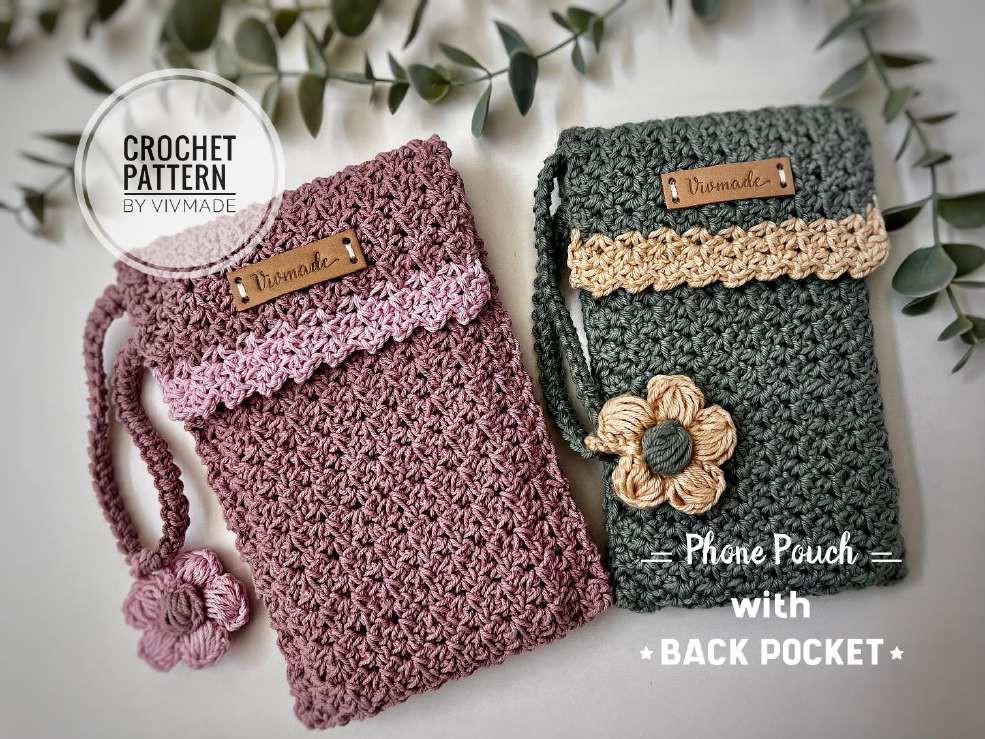
This crochet phone pouch with a back pocket is a wristlet made from one folded textured rectangle. A smaller panel provides the rear pocket, while a puff-petal flower hangs from the short Romanian-cord handle. It uses a magnetic flap rather than the long shoulder strap found on the other phone bags in this collection.
Materials, Size and Construction
- Approximately 150 m of firm cotton, worsted-weight yarn or non-stretch polyester cord, with a contrasting color for the trim and flower. The source recommends firm material to limit stretching.
- 3 mm crochet hook, tapestry needle, scissors, stitch markers and sewing pins.
- One magnetic snap; optional leather-style label and sewing thread.
Level: intermediate. Reference finished size: about 11 × 16 cm (4.3 × 6.3 in). The main rectangle is about 40 cm long before folding; the back pocket is about 10.5 cm long. The source cord is approximately 25 cm (9.8 in) before its ends are joined into the handle. It is a wristlet loop, not a 100 cm crossbody strap.
US Terms and Texture Repeat
Ch = chain; sc = single crochet; hdc = half double crochet; sl st = slip stitch; inc = 2 sc in one stitch; MR = magic ring; sp = space. Each textured group is (sc, ch 2, sc) in one stitch or space. On later rows, place the group into the previous row’s ch-2 space. Keep a single hdc at each outer edge. Ch 1 for turning; it does not count as a stitch.
Step 1: Work the Long Pouch Rectangle
| Round / row | Instructions | Total |
|---|---|---|
| Foundation | With the main color, ch 31. | |
| 1 | Hdc in the third ch, skip 1 ch, (sc, ch 2, sc) in the next ch. Repeat [skip 2 ch; (sc, ch 2, sc) in the next ch] eight times. Skip 1 ch, hdc in the last ch. Ch 1 and turn. | 9 groups + 2 hdc edges |
| 2 | Hdc in the first edge stitch, (sc, ch 2, sc) in each of the nine ch-2 spaces, hdc in the last edge stitch. Ch 1 and turn. | 9 groups + 2 hdc edges |
| 3–62 | Repeat Row 2 in the main color until the piece is about 38 cm long. | |
| 63–65 | Change to the contrast color and repeat the texture for three more rows, taking the total length to about 40 cm. Finish the ends. |
The source says to repeat Row 2 sixty more times after working its first two rows; that gives sixty-two main-color rows. Its contrast section is labelled Rows 63–65. If your gauge differs, use the measured lengths and test the fold around your actual phone before completing the contrast edge.
To change color neatly, begin the final hdc of the last main-color row. When three loops remain on the hook, pull the contrast yarn through all three to finish that stitch, then ch 1 and turn in the new color.
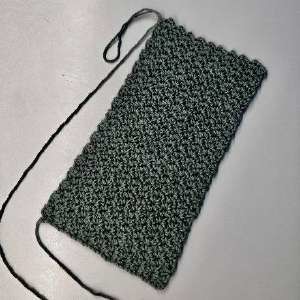
Step 2: Make the Back Pocket
| Round / row | Instructions | Total |
|---|---|---|
| Foundation | With the main color, ch 25. | |
| 1 | Hdc in the third ch, skip 1 ch, (sc, ch 2, sc) in the next ch. Repeat [skip 2 ch; (sc, ch 2, sc) in the next ch] six times. Skip 1 ch, hdc in the last ch. Ch 1 and turn. | 7 groups + 2 hdc edges |
| 2–14 | Hdc at each edge and work (sc, ch 2, sc) in each of the seven ch-2 spaces. Turn each row. Continue to about 8.5 cm. | |
| 15–17 | Change to the contrast color and work three more texture rows, taking the pocket to about 10.5 cm long. Finish. |
The source labels its three final pocket rows “Row 15”; here they are numbered 15–17 so the sequence is clear. With a new strand of the main color, edge the two sides and bottom: ch 1, 15 sc down one side, inc at the corner, 14 sc along the bottom, inc at the other corner, then 15 sc up the remaining side. Leave about a 50 cm tail for sewing. The contrast top remains the pocket opening.
Step 3: Crochet the Wristlet Cord
Leave a starting tail of about 20 cm. Ch 2 and sc into the second chain. Turn the cord from right to left; sc under the single side loop at its base. Turn the same way again and sc under the two side loops now visible. Continue turning and working through the next pair of side loops until the cord measures about 25 cm, or your chosen length. Keep the stitches even and avoid tightening the side loops so much that the hook cannot enter them.
On the last sc, leave the final two loops on the hook instead of completing and fastening off the stitch. Set this live end aside with a long working tail; the ends will be joined after threading the flower and pouch.
Step 4: Make the Five-Petal Flower Charm
| Round / row | Instructions | Total |
|---|---|---|
| 1 | With contrast color: ch 1, 5 sc in MR; join. | 5 sc |
| 2 | Ch 1, inc in each stitch; join. | 10 sc |
| 3 | Make five puff petals, each spanning the next pair of base stitches, as described below. | 5 petals |
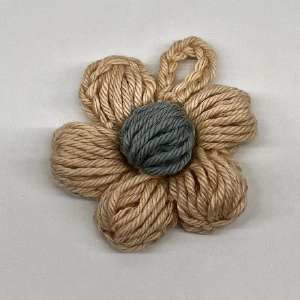
For one petal, ch 3. Yarn over and draw up a long loop in the same base stitch; repeat twice more in that stitch. Move to the next base stitch and make three more long draw-ups in the same way. Yarn over and close all the loops together. Ch 2 and sl st into the following base stitch, which becomes the starting stitch for the next petal. Work five petals over the ten base stitches, then join to the beginning of the first petal.
After the final join, ch 10 and sl st into the base of that chain to form the hanging loop. Fasten off and hide the end. For each of the two main-color center pieces, ch 3; yarn over and draw a long loop through the first chain nine times in total. Pull through the gathered loops and ch 1 to secure. Make two centers and sew one on each face of the flower so the charm is finished on both sides.
Step 5: Fold, Sew and Finish
- Lay the long panel with its contrast edge at the upper end. Fold approximately 15.5 cm of the main-color end upward to make the front of the pouch; the remaining upper section becomes the back and flap.
- With right sides together where the fold meets, sew the two side seams using a running stitch, then turn or arrange the pouch so the right side faces out. Leave the flap free.
- Place the small pocket on the lower outside back, pin it and sew its two sides and bottom through the edging back loops. Keep its contrast top open.
- Pass the unjoined wristlet end through the flower’s ch-10 loop, then through the side attachment point of the pouch. Bring the cord ends together; with the live two loops still on the hook, catch the corresponding starting-end loops and pull the working yarn through to join. Secure and weave the two yarn ends in opposite directions.
- Align the flap with the pouch front and sew the magnetic snap halves where they meet. Add the optional label and check the seams, handle join and phone fit.
Keep the front and rear openings separate while sewing. A piece of card inside the pouch helps stop the needle from catching both walls. Pin the rear pocket before stitching so it remains level when the flap is closed.
Frequently Asked Questions
How many texture groups are in each panel?
The main panel has nine groups between its two hdc edge stitches. The rear pocket has seven groups. Count the ch-2 spaces after each row.
Is this a shoulder bag?
The original 25 cm cord forms a wristlet handle after joining. A longer shoulder strap would be a separate adaptation and would need different attachment planning.
Why are there two flower centers?
The charm can turn while hanging from the wristlet. A center on both faces gives it a finished appearance from either side.
More Crochet Phone Pouches
Browse our crochet phone cases and covers, compare animal phone-pouch styles, or try a simple phone pouch with a strap.
Pattern and Photo Credits
Written adaptation of Vivmade, Phone Pouch with Back Pocket, supplied PDF and original reference photographs. The contrast-row numbering has been clarified while retaining the source’s measured lengths. The instructions have been checked against the supplied pattern pages; this article has not been physically crocheted or maker-tested. Reference images show the source project, rather than a newly made sample.
Leave a Reply