
Oak Grove Crochet Baby Earflap Hat Worked Sideways
· admin
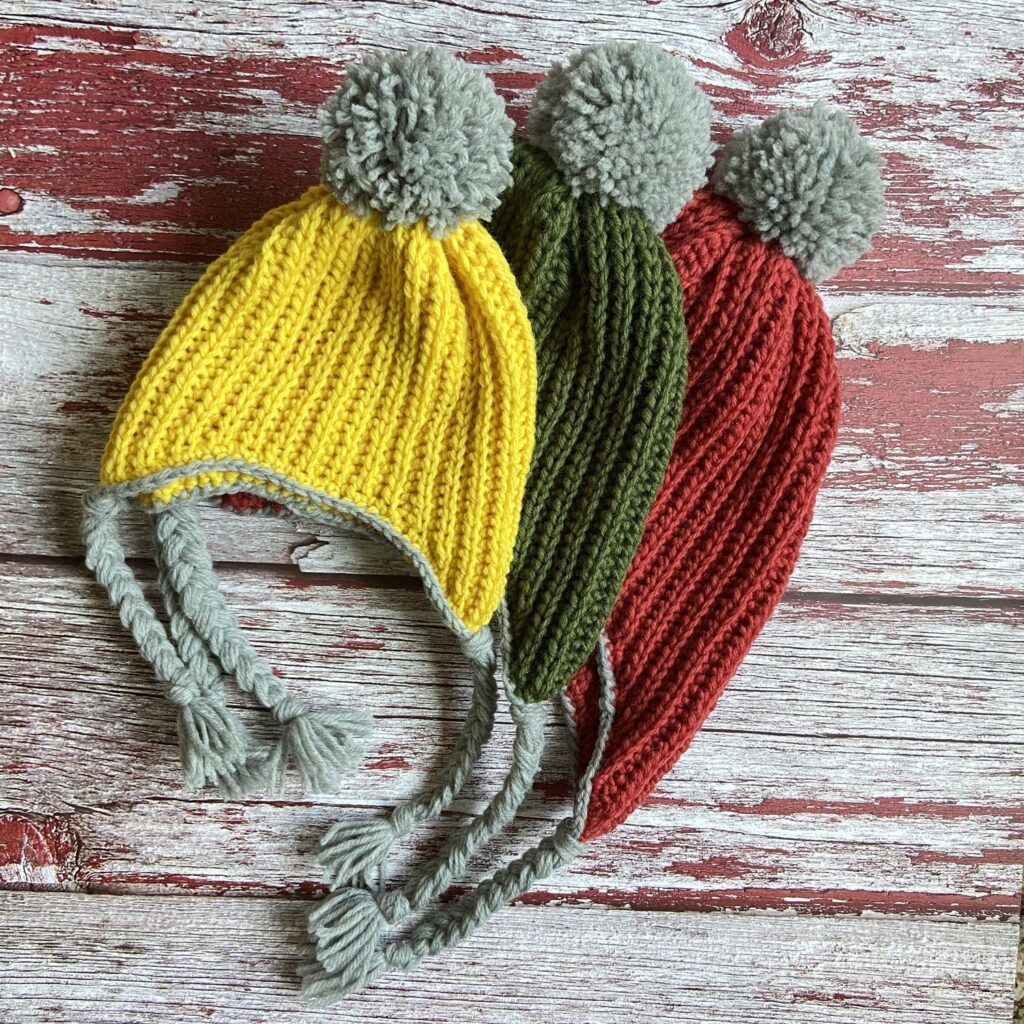
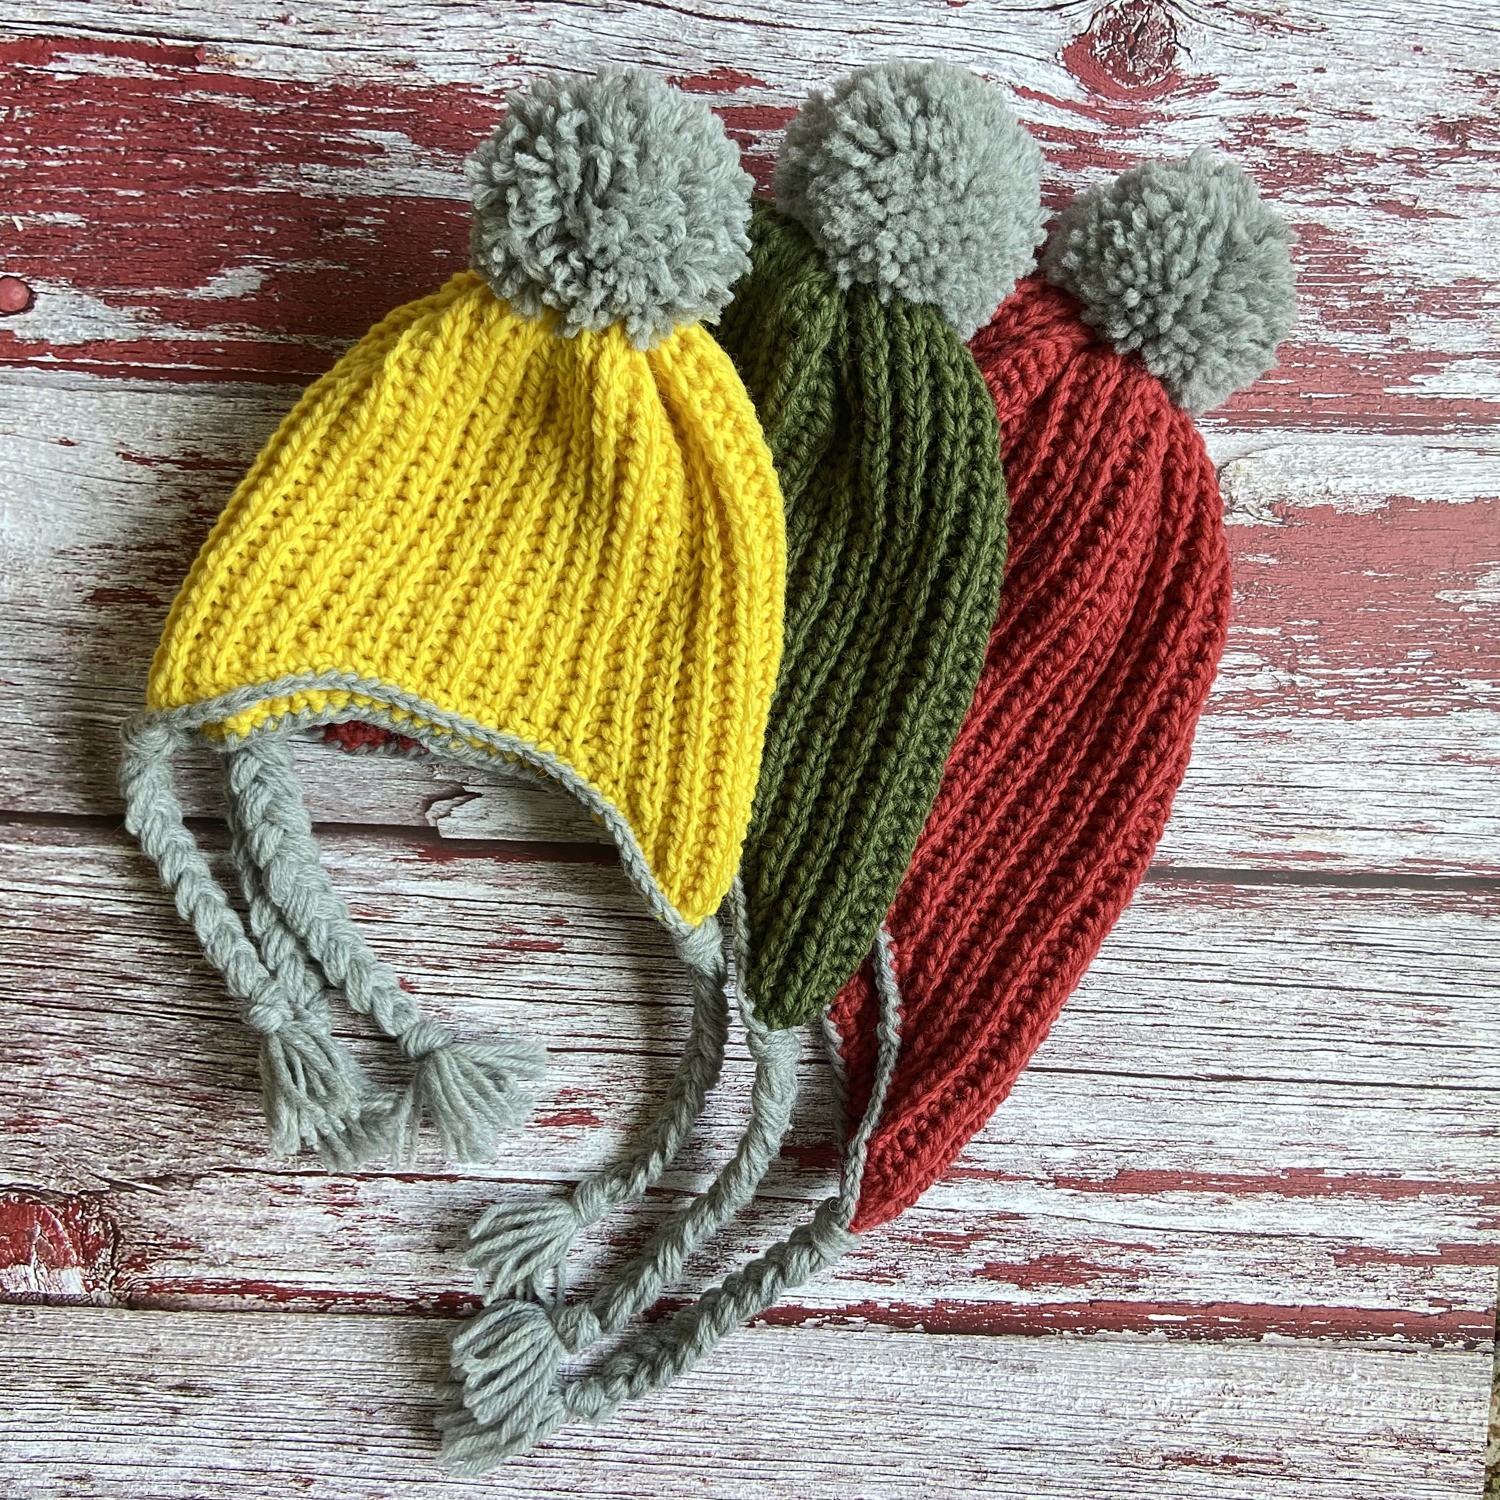
The Oak Grove crochet baby earflap hat is made sideways, so the two earflaps grow from increases and decreases along one edge. The opposite straight edge is gathered into the crown after seaming. This article follows the baby size only; the source photographs also show toddler and adult versions in different colors.
Materials, Gauge and Size
Worsted / category 4 yarn: about 165 yd / 151 m main color and 70 yd / 64 m contrast for the source baby version. Use a 5 mm hook for the hat and 3.75 mm for edging, plus needle, scissors and optional markers. Blocked gauge is 16 stitches × 15 rows per 10 cm in BLO yarn-over slip stitch. Baby reference circumference is about 40.5 cm / 16 in and center-back height about 16.5 cm / 6.5 in. The fabric is stretchy; choose by measurements.
Stitches and Pattern Notes
US crochet terms: ch = chain; sc = single crochet; hdc = half double crochet; dc = double crochet; tr = treble crochet; sl st = slip stitch; st = stitch; sp = space; BLO = back loop only; inc = 2 stitches in one stitch. Sc2tog, hdc2tog and dc2tog combine two neighboring stitches into one. A number before a stitch tells you how many consecutive stitches to work. Parentheses followed by a repeat number describe one complete group repeated that many times.
Step 1: Learn the Rib Stitch
For a yarn-over slip stitch, yarn over, insert the hook, yarn over and draw up a loop, then continue that drawn-up loop through both loops already on the hook. This finishes in one continuous pull-through after drawing up the loop; it is not hdc. Most rows use the back loop only.
For a BLO decrease, yarn over, insert through the back loops of the next two stitches, yarn over and draw up one loop through both, then pull it through the two loops on the hook. Two stitch positions become one. Ch 1 for turning does not count. The larger chain starts shown in the row table add actual new stitches along the earflap edge.
Step 2: Follow the Baby Row Chart
| Row / round | Instructions | Count / note |
|---|---|---|
| 1 | Ch 27; from second chain, yarn-over slip stitch across. | 26 |
| 2–5 | Ch 1, turn; yarn-over slip stitch in BLO across. | 26 |
| 6 | Ch 3, turn; work into two new chains, then all existing stitches. | 28 |
| 7 | Work across in BLO; use both loops for the last stitch. | 28 |
| 8 | Ch 4, turn; work into three new chains, then across. | 31 |
| 9 | Work across, last stitch in both loops. | 31 |
| 10 | Ch 2, turn; work into one new chain, then across. | 32 |
| 11–16 | Ch 1, turn and work across. | 32 |
| 17 | Work 30 stitches, decrease over last two. | 31 |
| 18 | Work across. | 31 |
| 19 | Work 27 stitches, decrease twice. | 29 |
| 20 | Decrease, then work 27 stitches. | 28 |
| 21 | Work 24 stitches, decrease twice. | 26 |
| 22 | Decrease, then work 24 stitches. | 25 |
| 23 | Work 23 stitches, decrease over last two. | 24 |
| 24 | Decrease, then work 22 stitches. | 23 |
| 25–35 | Work across: forehead section. | 23 |
| 36 | Ch 3, work two new chain stitches then across. | 25 |
| 37 | Work across, last stitch in both loops. | 25 |
| 38 | Ch 4, work three new chain stitches then across. | 28 |
| 39–52 | Repeat the instructions of original Rows 7–20, in order. | Ends with 28 |
| 53 | Work 26 stitches, decrease. | 27 |
| 54 | Decrease, then work 25 stitches. | 26 |
| 55–60 | Work across. | 26 |
Step 3: Read the Second Earflap Repeat Correctly
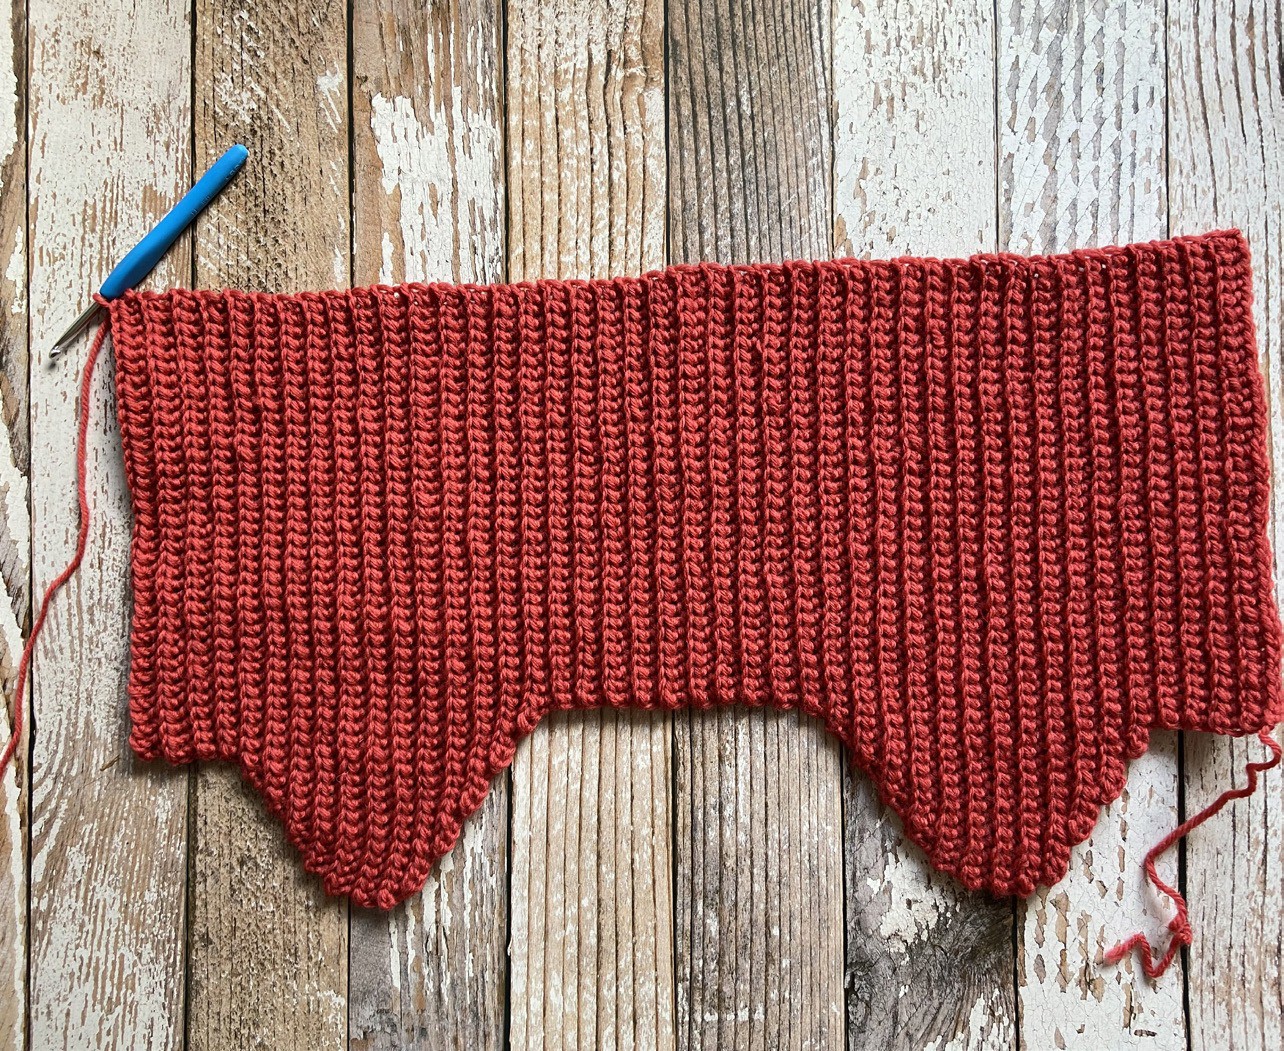
Rows 39–52 repeat the instructions of Rows 7–20 rather than their original row numbers. You begin this repeat with 28 stitches, just as Row 7 did: Row 39 is plain, Row 40 adds three to reach 31, Row 41 is plain, Row 42 adds one to reach 32, and Rows 43–48 stay at 32. Rows 49–52 then reduce to 31, stay at 31, reduce to 29 and reduce to 28.
Keep the straight crown edge on the same side throughout. All ordinary table rows begin with ch 1 and a turn. Where the source specifies a final both-loop stitch on the return from an increase, keep that stitch marked so it does not disappear into the edge.
Step 4: Seam and Close the Crown
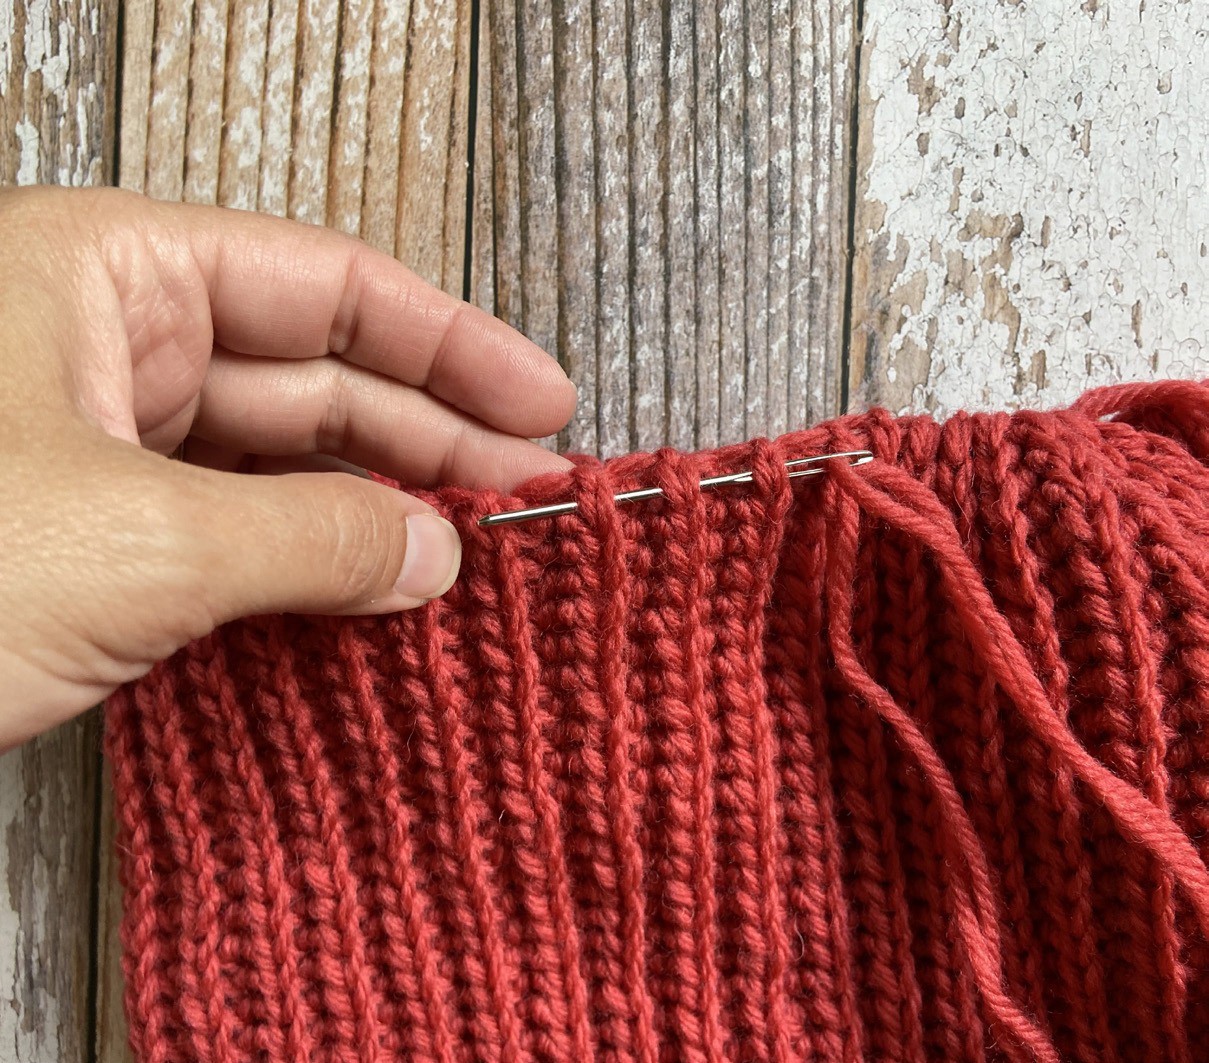
After Row 60, fold the first and last rows together. Slip stitch across through both loops of the working row and the front loops of the foundation edge. Turn the seam to the inside. Use a doubled main-color strand to gather the straight top edge through the ends of the rib ridges, draw it closed and sew any small remaining crown opening securely.
Check that both shaped earflaps sit on the same lower edge before finishing the gathering. The source panel photograph shows that outline clearly; the earflaps are not separate pieces sewn on afterward.
Step 5: Add the Contrast Edging
With the smaller hook and contrast yarn, sc along the lower edge. Work one sc per straight row end and distribute stitches around the shaped earflaps so the edging neither gathers nor ripples. The source suggests one sc at each rib ridge plus additional stitches between ridges as needed. Join and fasten off. Rejoin contrast and work a yarn-over slip stitch in every edging stitch, then finish the ends.
The source adds a pompom; it is optional, so the hat can be left plain. Block according to the yarn label and remeasure the relaxed hat. If an edging pulls tight, increase its spacing or loosen its tension; do not force the fabric wider by pulling on the earflaps.
Frequently Asked Questions
Are earflaps sewn on? No. They are shaped into the sideways panel.
Is a yarn-over slip stitch the same as hdc? No. After drawing up its loop, continue that loop through both existing loops in one motion.
Does the source photo show only the baby size? No. Yellow is its baby sample, green toddler and red adult medium.
More Baby Crochet Ideas
Browse our Crochet Baby collection, compare baby bootie patterns, or explore baby cardigan ideas. Save the project to Pinterest before gathering your yarn.
Pattern and Photo Credits
Adapted from the supplied Oak-Grove-Earflap-Hat.pdf. Pattern and photographs: Brenda K. B. Anderson / Creative Crochet Corner, Oak Grove Earflap Hat. Source photographs show the reference samples; captions identify any detail crops. This written adaptation has been reviewed against the supplied pattern pages but has not been physically crocheted or maker-tested. Yarn substitutions and tension can change the result.
Leave a Reply