
Low Sew Crochet Spider Pattern with Plush Legs
· admin
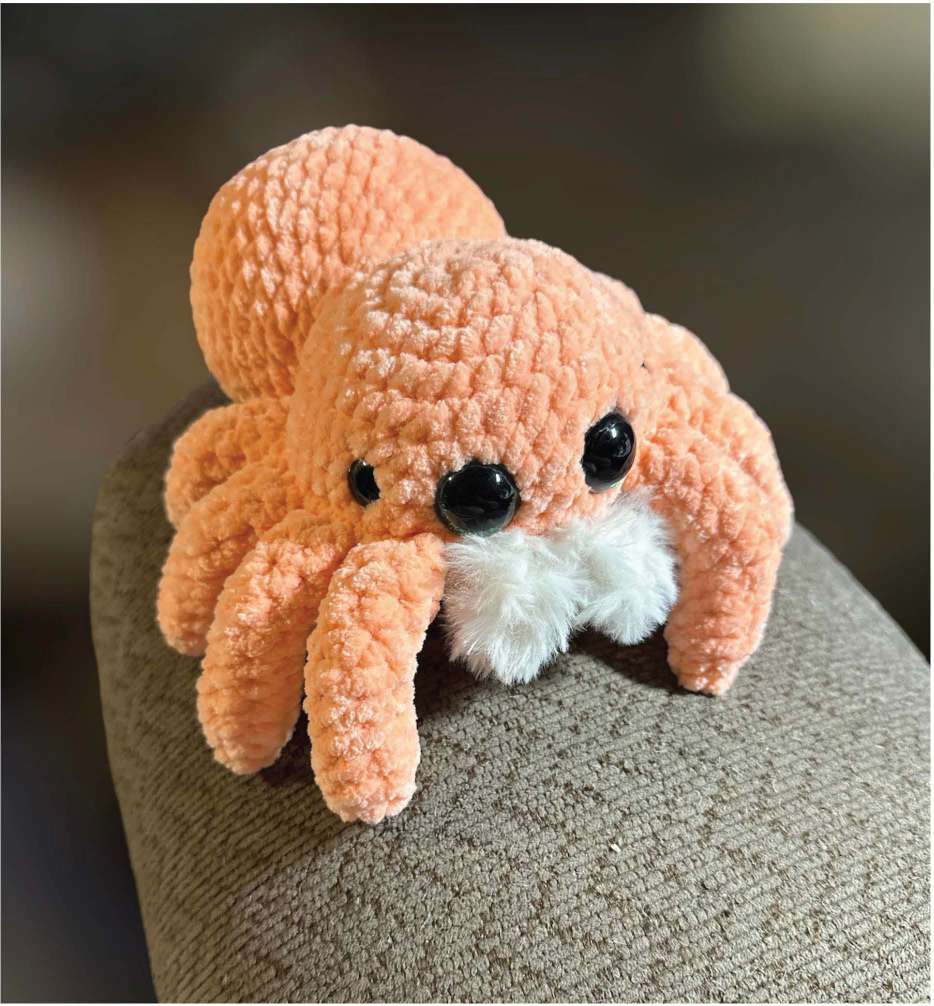
This low sew crochet spider uses eight shaped legs that are crocheted directly into the head. A separate rounded abdomen is the main piece to sew on afterward. Plush yarn and a fuzzy pair of fangs give it a soft, friendly Halloween look. The important step is checking leg direction before completing the joining round.
Project at a glance
| Detail | What to expect |
|---|---|
| Skill level | Confident beginner to intermediate |
| Finished size | Approximately 8 inches with the source yarn |
| Pattern language | English; stitch terms explained below |
| Construction | See the component and assembly sections |
Materials and tools
- About 75 g of Parfait Chunky, or another suitable plush yarn
- 5 mm hook for Parfait Chunky; the source suggests 6 mm for Sweet Snuggles Lite
- Small amount of fuzzy or accent yarn for two fangs
- 20 mm and 12 mm safety eyes, or embroidered alternatives
- Fiberfill, stitch marker, scissors and tapestry needle
Stitches and pattern notes
Unless stated otherwise, this article uses US crochet terms. ch = chain; sl st = slip stitch; sc = single crochet; hdc = half double crochet; dc = double crochet; inc = 2 stitches in one stitch; dec = work 2 stitches together; MR = magic ring; BLO/FLO = back/front loop only. Numbers in the final column are the finished stitch counts.
The readable source occasionally renders “sc” as “se”; the tables below consistently use sc. Stuff legs as you go if you want the source’s firmer shape. For a floppier version, the source offers a closed, flattened leg opening. Crocheting the legs into the head reduces sewing, but it still requires careful alignment. Embroidered eyes are preferable for small children.
Make eight legs and two fangs
Legs: make eight
| Round / row | Instructions | Count |
|---|---|---|
| 1 | 4 sc in MR. | 4 |
| 2 | Sc, 3 inc. | 7 |
| 3–7 | Sc around for 5 rounds. | 7 |
| 8–10 | 2 sc, inc, 2 sc, dec on each round. | 7 |
| 11 | Sc around. | 7 |
| 12 | Work 2 sc only; leave the other 5 stitches unworked. Sl st and fasten off. | Partial round |
The partial final round shifts the attachment point; it is not a decrease round. Stuff lightly and preserve the natural bend. If you choose the floppy-leg option, flatten and close each opening with 3 sc through both sides. For the firmer option, leave the opening as in the source and catch both sides while attaching it.
Fangs
Make two in fuzzy yarn. Leave a tail at each end, chain 5 and work 4 sc back from the second chain. Their natural curve should turn inward toward the head when attached.
Head with joined legs
| Round / row | Instructions | Count |
|---|---|---|
| 1 | 9 sc in MR. | 9 |
| 2 | 9 inc. | 18 |
| 3 | (2 sc, inc) × 6. | 24 |
| 4 | (3 sc, inc) × 6. | 30 |
| 5 | (4 sc, inc) × 6. | 36 |
| 6 | (5 sc, inc) × 6. | 42 |
| 7–8 | Sc around. | 42 |
| 9 | Join four legs with 3 sc each; 7 sc across the face; join four more legs with 3 sc each; 11 sc. | 42 |
| 10 | Sc around; secure the leg tails inside. | 42 |
| 11 | (5 sc, dec) × 6. | 36 |
| 12 | (4 sc, dec) × 6. | 30 |
| 13 | (3 sc, dec) × 6. | 24 |
| 14 | (2 sc, dec) × 6; stuff. | 18 |
| 15 | 9 dec; fasten off and close. | 9 |
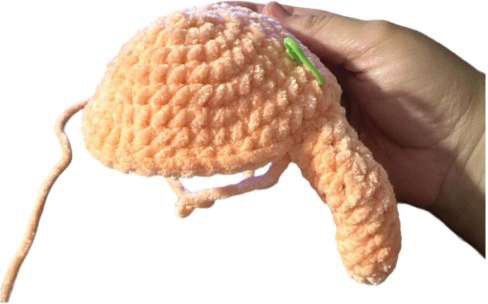
For each attached leg, pass through the front and back of its opening as well as the next head stitch, making three joined stitches per leg. Hold the head upright and check that every leg bends downward. The joining round contains 24 attachment stitches plus 7 face stitches and 11 rear stitches, for 42 total. Place the larger eyes between Rounds 7 and 8 within the seven-stitch face area, three stitches apart. The smaller outer eyes sit 2–3 stitches farther back; the source also shows a slightly higher placement between Rounds 6 and 7. Position both fangs on Round 8, 1–2 stitches apart, before access to the inside closes.
Abdomen
| Round / row | Instructions | Count |
|---|---|---|
| 1 | 6 sc in MR. | 6 |
| 2 | 6 inc. | 12 |
| 3 | Sc around. | 12 |
| 4 | (sc, inc) × 6. | 18 |
| 5 | (2 sc, inc) × 6. | 24 |
| 6 | Sc around. | 24 |
| 7 | (3 sc, inc) × 6. | 30 |
| 8 | (4 sc, inc) × 6. | 36 |
| 9 | (5 sc, inc) × 6. | 42 |
| 10–13 | Sc around. | 42 |
| 14 | (5 sc, dec) × 6. | 36 |
| 15 | Sc around. | 36 |
| 16 | (4 sc, dec) × 6. | 30 |
| 17 | Sc around. | 30 |
| 18 | (3 sc, dec) × 6. | 24 |
Attach the abdomen
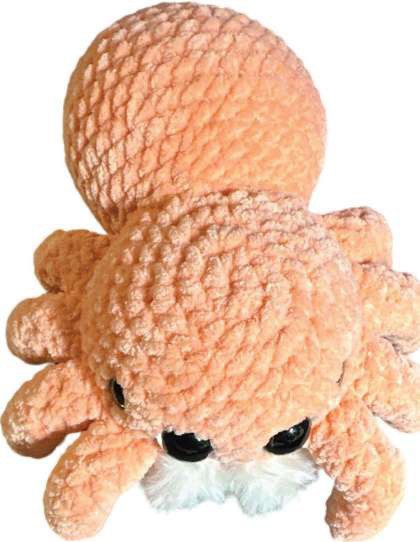
Slip stitch, fasten off with a long tail and fill the abdomen. Pin its open edge to the back of the head, right beside the legs. The source describes the seam as roughly four rounds below the top center and four rounds above the bottom of the head. Check the profile and use the original photo to establish the angle. Sew around the open edge, catching solid stitches rather than the fuzzy surface fibers alone. Add a final small amount of stuffing before closing the seam.
Tips for a neat finish
- Arrange all eight legs in order before beginning head Round 9.
- Keep filling away from the last few stitches of a leg so the hook can catch the opening cleanly.
- Do not pull chenille yarn sharply when closing a magic ring; tighten it gradually.
- Anchor the abdomen firmly while preserving the rounded shape.
Frequently asked questions
Is this a no-sew pattern?
It is low sew: the legs join while crocheting, but the abdomen still needs a sewn seam and the fangs must be secured.
Can I leave the legs floppy?
Yes. Use the source’s flattened opening option and reduce stuffing, while still attaching three stitches for each leg.
Why is my leg count still seven after shaping?
Each shaping round contains one increase and one decrease, so the total stays at seven while the bend develops.
More Halloween crochet ideas
Build a coordinated seasonal display with our Halloween crochet collection. For another small project, explore the crochet ghost tutorial or browse these Halloween coaster ideas.
Pattern source and credit
This article is based on Cute Spider.pdf. Designer not named in the readable source text. The project photographs come from that source and show its original samples. The text has been organized into an article with additional explanations; any editorial clarification is identified where it matters. This is a document-based adaptation, without a claim that we physically tested the finished project.
Open the original pattern reference for the source photographs and original layout.
Leave a Reply