
Flower Granny Square Pencil Case Crochet Pattern: Free PDF
· admin
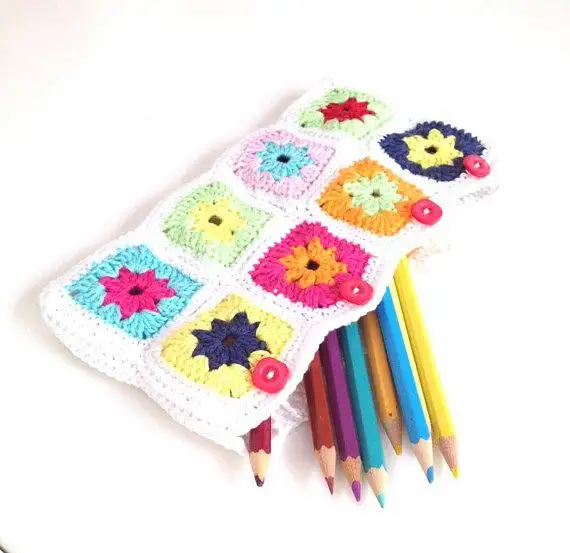
A flower granny-square pencil case is a colorful way to use small amounts of cotton yarn. This Bloom Grid design joins sixteen little motifs into two panels, adds a neat white edge, and closes with four buttons. The finished pouch holds pencils and small stationery, and the free six-page printable pattern keeps every step together.
At a glance: US crochet terms · 2.5 mm hook · 16 flower squares · two panels of 4 x 2 squares · four buttons and matching loops · approximately 20 x 10 cm (8 x 4 in) if each blocked square measures about 5 cm (2 in).
Materials for the pencil case
- Small amounts of sport or fine cotton in five to eight flower colors, plus approximately 50–70 g of white or cream for borders and joins.
- 2.5 mm crochet hook, yarn needle, scissors, four small flat buttons, and optional stitch markers.
Make and block one test square before committing to all sixteen. Your final case will be roughly four square widths long and two square heights tall, less a little for seams. Choose button sizes that stay securely inside the crocheted loops.
US crochet abbreviations
ch = chain; dc = double crochet; sc = single crochet; sl st = slip stitch; sp = space. A 2-dc cluster is two unfinished double crochets worked in the same stitch and closed together. Yarn over and draw up a loop, yarn over and pull through two loops; repeat in the same stitch, then yarn over and pull through all three loops.
Step 1: Crochet sixteen flower squares
Use a center shade (A), petal shade (B), background shade (C), and a consistent white border. Join each round with a slip stitch. Change the flower colors from square to square while keeping the stitch structure the same.
- Round 1 — center: With A, ch 4 and sl st to make a ring. Ch 3 (counts as a dc), work 15 dc into the ring, and join in the top of the ch 3. You have 16 dc. Fasten off A.
- Round 2 — petals: Join B in any dc. Ch 2 (does not count as a stitch), make a 2-dc cluster in the same dc, and ch 1. Work one 2-dc cluster followed by ch 1 in each remaining dc. Join in the first cluster. You have 16 clusters and 16 ch-1 spaces. Fasten off B.
- Round 3 — background: Join C in any ch-1 space. Ch 3 and 2 dc in that space, ch 1. Work (3 dc, ch 1) in each of the other 15 ch-1 spaces. Join in the top of the starting ch 3. You have 16 groups. Fasten off C.
- Round 4 — square border: Join white in any ch-1 space. Work (ch 3, 2 dc, ch 2, 3 dc) in that space for the first corner. Ch 1 and make 3 dc in each of the next three spaces, separating groups with ch 1. Ch 1, then work (3 dc, ch 2, 3 dc) in the next space for the next corner. Repeat around, placing a corner in every fourth space, and join to the first ch 3.
Check that four corners are evenly spaced, with three ordinary spaces between each pair. Block the sixteen squares to matching dimensions so the panel seams line up.
Step 2: Arrange and join the two panels
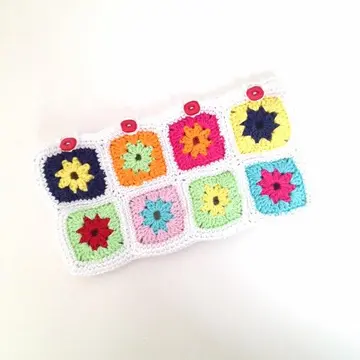
Lay out eight squares for the front in four columns and two rows. Make another arrangement of eight for the back. Move the colors around until the layout feels balanced; a quick photo helps you remember the order while sewing.
With right sides facing, match the edges of two adjacent squares stitch for stitch. Use white yarn and a needle to sew through the outer loops of the facing edge stitches. Join four squares into a horizontal strip, make a second strip, then sew the strips together. Repeat for the back panel. Weave in the short join tails as you go.
With the right side facing, join white at an outside corner and work sc evenly around one panel. At each corner, work (sc, ch 1, sc). Join and work a second matching round. Repeat around the other panel. If an edge pulls or ripples, adjust the sc spacing before fastening off. Both panel perimeters should match.
Step 3: Sew the pouch and add the closure
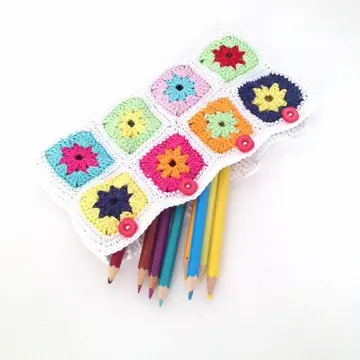
Place the panels together with their right sides facing inward. Pin the matching corners and sew along one short side, across the long bottom, and up the other short side through both loops of the perimeter stitches. Leave the long top edge open. Turn the pouch right side out and gently shape the bottom corners.
Sew one flat button near the center of each of the four top squares on one side. On the opposite top edge, join white yarn across from a button, chain about six or enough to go over it comfortably, skip one or two top-edge sc, and anchor the loop with a sl st. Test the fit before fastening off. Repeat for the other three buttons.
Weave in all ends and lightly block the case, avoiding heat on the buttons. Fasten all four loops and try it with pencils inside. You can add a separately sewn fabric lining if you want a firmer pouch.
Download the free Bloom Grid Pencil Case PDF
The printable six-page guide includes the materials, flower-square rounds, panel layout, joining, edging, button loops, and full-color photos. The photographs show the color arrangement; your stitch texture and size can vary with yarn and tension.
Or visit the free product page for the same direct download without checkout. For more crochet ideas, follow Crochet Pattern Nest on Pinterest.
Leave a Reply