
Easy Half Double Crochet Triangle Bandana: Free Beginner Pattern
· admin
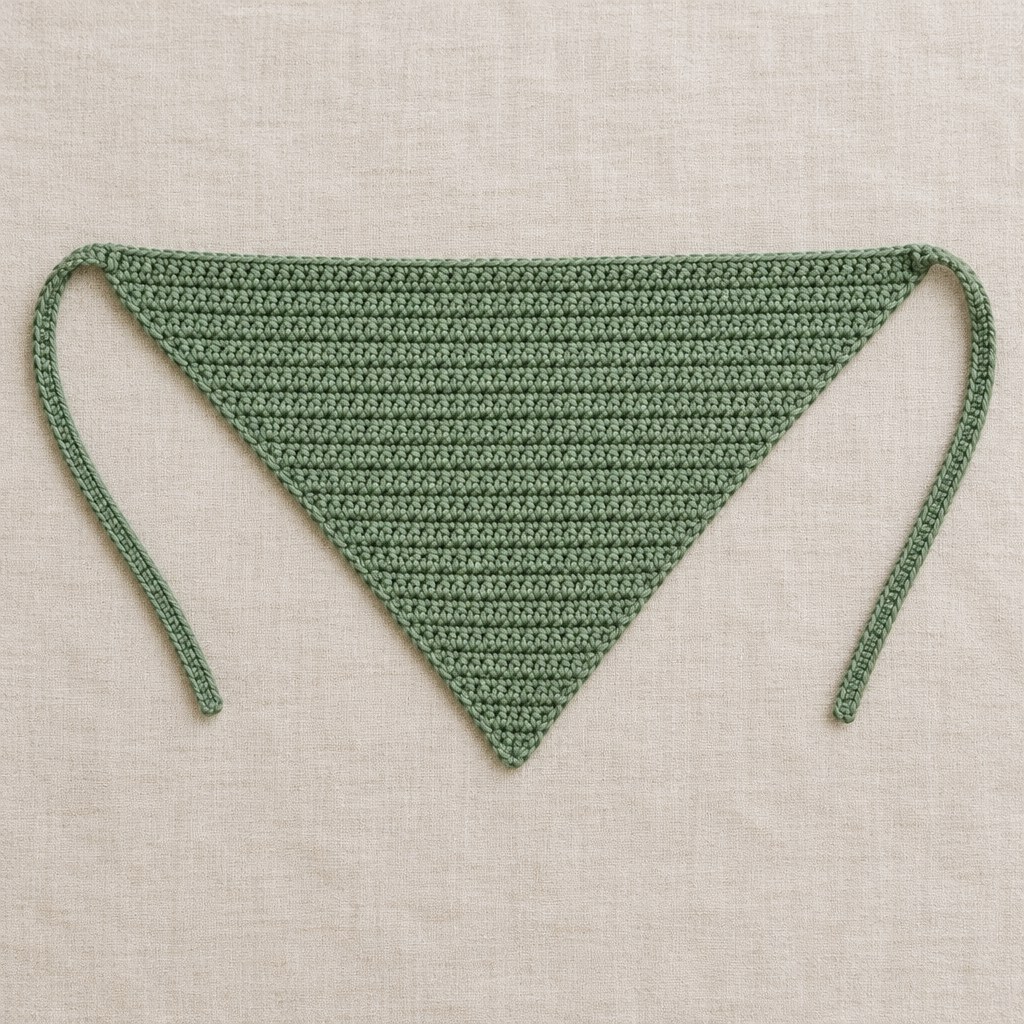
This easy crochet bandana uses just one stitch, the half double crochet, so it is a great first wearable project. You start at the lower point with three stitches and add two stitches every row, which builds a neat triangle with no counting tricks. Add two long ties and you have a soft cotton head scarf for summer days.
At a glance: Beginner level · US crochet terms · DK cotton · 3.5 mm (US E/4) hook · about 46, 53, or 60 cm (18, 21, or 23.5 in) across the top edge.
Materials
- About 150 m (165 yd) of DK weight cotton for a medium bandana. A larger size or longer ties may need a little more.
- 3.5 mm (US E/4) crochet hook, tapestry needle, scissors, and measuring tape.
US crochet abbreviations
ch = chain; hdc = half double crochet; sc = single crochet; sl st = slip stitch; st(s) = stitch(es). The turning ch 2 at the start of each row does not count as a stitch.
Size guide
With a gauge of about 16 hdc per 10 cm (4 in), work until the last row has the number of stitches shown below. Your tension may differ, so measure the top edge and adjust the row count if needed.
- Small, about 46 cm / 18 in: 36 rows (73 hdc)
- Medium, about 53 cm / 21 in: 42 rows (85 hdc)
- Large, about 60 cm / 23.5 in: 48 rows (97 hdc)
Step 1: Start the lower point
Ch 2. Row 1: Work 3 hdc in the 2nd ch from the hook. (3 sts)
Row 2: Ch 2 and turn, work 2 hdc in the first stitch, hdc in the next stitch, and work 2 hdc in the last stitch. (5 sts)
Step 2: Repeat the increase row
For every row after Row 2, ch 2 and turn, work 2 hdc in the first stitch, hdc in each stitch across until one stitch remains, then work 2 hdc in the last stitch. Each row adds 2 stitches, so Row 3 has 7 stitches, Row 4 has 9, and Row n has (2n + 1).
Always work the increases into the first and last real stitches of the row, not into the turning chain. Lay the triangle flat every 8 to 10 rows to check that both sides look the same.
Step 3: Add the ties and top edge
When you reach your target row, do not fasten off. Chain until the tie measures about 35 cm (14 in) without stretching; record the chain count for the second tie. Starting in the 2nd ch from the hook, work sc in each chain back to the corner of the triangle.
Work 1 sc in each hdc across the top edge, beginning in the corner stitch. At the opposite corner, make the same number of chains as for the first tie, work sc back along the chain, sl st into the corner stitch, and fasten off. The sc edge keeps the top from stretching and gives the ties a firm base.
Step 4: Finish and block
Weave in all tails. For an optional edging, join yarn at one top corner and work sc evenly down one sloping side, around the point, and up the other side. Keep the edging loose enough for the triangle to lie flat. Wet-block the cotton by pinning it flat to the measurements above, then let it dry completely. Blocking evens out the hdc rows and makes the triangle drape more softly.
Wearing and styling tips
- Fold the point under and tie the cords at the nape for a classic headscarf look.
- Tie the cords over the point for a more covered, neckerchief-style fit.
- Use stripes or two-row color changes to make the same pattern look new.
- For a wider shape, add a few more rows. For a snug fit, stop a row or two early.
Looking for more designs? Try our collection of 15 granny square crochet bandana patterns. Follow Crochet Pattern Nest on Pinterest for more free crochet ideas.
Leave a Reply