
Easy Crochet Fingerless Gloves Pattern: Free Beginner Tutorial
· admin
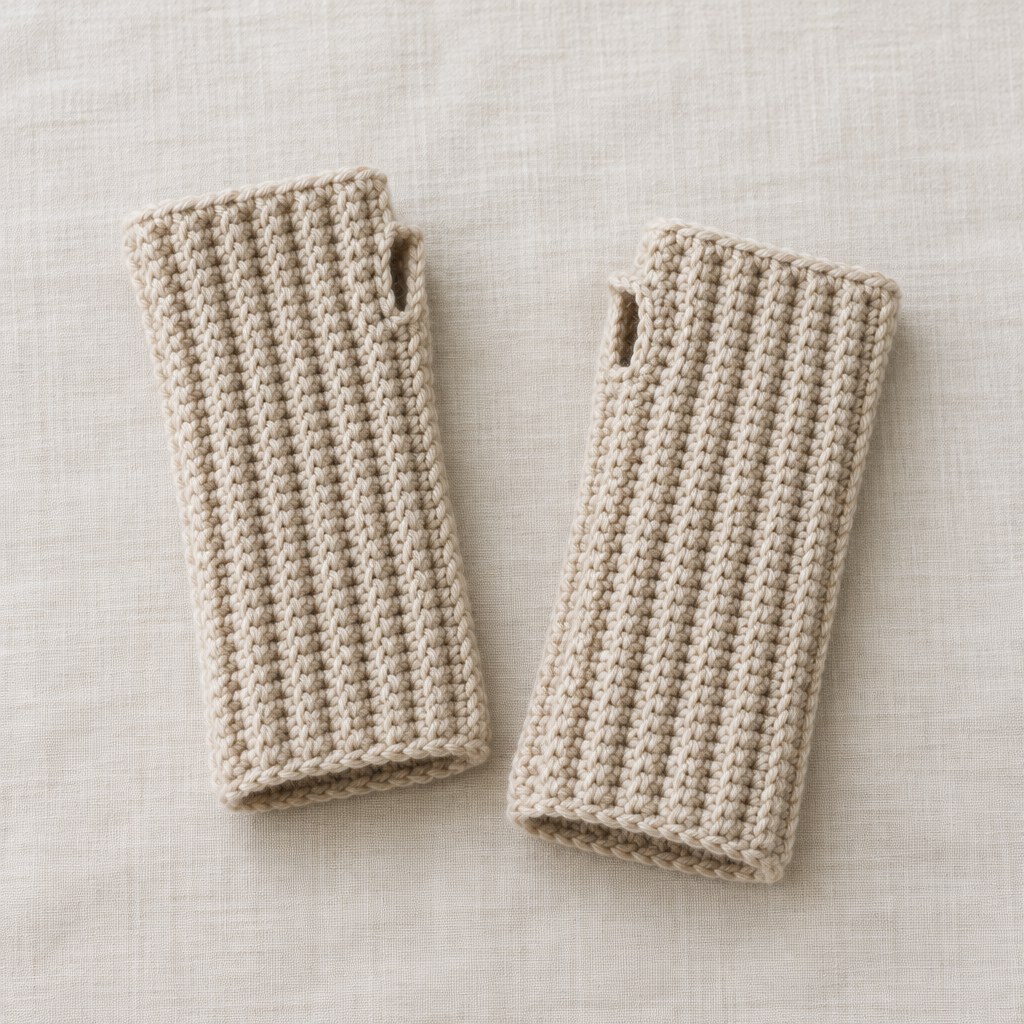
These crochet fingerless gloves are worked as a simple ribbed rectangle, then folded and seamed with a gap left for the thumb. There is no shaping, no working in the round and no complicated thumb gusset, so they make a very good first wearable. They keep your wrists and palms warm while leaving your fingers free for typing, driving, or holding a hook.
At a glance: Beginner level · US crochet terms · worsted weight yarn · 5 mm (US H/8) hook · fits an average adult hand of about 19 to 21 cm (7.5 to 8.25 in) around.
Materials
- About 90 m (100 yd) of worsted weight (4) yarn for a pair.
- 5 mm (US H/8) crochet hook, tapestry needle, scissors, and measuring tape.
US crochet abbreviations
ch = chain; hdc = half double crochet; sc = single crochet; BLO = back loop only; st(s) = stitch(es). The turning ch 2 does not count as a stitch.
Gauge and fit
Twenty hdc across measure roughly 15 cm (6 in) in worsted yarn, and that distance becomes the length of the glove from wrist to knuckles. The rows run around your hand. Ribbed fabric stretches, so aim for a piece that is about 2 cm (3/4 in) smaller than your hand circumference for a snug fit.
Step 1: Make the foundation row
Ch 22. Row 1: Work hdc in the 3rd ch from the hook and in each ch across. (20 hdc)
Step 2: Work the ribbed rows
Row 2 and all following rows: Ch 2 and turn. Work hdc in the back loop only of each stitch across. (20 sts)
Continue until the rectangle fits around your hand just below the knuckles with a slight stretch. For a hand measuring 19 to 21 cm around, start by aiming for 17 to 19 cm (6.75 to 7.5 in) of unstretched fabric. Row count depends on your gauge. Wrap the piece around your hand before you fasten off. Leave a tail of about 50 cm (20 in) for seaming.
Step 3: Seam the glove and leave a thumb gap
Hold the first row and the last row together with right sides facing out, so the ridges show on the outside. Thread the long tail onto a tapestry needle and use a whipstitch or mattress stitch along the 20-stitch edge:
- Starting at the wrist end, seam the first 11 stitches, about 8 cm (3.25 in).
- Leave the next 5 stitches open for the thumb, about 4 cm (1.5 in).
- Seam the final 4 stitches toward the knuckle edge, about 3 cm (1.25 in).
Pin the seam and try the glove on first. Move or resize the thumb gap to suit your hand; the opening should sit near the upper end, with most of the seam below it.
Reinforce both ends of the thumb opening with a couple of extra stitches so the seam does not pull apart when you put the glove on.
Step 4: Make the second glove
Work the second glove exactly the same way. The pattern is symmetrical, so there is no left or right glove. Weave in all tails and try both on before you trim them.
Variations
- Stripe the rows in two colors, changing every 2 rows.
- Add a row of sc around the thumb opening for a smoother edge.
- Make them longer by using a longer foundation chain, adding 1 chain for every extra stitch.
- For smaller hands, measure wrist-to-knuckle length and hand circumference, then adjust the foundation and number of rows. Reposition the thumb opening before seaming.
Pair them with a matching winter crochet scarf. Follow Crochet Pattern Nest on Pinterest for more free crochet ideas.
Leave a Reply