
Crochet Dripping Halloween Pumpkin Pattern with a Skull Face
· admin
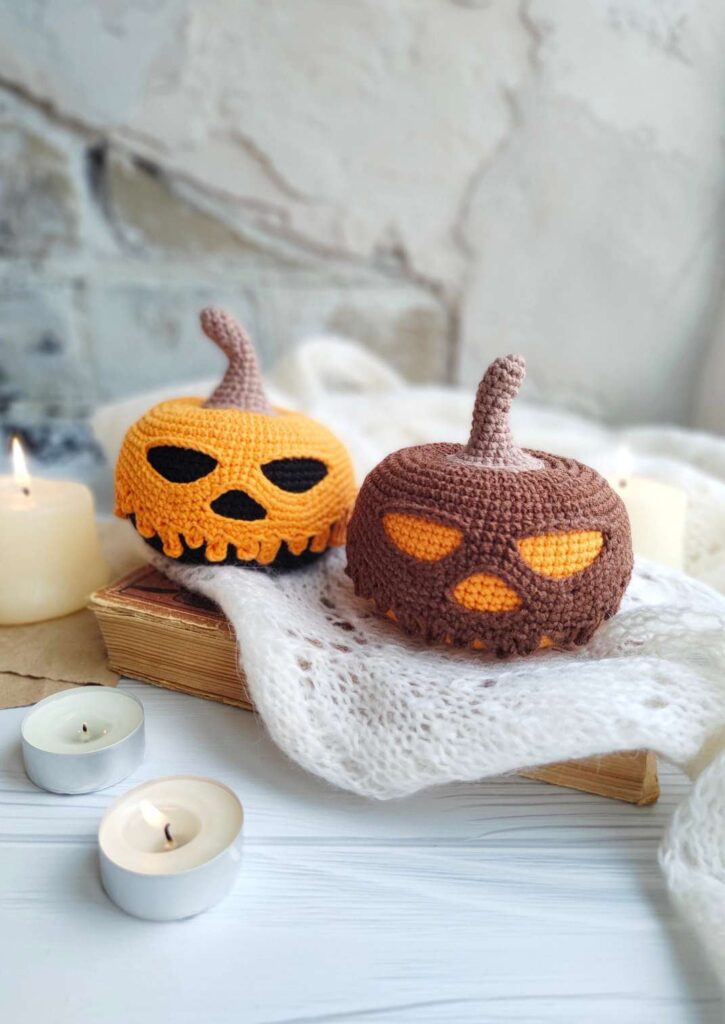
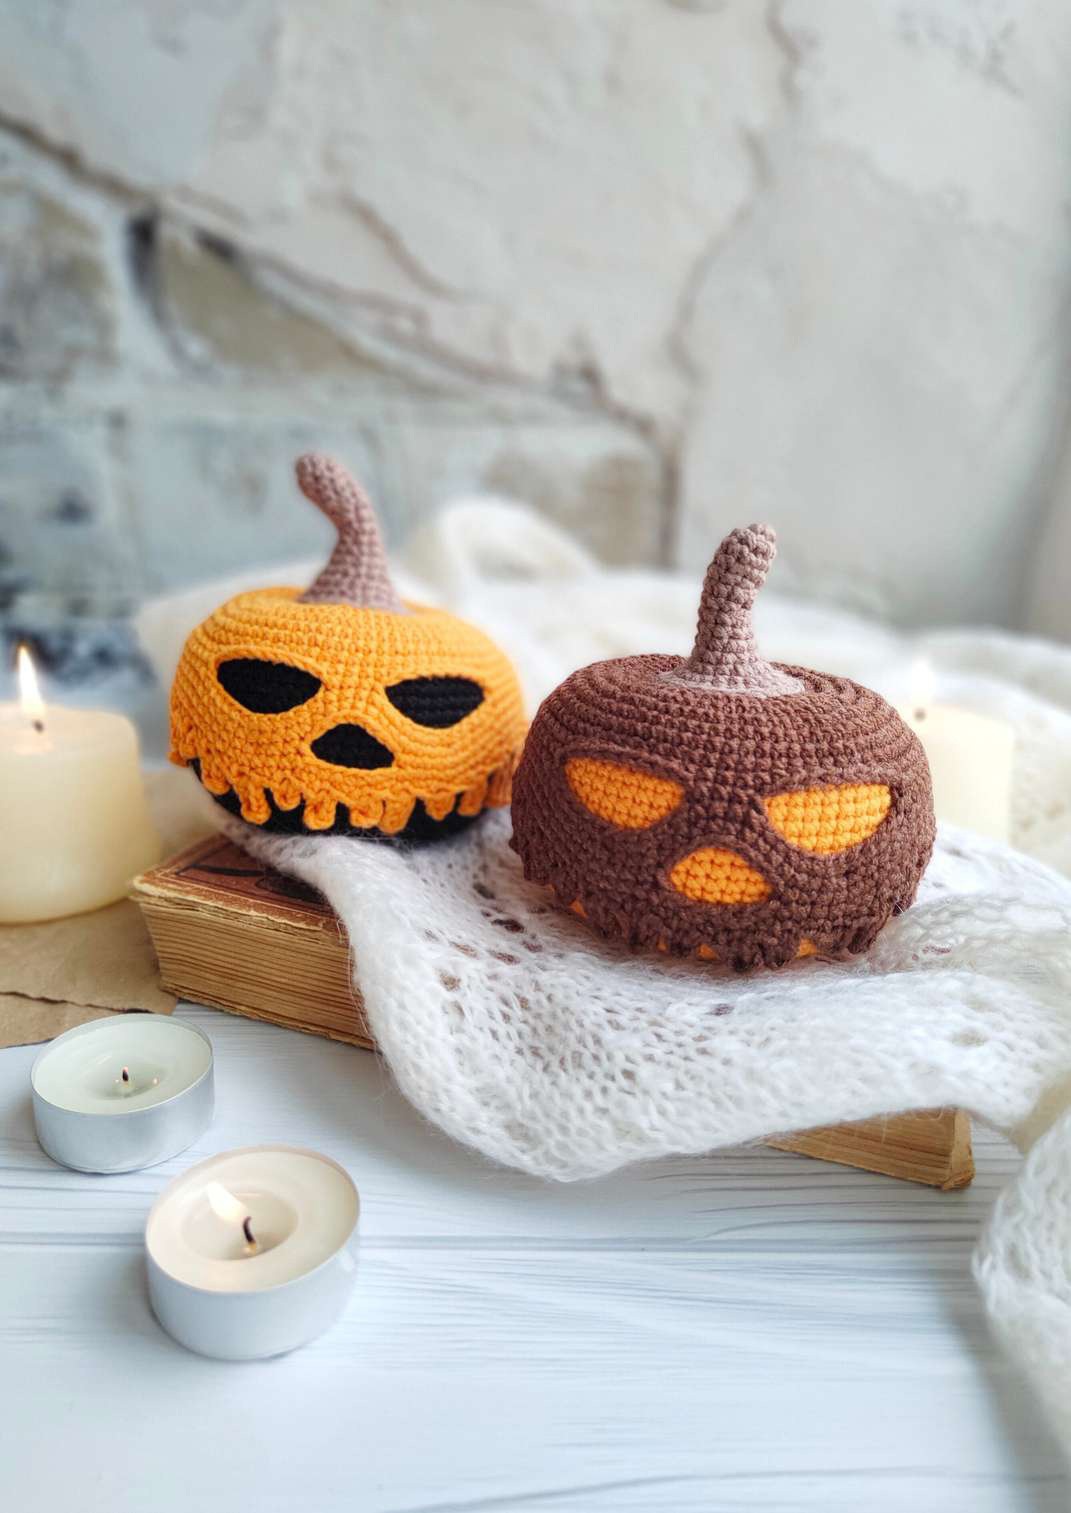
This Halloween pumpkin uses two crocheted layers: a stuffed inner body and a contrasting outer face with chain openings for the eyes and nose. An irregular dripping edge hangs down over the body, while a curved stalk finishes the top. Reversing orange and brown produces the two color variations shown in the source.
Project at a glance
| Detail | What to expect |
|---|---|
| Skill level | Intermediate |
| Finished size | About 10 cm / 3.94 inches tall with the recommended yarn |
| Pattern language | English; stitch terms explained below |
| Construction | See the component and assembly sections |
Materials and tools
- Sport/4-ply YarnArt Jeans, 50 g / 160 m
- Orange and brown for the two pumpkin layers; light brown for the stalk
- 1.75 mm hook
- Fiberfill, marker, pins, tapestry needle and scissors
Stitches and pattern notes
Unless stated otherwise, this article uses US crochet terms. ch = chain; sl st = slip stitch; sc = single crochet; hdc = half double crochet; dc = double crochet; inc = 2 stitches in one stitch; dec = work 2 stitches together; MR = magic ring; BLO/FLO = back/front loop only. Numbers in the final column are the finished stitch counts.
Use US terms and continuous rounds for the main body. The first section is brown, changing to orange at a BLO boundary. The later face overlay is attached to the front loops left at that boundary. Keep the body and overlay counts separate; the eyes are formed by chain bridges, not by removing stuffing or cutting the inner layer.
Make the stuffed pumpkin body
Inner body
| Round / row | Instructions | Count |
|---|---|---|
| 1 | In brown, 8 sc in MR. | 8 |
| 2 | 8 inc. | 16 |
| 3 | (sc, inc) × 8. | 24 |
| 4 | Sc, inc, (2 sc, inc) × 7, sc. | 32 |
| 5 | (3 sc, inc) × 8. | 40 |
| 6 | 2 sc, inc, (4 sc, inc) × 7, 2 sc. | 48 |
| 7 | (5 sc, inc) × 8. | 56 |
| 8 | 3 sc, inc, (6 sc, inc) × 7, 3 sc. | 64 |
| 9 | (7 sc, inc) × 8. | 72 |
| 10–12 | Sc around. | 72 |
| 13 | Change to orange; BLO sc around. | 72 |
| 14–27 | Sc around for 14 rounds. | 72 |
| 28 | (7 sc, dec) × 8. | 64 |
| 29 | 3 sc, dec, (6 sc, dec) × 7, 3 sc. | 56 |
| 30 | (5 sc, dec) × 8. | 48 |
| 31 | 2 sc, dec, (4 sc, dec) × 7, 2 sc. | 40 |
| 32 | (3 sc, dec) × 8; add filling. | 32 |
| 33 | Sc, dec, (2 sc, dec) × 7, sc. | 24 |
| 34 | (sc, dec) × 8. | 16 |
| 35 | 8 dec; leave a long sculpting tail. | 8 |
Distribute filling outward from the center so the pumpkin is round and supported. Draw the long tail through the center from the closing opening to the opposite base and back. Tighten gently and repeat to bring the two centers closer. Secure the resulting shallow indentation without pulling the body into a hard flat disc.
Crochet the skull-face overlay
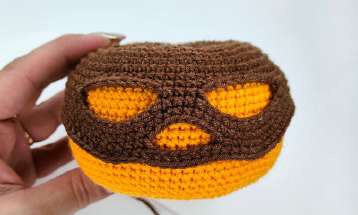
Turn the brown crown upward. Rejoin brown to the reserved front loops at the Round 12/13 boundary, keeping the hook directed downward as in the source photo. Start the new overlay count at Round 1.
Face layer in brown
| Round / row | Instructions | Count |
|---|---|---|
| 1 | Sc in each of the 72 reserved front loops. | 72 |
| 2 | 26 sc, ch 12, skip 8, 4 sc, ch 12, skip 8, 26 sc. | 80 positions |
| 3 | 26 sc, 12 sc across first chain bridge, 4 sc, 12 sc across second bridge, 26 sc. | 80 |
| 4 | Sc around. | 80 |
| 5 | 37 sc, ch 7, skip 8, 35 sc. | 79 positions |
| 6 | 37 sc, 7 sc across chain bridge, 35 sc. | 79 |
The two chain-12 bridges create eyes; replacing eight positions with twelve expands the overlay by four stitches at each eye. The chain-7 bridge replaces eight stitches at the nose, reducing the next round by one. Check those counts before starting the dripping border. The contrasting inner body should show clearly through all three openings.
Create the dripping edge
Keep the yarn attached. Chain 5, work 4 hdc back from the second chain, slip stitch into the next overlay stitch and work 2 sc along the edge. For the next drip, chain 6 and work 5 hdc back, attach with a slip stitch into the next overlay stitch and work 2 sc. Continue around with chains ranging from 3–7, working one fewer hdc than the chain length. This irregular length sequence is intentional; the source does not prescribe a fixed repeat around all 79 positions.
Stop when the edge is complete, leave a long sewing tail and pin the eyes, nose and drips against the inner pumpkin. Sew them discreetly so the skull openings stay shaped. Do not sew across the openings themselves. Check the front view before pulling each attachment tight.
Curved stalk in light brown
| Round / row | Instructions | Count |
|---|---|---|
| 1 | 6 sc in MR. | 6 |
| 2 | (sc, inc) × 3. | 9 |
| 3–6 | Sc around. | 9 |
| 7 | 4 sl st, 5 sc. | 9 |
| 8 | Sc around. | 9 |
| 9 | 4 sl st, 5 sc. | 9 |
| 10 | Sc around. | 9 |
| 11 | (2 sc, inc) × 3. | 12 |
| 12 | Sc around. | 12 |
| 13 | (sc, inc) × 6. | 18 |
| 14 | Sc around. | 18 |
| 15 | (2 sc, inc) × 6. | 24 |
| 16 | Sc around; leave a sewing tail. | 24 |
Final assembly and color variations
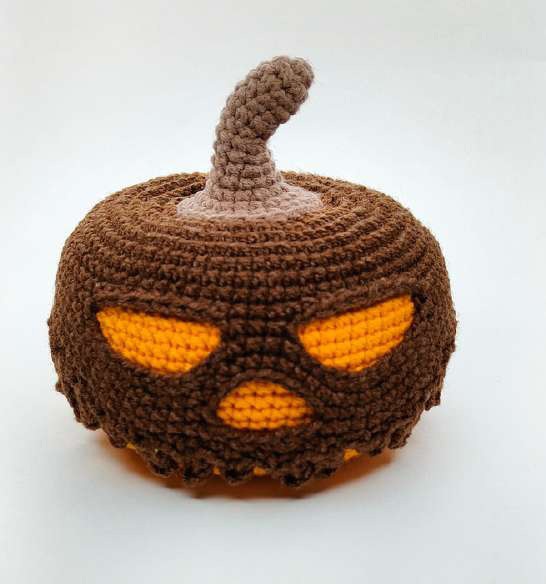
Fill the stalk lightly and sew its flared base to the pumpkin’s central indentation. Check that its curve points in the direction you prefer before completing the seam. Hide all ends inside the filling. For the reversed version, swap the orange and brown inner-body and face colors while keeping the light brown stalk; the construction and stitch counts stay unchanged.
Tips for a neat finish
- Mark the reserved front-loop boundary before the body grows too large.
- Count chain bridges as stitches on the following round.
- Pin all face openings before sewing the first one in place.
- Vary drip lengths gradually so they remain distinct rather than forming a dense fringe.
Frequently asked questions
Are the eyes separate appliqués?
No. They are openings formed by chain bridges in the contrasting outer layer.
Why does the overlay reach 80 stitches?
Each eye replaces eight old stitches with twelve chains, adding four positions twice.
Can I reverse the colors?
Yes. The source shows both a dark overlay on orange and an orange overlay on a dark body.
More Halloween crochet ideas
Build a coordinated seasonal display with our Halloween crochet collection. For another small project, explore the crochet ghost tutorial or browse these Halloween coaster ideas.
Pattern source and credit
This article is based on Pumpkin Halloween.pdf. Designer not named in the readable source text. The project photographs come from that source and show its original samples. The text has been organized into an article with additional explanations; any editorial clarification is identified where it matters. This is a document-based adaptation, without a claim that we physically tested the finished project.
Open the original pattern reference for the source photographs and original layout.
Leave a Reply