
Crochet Carnation Flower Pattern: Step-by-Step Tutorial
· admin
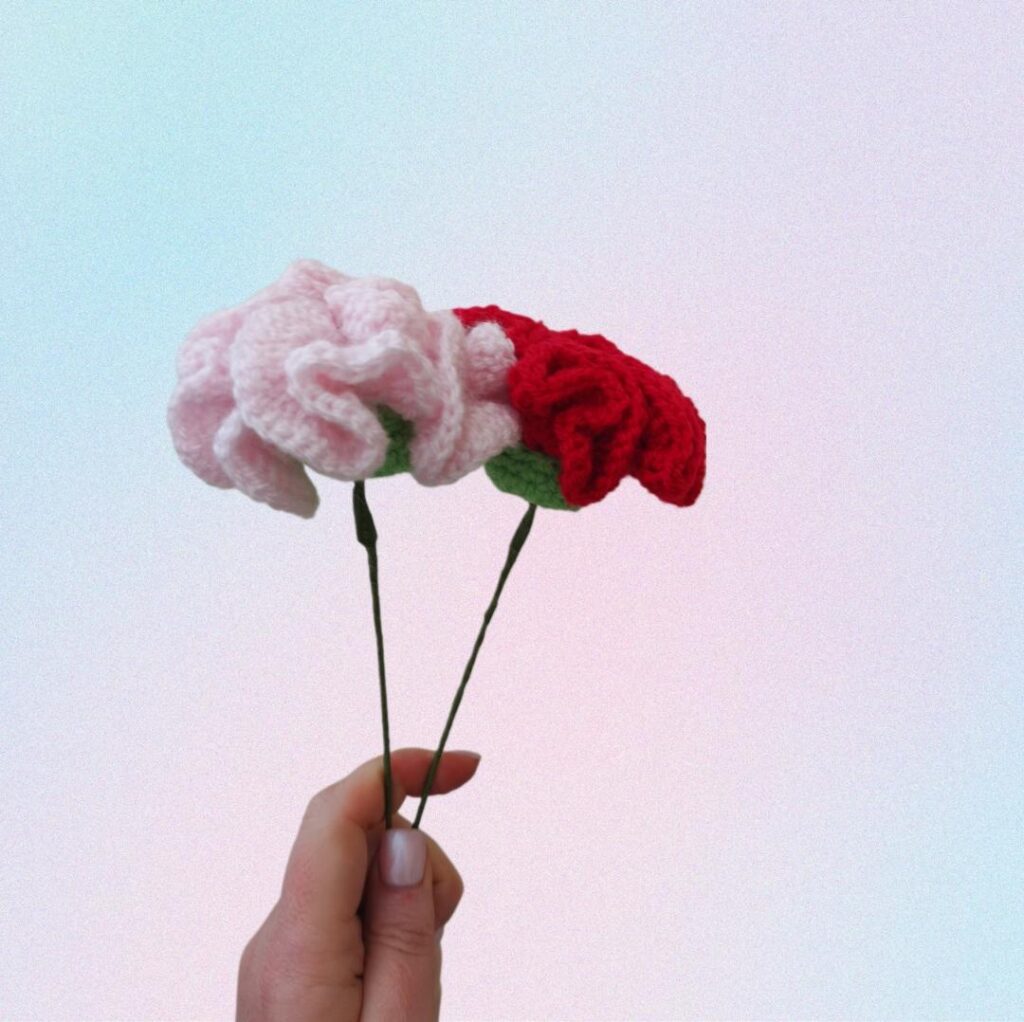
This crochet carnation flower pattern creates a soft, ruffled bloom for a handmade bouquet. Its flower head grows from a small circular center into layers of closely packed petals, while a green base and wire stem give the bloom its finished shape.
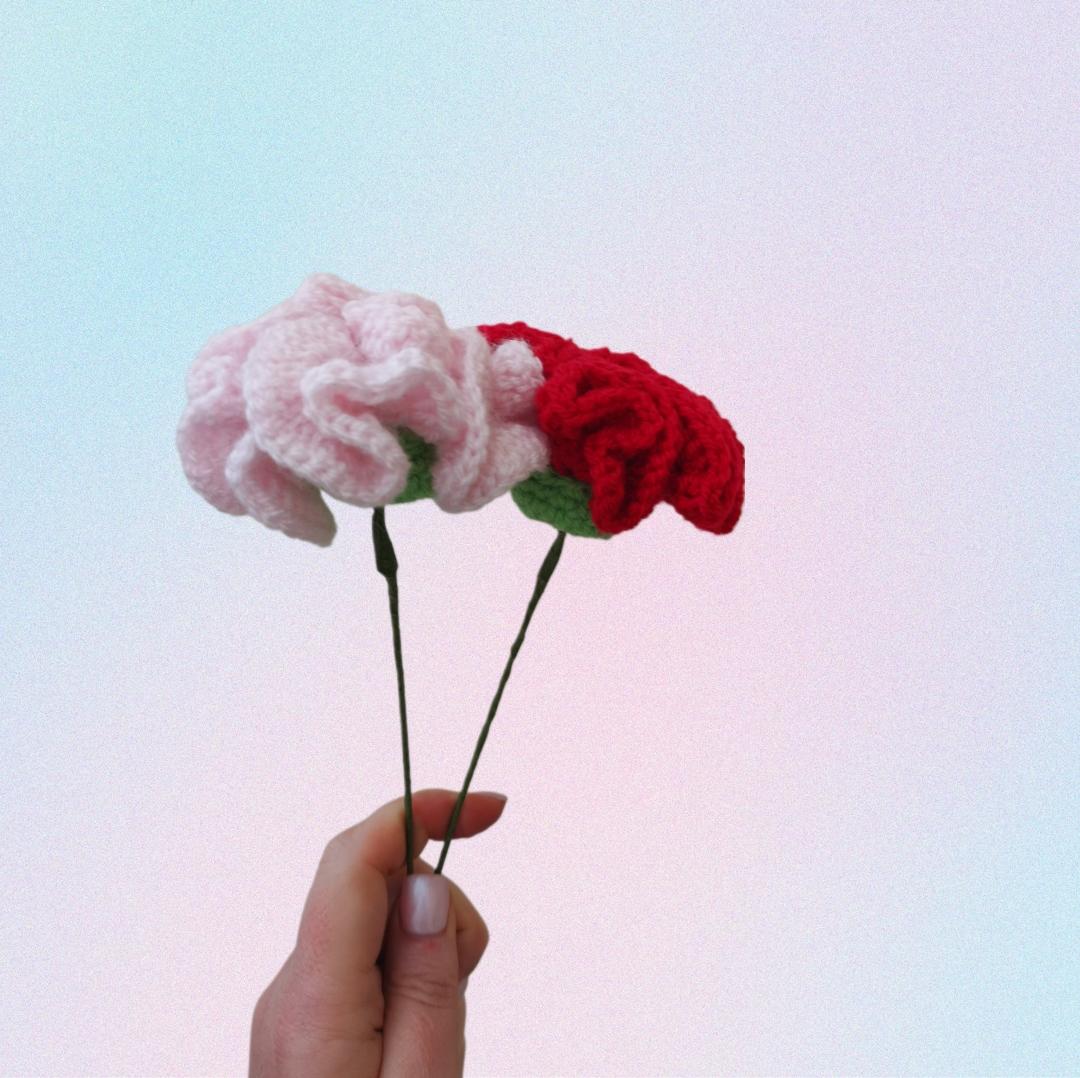
This article adapts Carnation Flower by Kat Witherall of Luna Crochet Designs. The original pattern uses US crochet terms and is intended for confident beginners. You will work a green base, add the ruffled flower head, and assemble the two around a floral wire stem.
Materials · Abbreviations · Green base · Petals · Assembly
Materials for the Crochet Carnation Flower Pattern
- A 3.5 mm crochet hook.
- DK yarn, size 3: approximately 10 g in your chosen flower color and a small amount of green.
- A yarn needle and scissors.
- Floral wire for the stem.
- Florist tape, optional.
- A stitch marker, useful for the green base.
The designer allows other yarn weights with a suitable hook. Changing the yarn and hook will change the size and texture of the flower. The source does not give a finished flower diameter or stem length, so those measurements are not specified here.
US crochet abbreviations
| Abbreviation | Meaning |
|---|---|
| ch | Chain |
| sl st | Slip stitch |
| sc | Single crochet |
| dc | Double crochet |
| inc | Increase: work 2 single crochets into the same stitch for the green base |
| FLO | Front loop only |
| BLO | Back loop only |
| st(s) | Stitch(es) |
Before starting, be comfortable with a magic ring, single and double crochet, and identifying the front and back loops of a stitch. There is no numerical gauge requirement in the source. The designer recommends tight stitches without gaps and suggests a smaller hook if needed.
Part 1: Crochet the green flower base
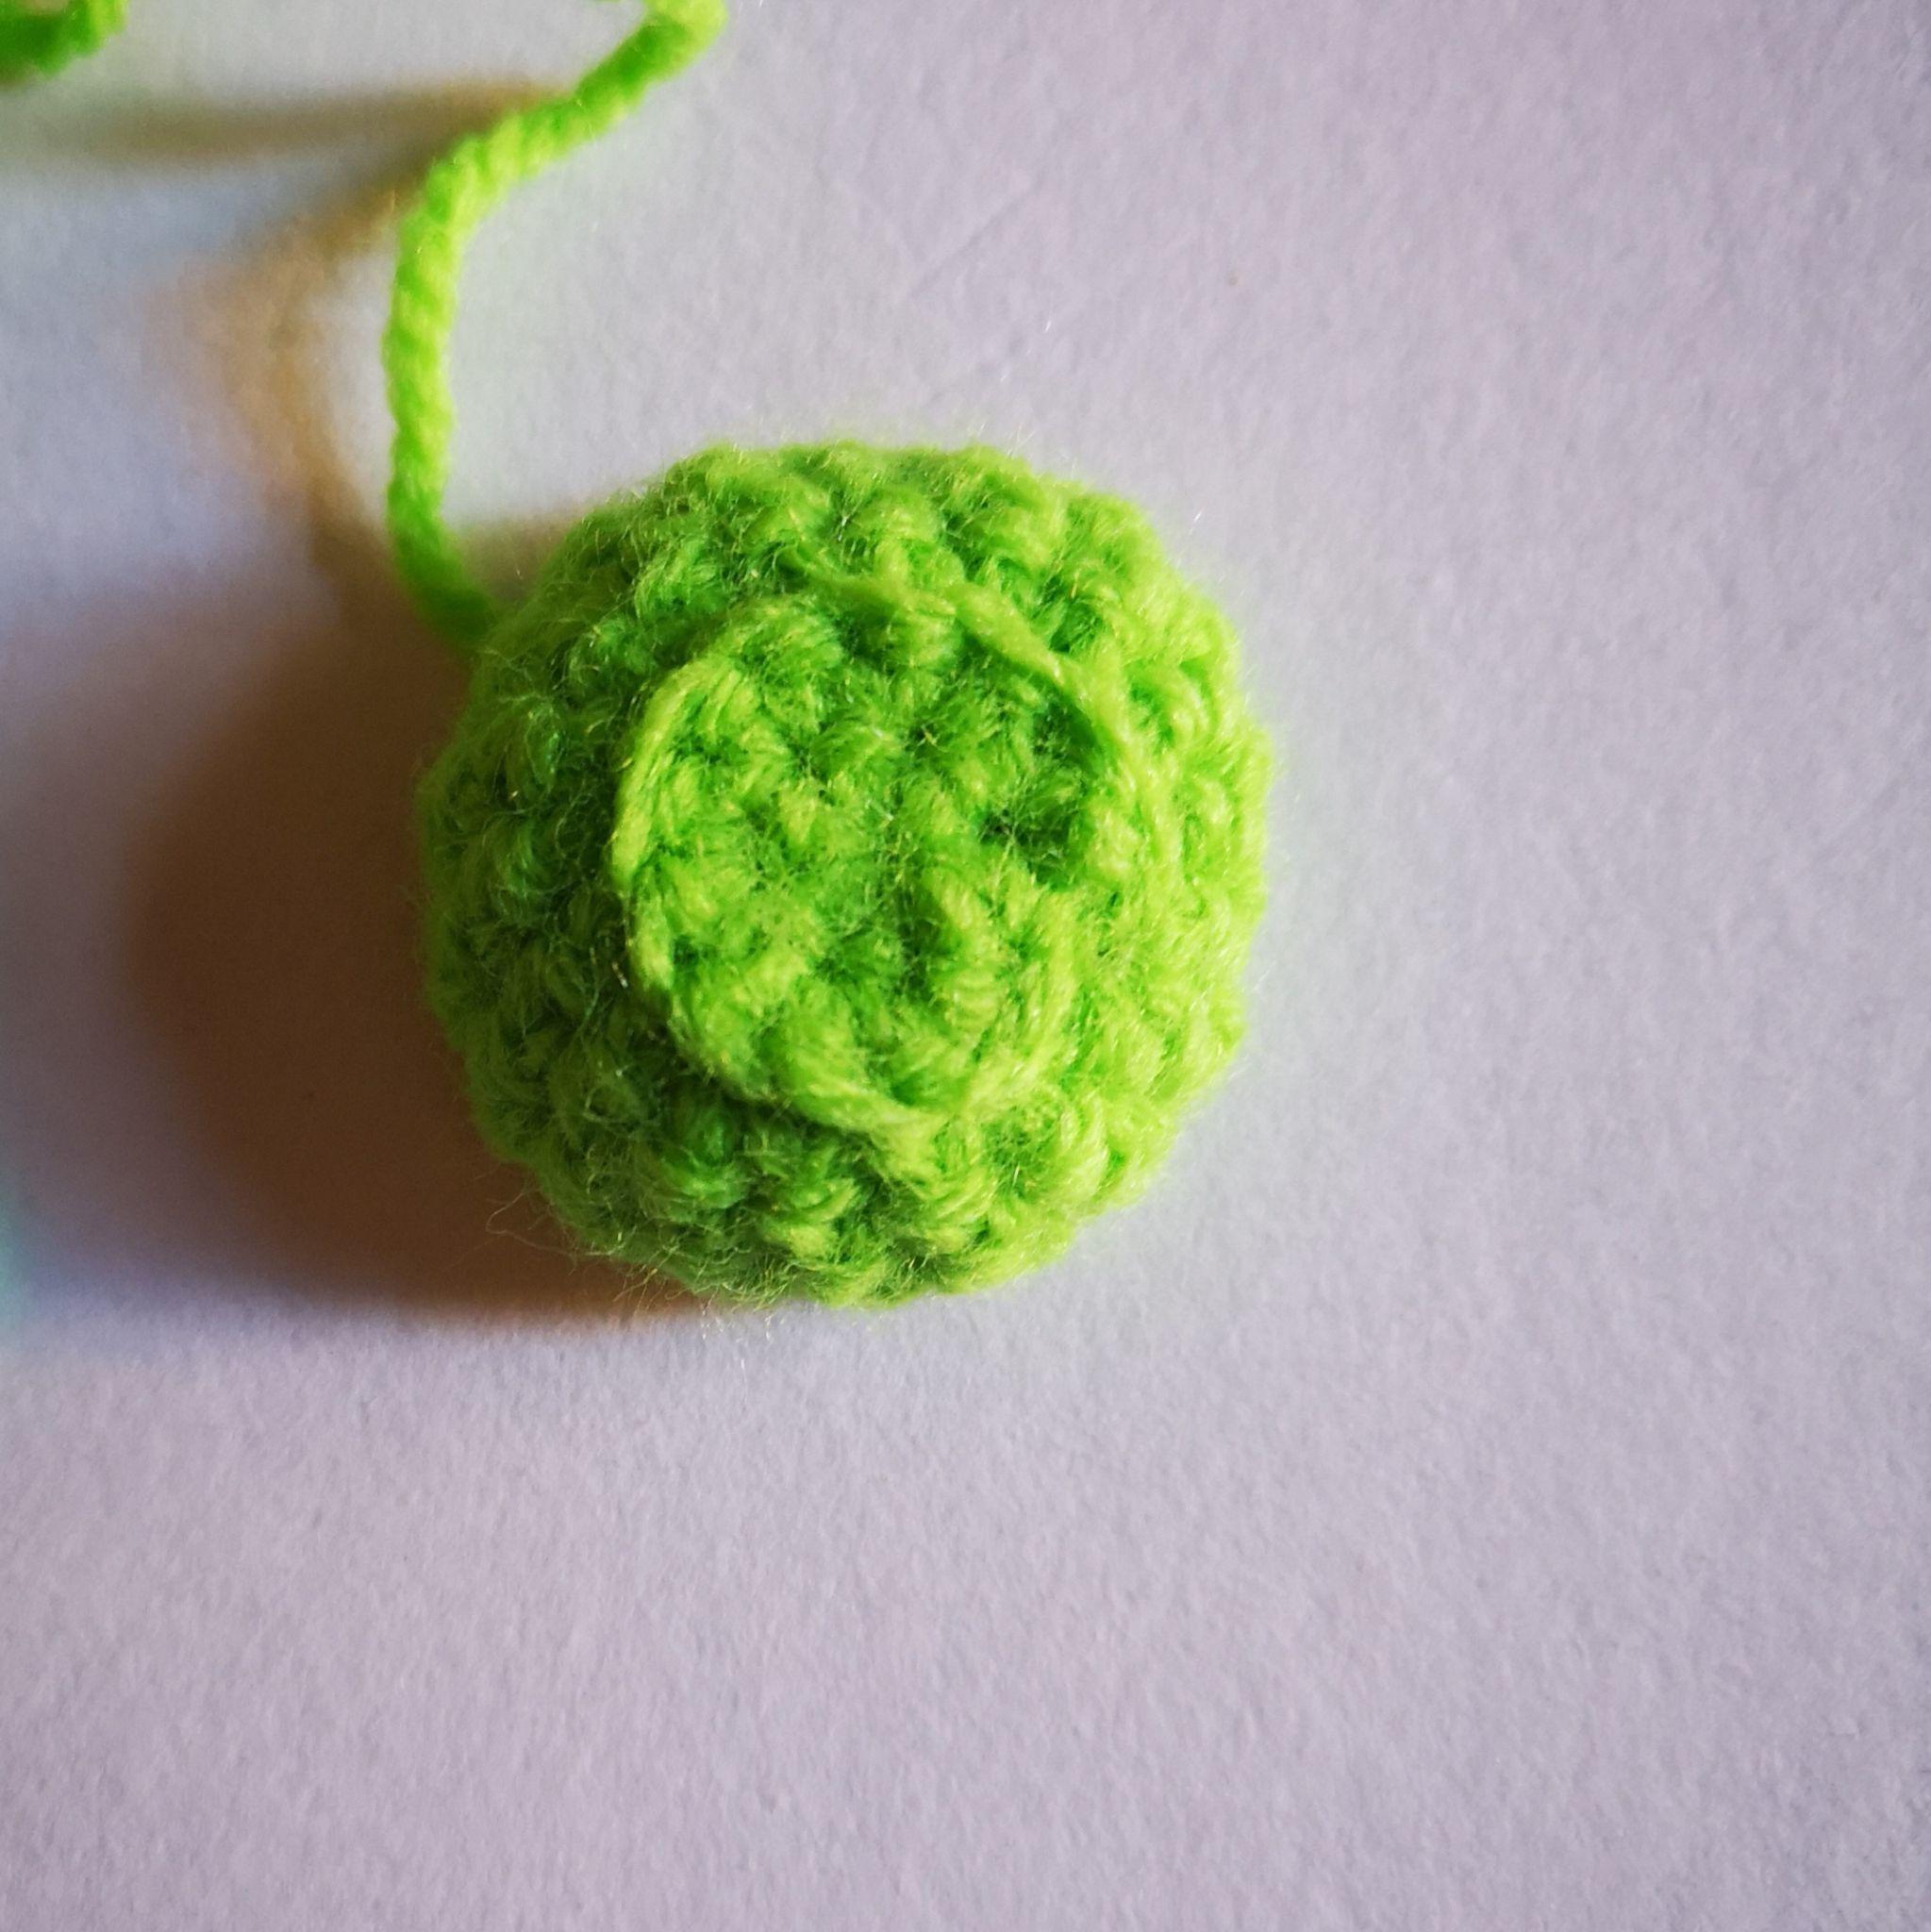
Begin with green yarn and a magic ring. Work this section in continuous rounds. Mark the first stitch and move the marker as you complete each round.
| Round | Instructions | Stitches |
|---|---|---|
| 1 | Work 6 sc into the magic ring. | 6 |
| 2 | Work an increase in each stitch, 6 times. | 12 |
| 3 | Working in the front loops only, repeat: 1 sc in the next stitch, increase in the following stitch. Work this repeat 6 times. | 18 |
| 4–6 | Work 1 sc in each stitch for all 3 rounds. | 18 each round |
Fasten off and leave a tail for assembly. Leave the green base unturned for now: you still need access to the unused back loops of the stitches worked into during Round 3.
There are 12 reserved back loops around that earlier round. The increases in Round 3 create 18 new stitches, but they do not create 18 reserved loops. The flower head begins in those 12 unused loops.
Part 2: Add the ruffled carnation petals
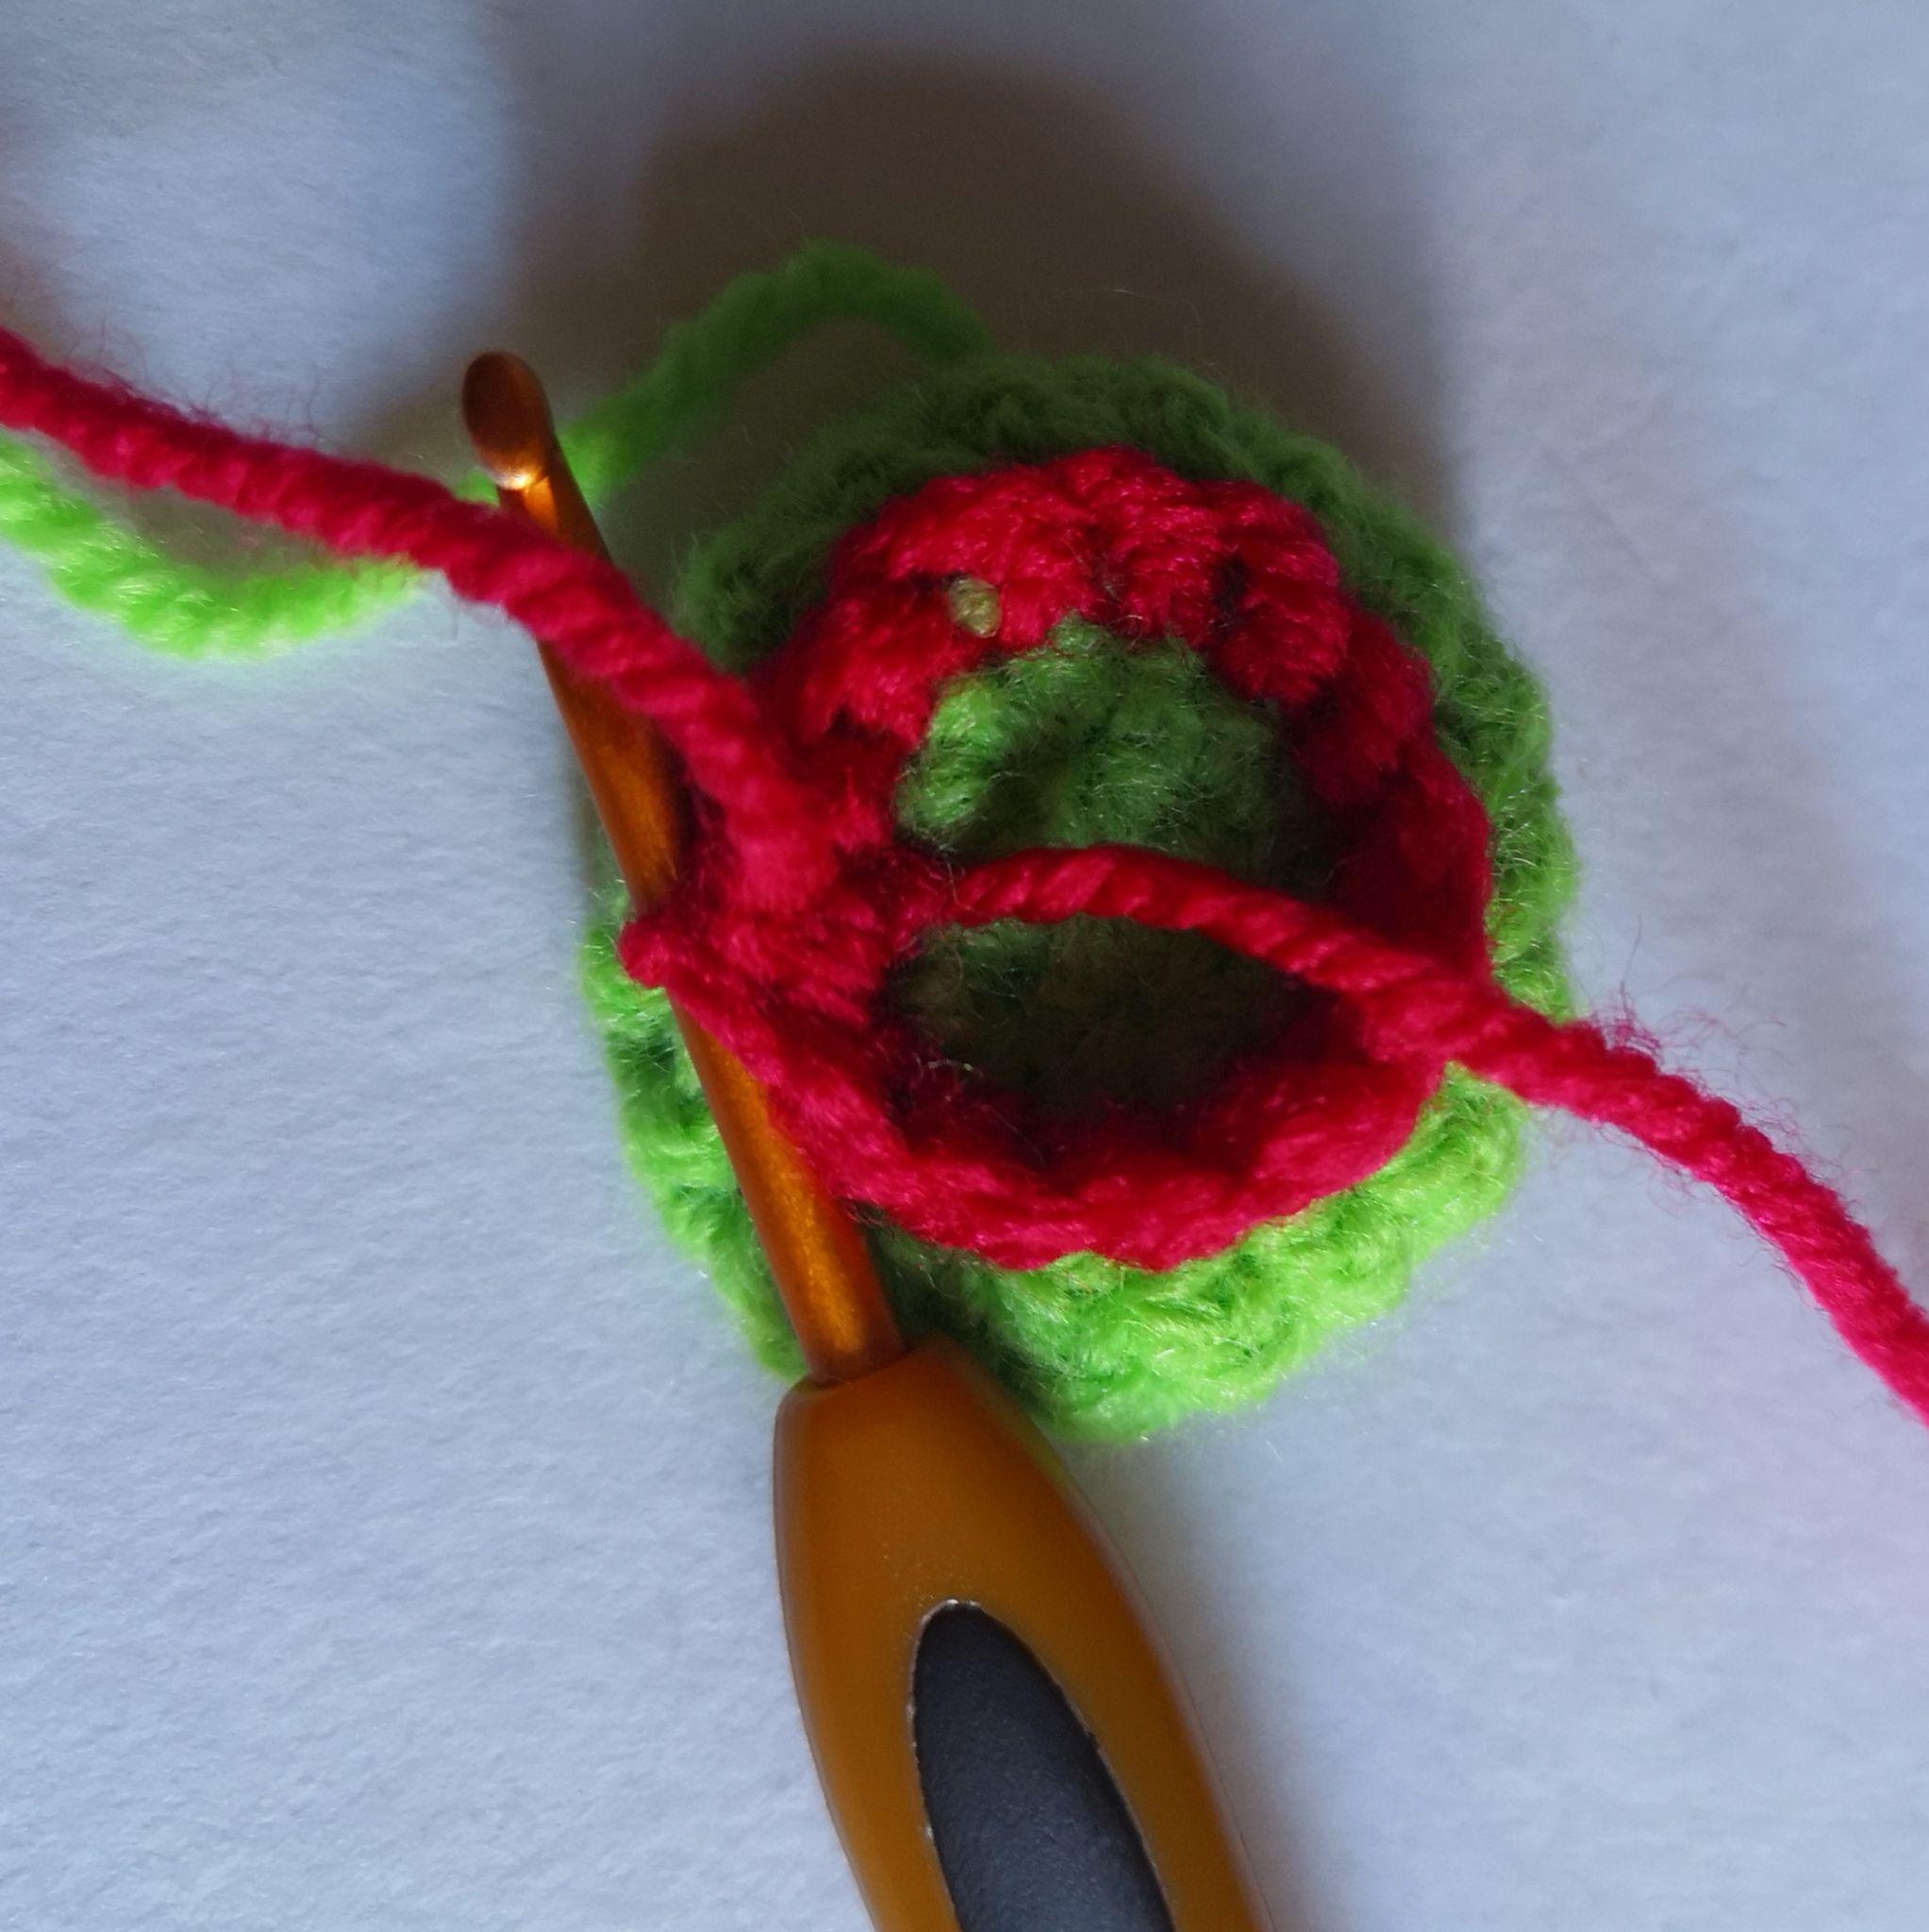
Join your flower-color yarn to one of the reserved back loops. The petal section uses joined rounds. Beginning chains do not count as stitches.
| Round | Instructions | Stitches |
|---|---|---|
| 1 | Ch 1. Work 1 sc into each of the 12 reserved back loops. Join with a sl st to the beginning ch-1, as directed in the source. | 12 |
| 2 | Ch 2. Work 1 dc into each stitch. Join with a sl st to the top of the first dc. | 12 |
| 3 | Ch 2. Work 3 dc into every stitch. Join to the first dc. | 36 |
| 4 | Ch 2. Work 3 dc into every stitch. Join to the first dc. | 108 |
| 5 | Ch 2. Work 3 dc into every stitch. Join to the first dc. | 324 |
Fasten off, leaving a long tail for sewing. Weave in the starting tail if it was not worked over.
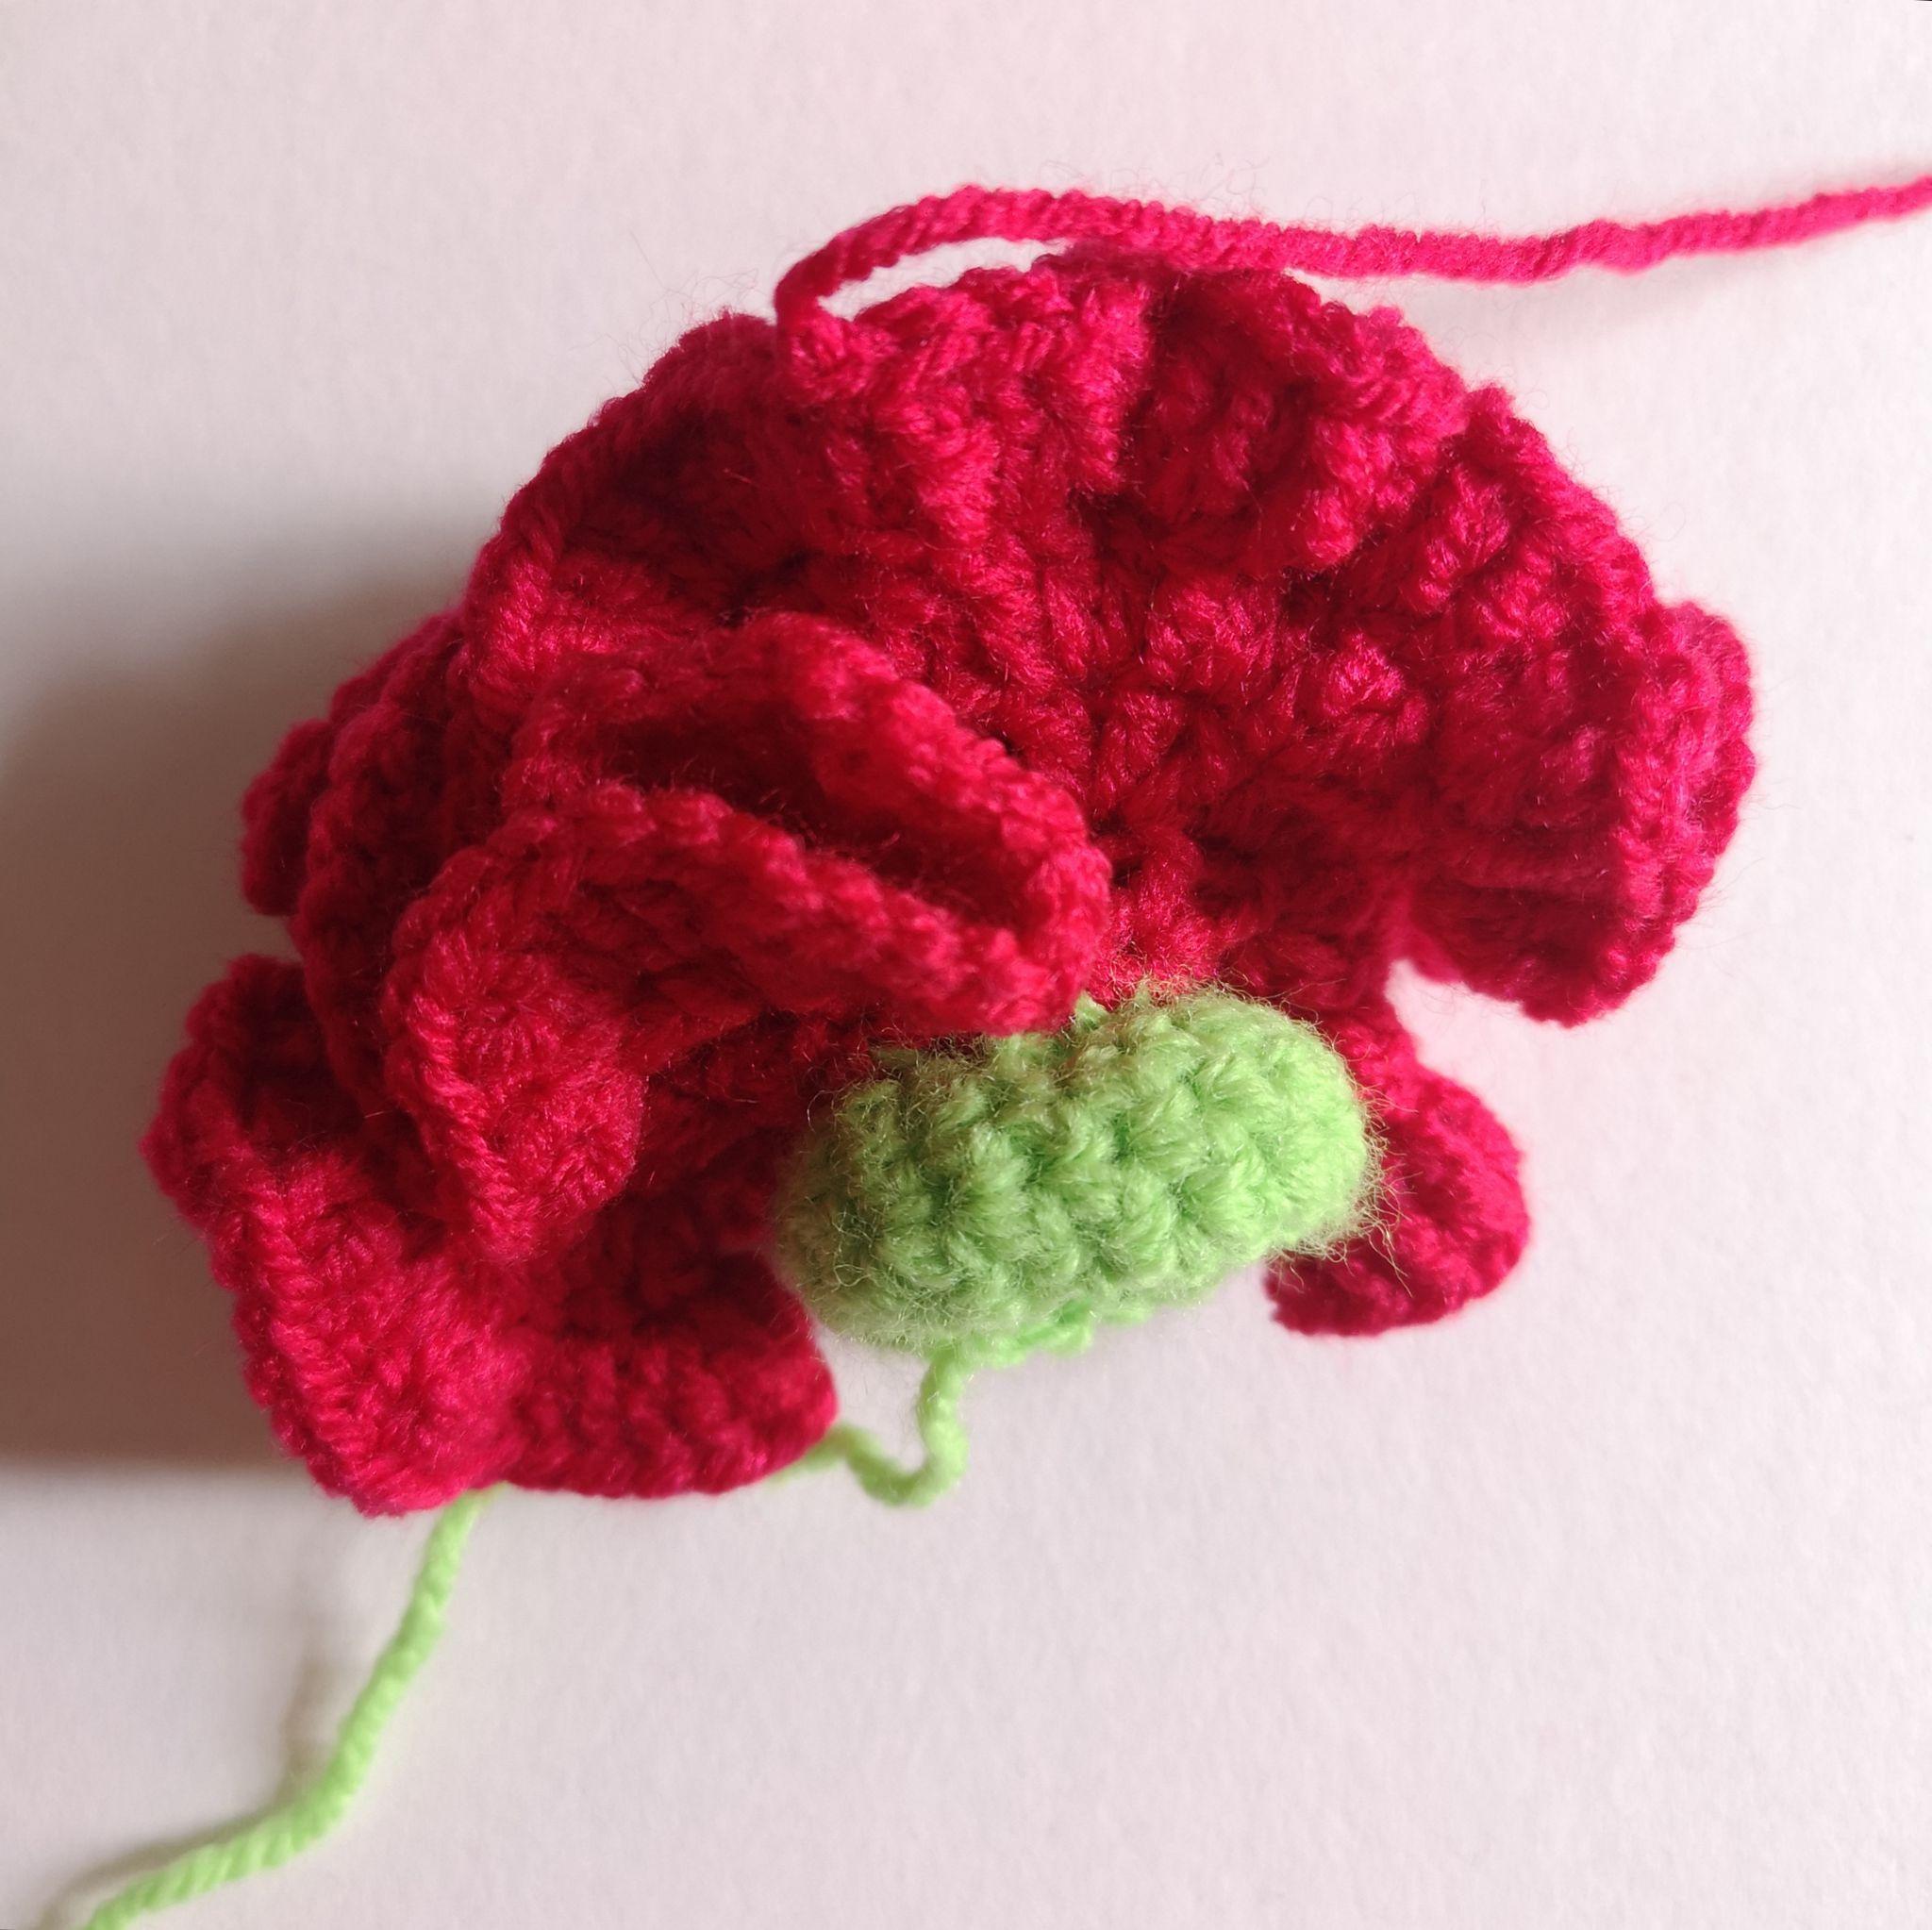
Part 3: Shape and assemble the flower
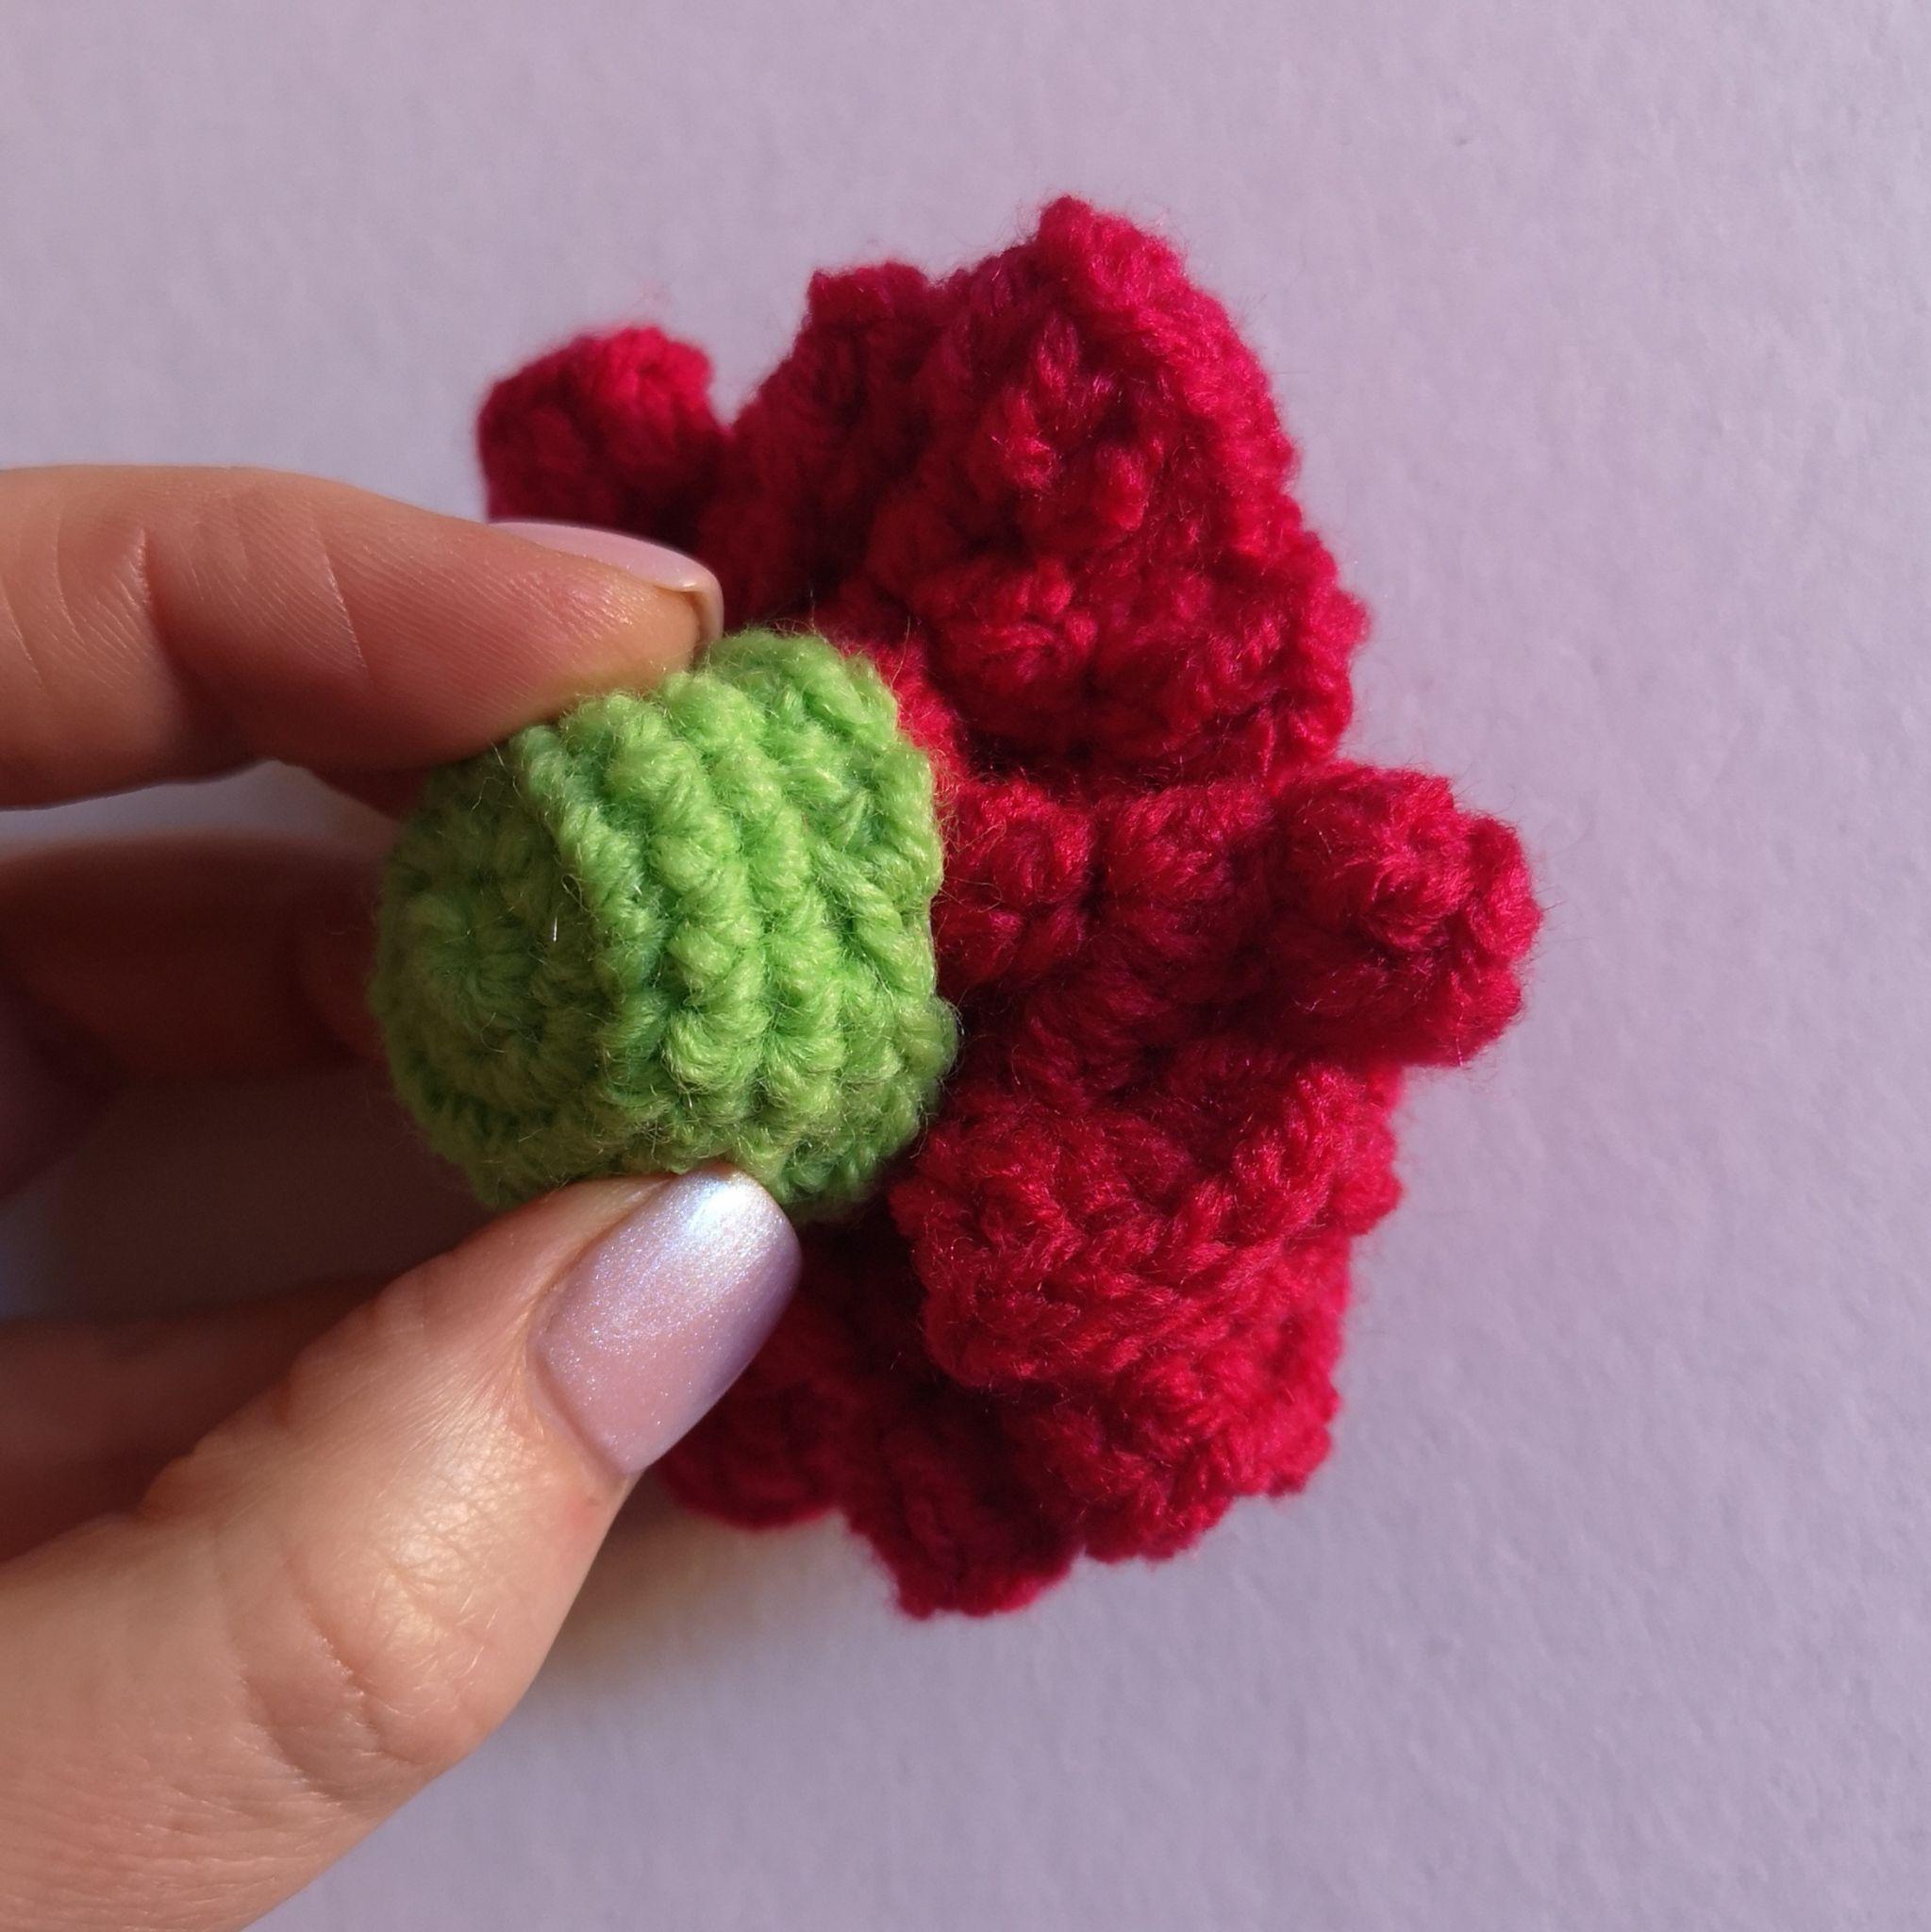
- Gather the center. Thread the flower-color tail onto a yarn needle. Make a few stitches through the middle of the flower head to hold the ruffles together. Gather them more firmly for a compact bloom or leave them looser for a more open shape.
- Turn the green base. Turn it right side out so it covers the underside of the petals and forms the green base of the bloom. Secure it around the flower head with a few stitches.
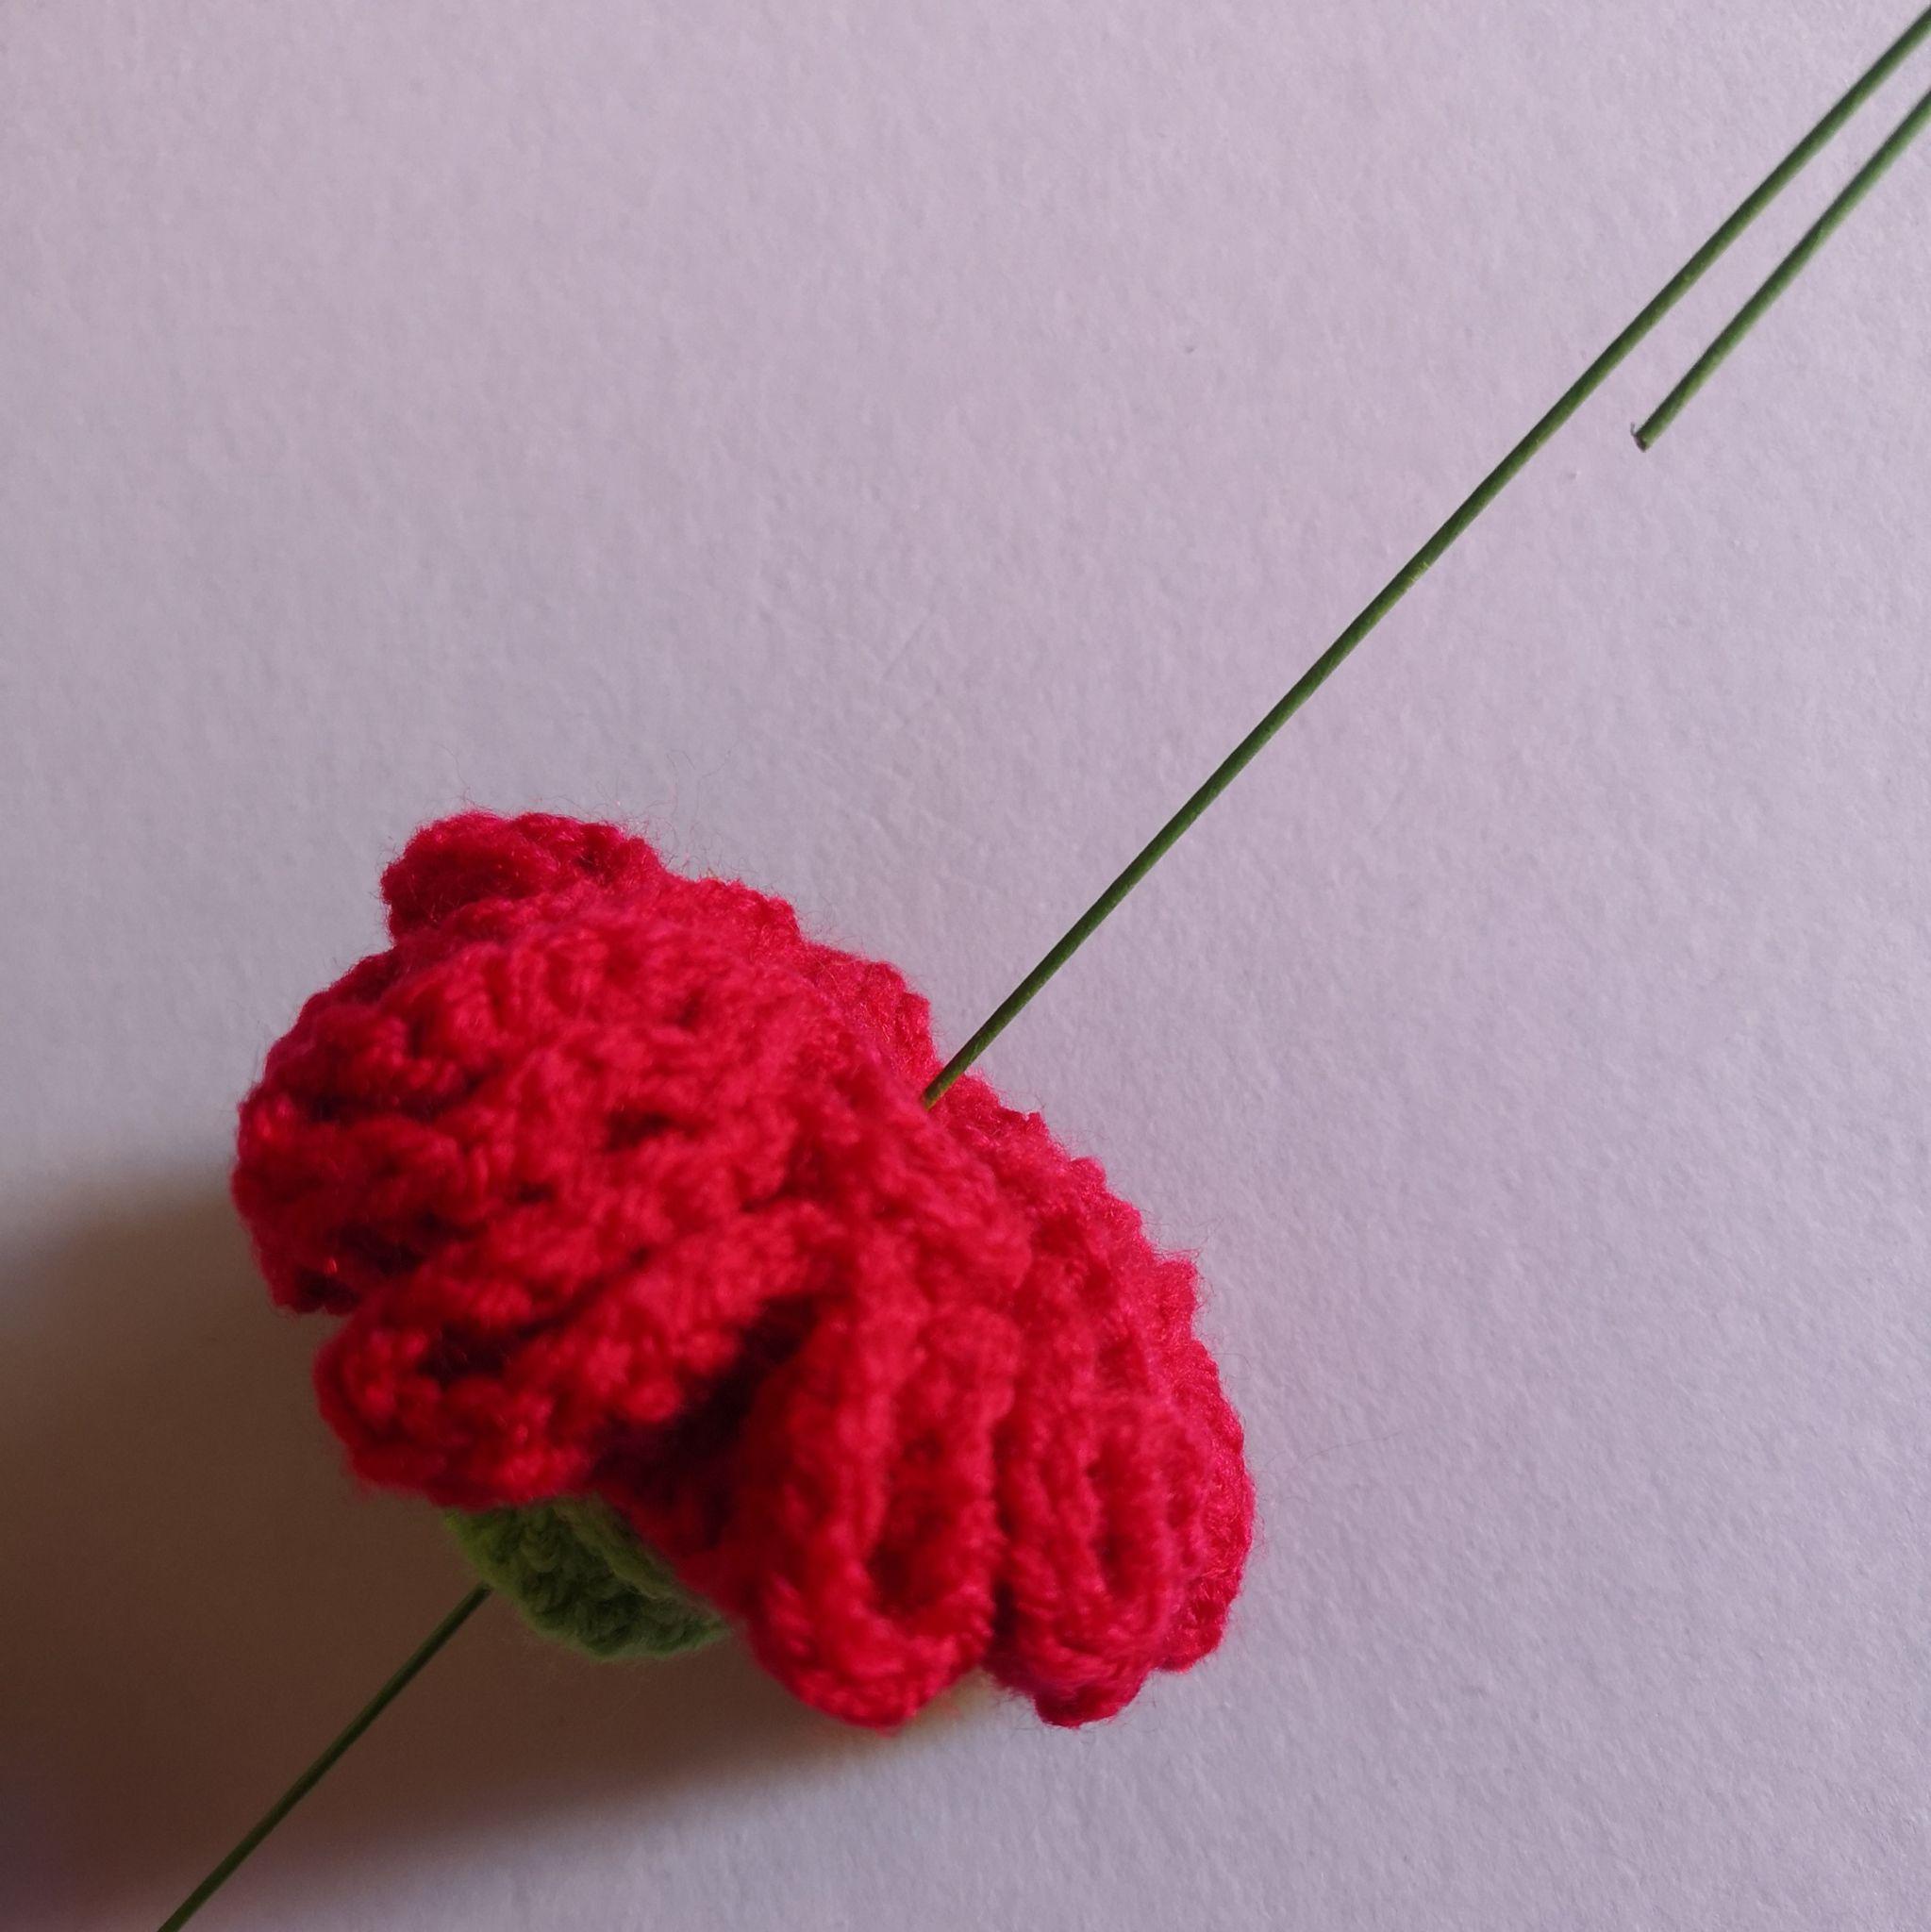
- Add the wire stem. Bend the top of the floral wire. Guide it through the center of the flower head and out through the center of the green magic ring, following the arrangement shown in the source photographs.
- Finish the stem. Twist the wire ends together. If you are using florist tape, wrap it along the stem.
Check your stitch counts before finishing
The green base should progress from 6 to 12 to 18 stitches, then remain at 18 for three rounds. The petal section should progress from 12 to 12 to 36 to 108 to 324 stitches. Count actual stitches and keep the beginning chains separate.
Ruffling is expected: the last three petal rounds each triple the stitch count. Keep the 12 reserved loops accessible until the flower-color yarn has been attached.
Color ideas for a crochet carnation bouquet
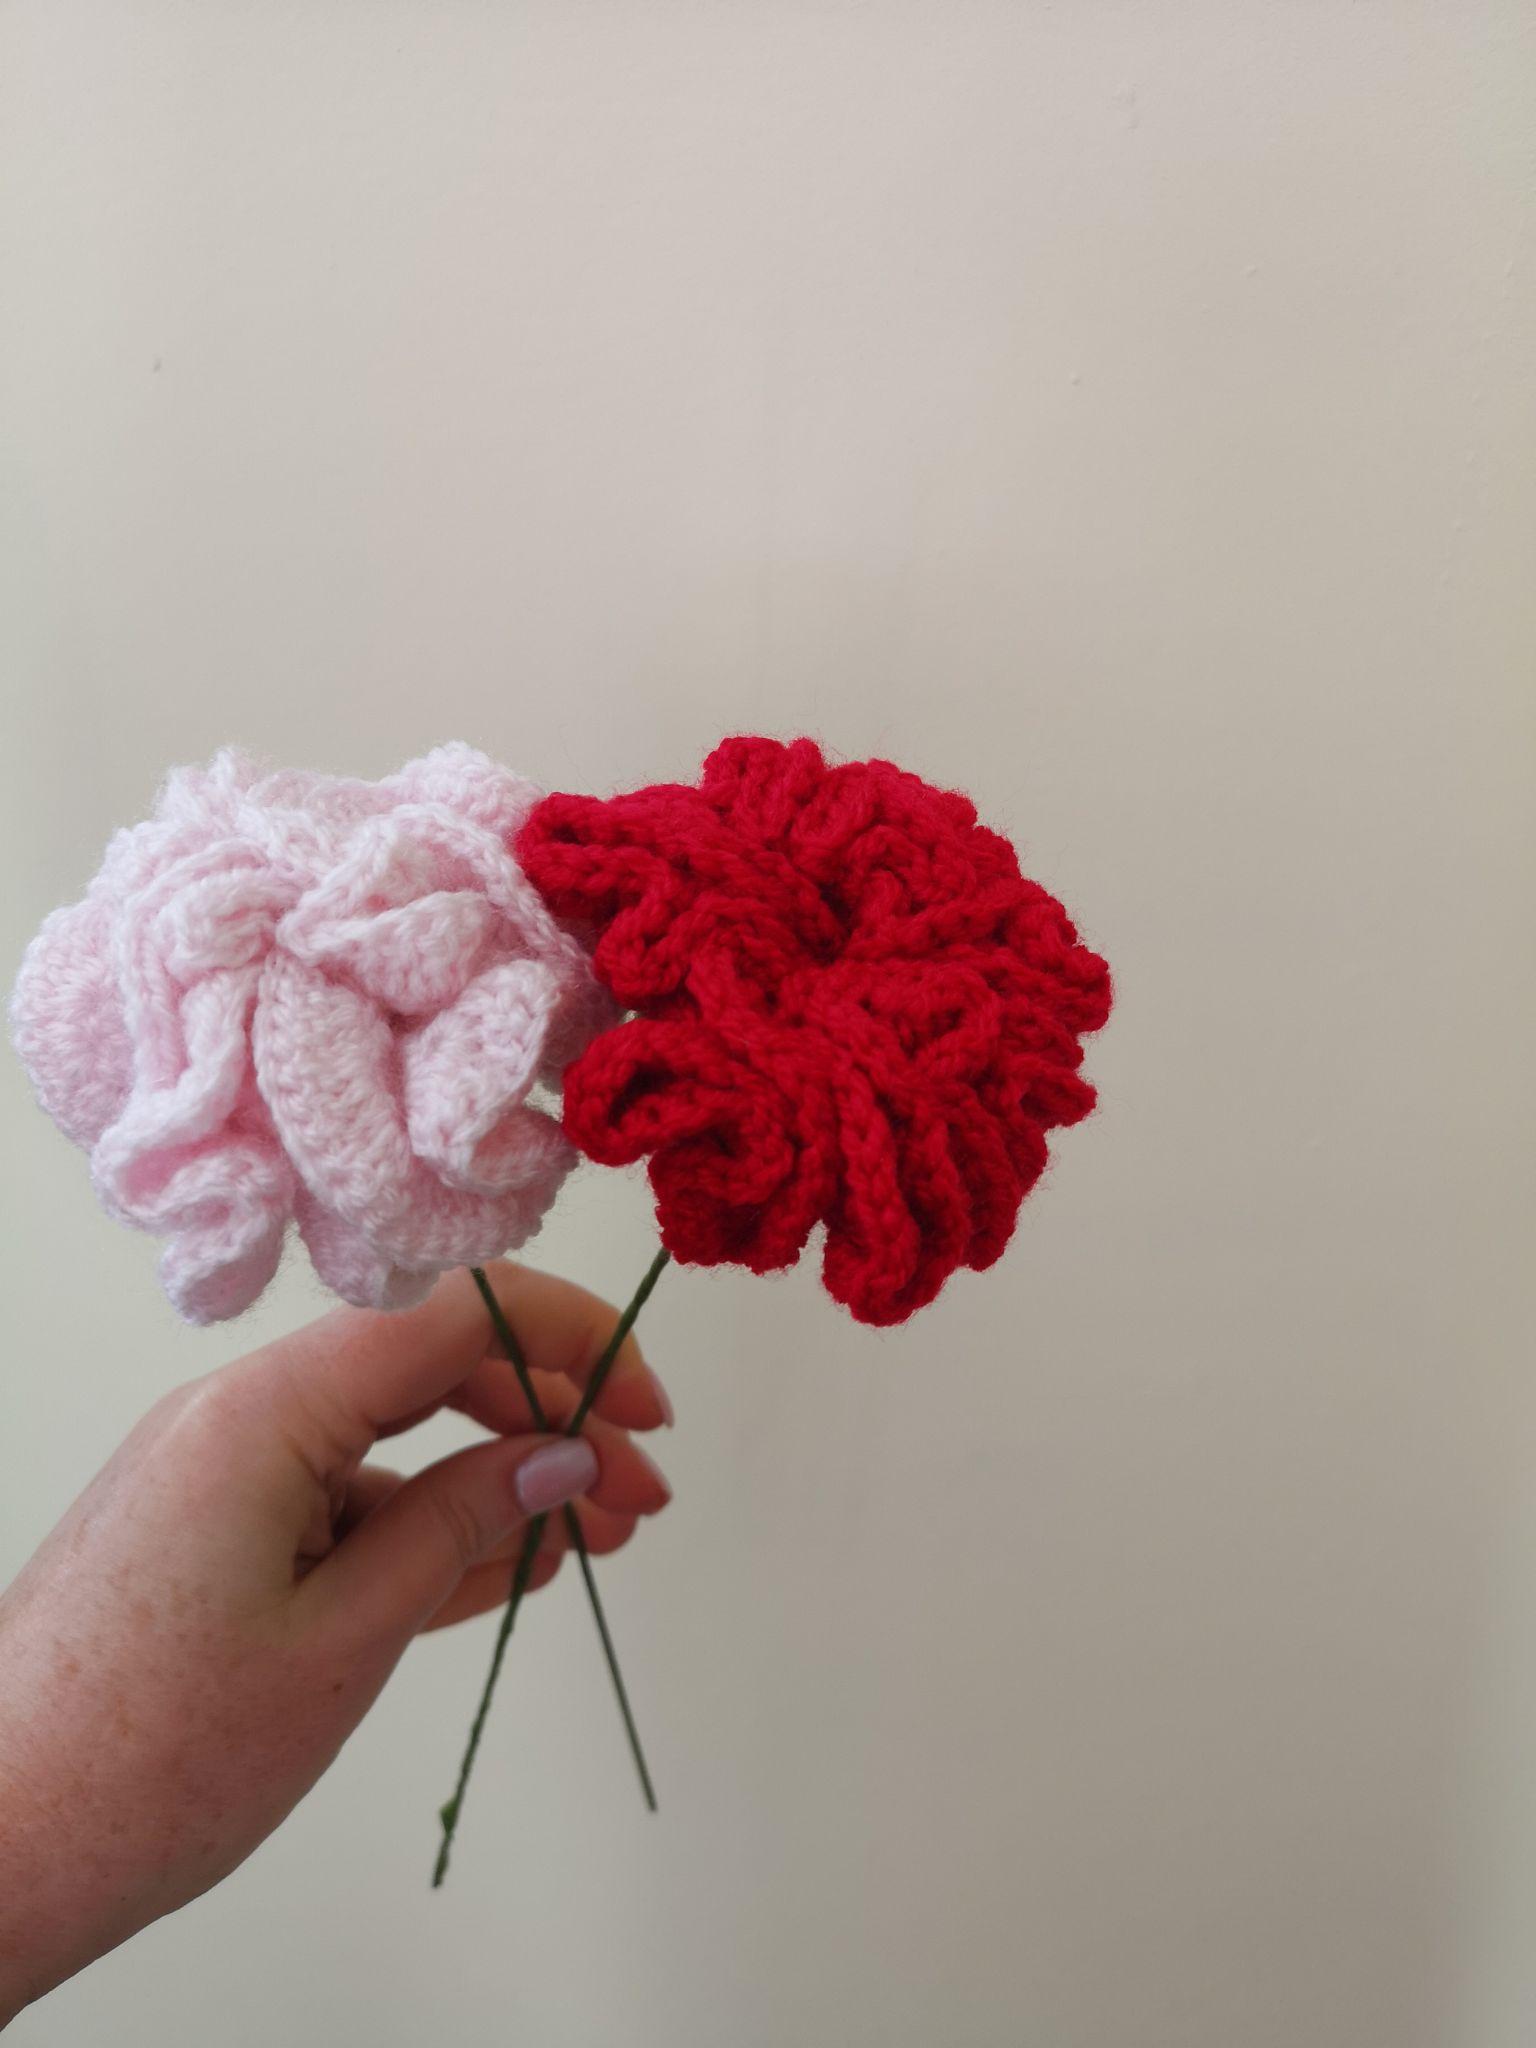
Use one shade throughout for a simple bunch, or make individual carnations in several colors. The source shows both pink and red flowers, with different amounts of gathering at the center. Let that gathered shape guide how compact or open you make each bloom.
Frequently asked questions
Can I use a different yarn?
Yes. The designer permits different yarn types and weights with a suitable hook. The size will change, so make one sample before preparing a full bouquet.
Do I need to match a specific gauge?
The pattern does not require a numerical gauge. It asks for tight stitches without gaps. Keep your tension consistent through the base and petals.
Why are there 12 loops for the petals when the green base has 18 stitches?
The petals attach to the unused back loops of the 12 stitches below the green base’s third round. The 18 stitches are the result of the increases worked into those stitches.
Is there a video to follow?
The original PDF links to the designer’s carnation crochet tutorial. It can help you compare the loop placement and assembly with the written steps.
More Crochet Flower Patterns
For another handmade botanical project, try our crochet lavender stem pattern or rolled crochet flowers in three sizes. Explore more crochet flower bouquet patterns for a mixed arrangement.
Original design and credits
Original pattern and reference photographs: Kat Witherall, Luna Crochet Designs. Find the designer’s work on Ravelry or in the LunaTheLadybird Etsy shop. This article is an editorial adaptation of the supplied pattern, rather than an original pattern designed by Crochet Pattern Nest.