
Crochet Bunny Wooden Ring Rattle with Embroidered Eyes
· admin
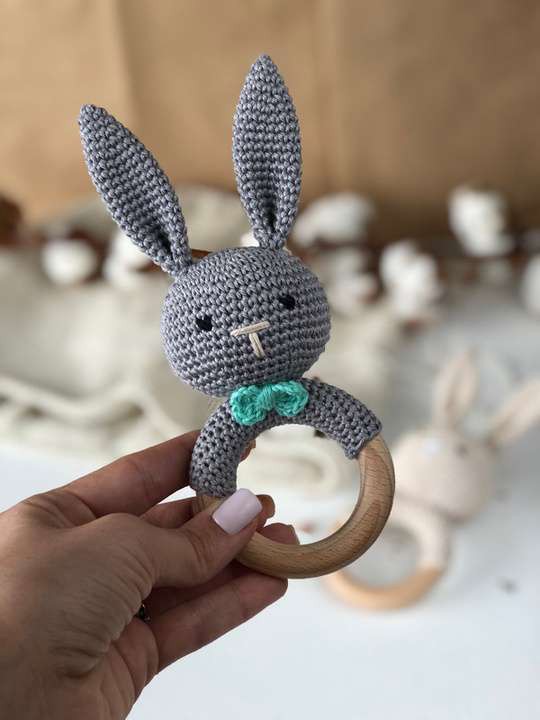
This crochet bunny wooden ring rattle combines a smooth wooden handle with a compact cotton animal head. Long straight ears and a tiny bow distinguish the bunny. The head, ring sleeve and small features are made independently, so check their proportions before sewing. The tables use US terms and keep the spiral pieces separate from the flat accessory rows.
Materials, Gauge and Size
Vita Cotton Lily cotton, 125 m / 50 g, about 80 m / 87 yd in total; gray for the main face. Use a 2.5 mm hook for pieces and 2 mm around the ring, a 60–70 mm wooden ring, 24–30 mm enclosed rattle insert, fiberfill, black embroidery thread, needle, scissors and marker. Source gauge: 26 sc × 25 rows per 10 cm. The yarn-ball quantities are shopping allowances; substitute cotton by gauge and firmness rather than color name alone.
Stitches and Pattern Notes
US crochet terms: ch = chain; sc = single crochet; hdc = half double crochet; dc = double crochet; tr = treble crochet; sl st = slip stitch; st = stitch; sp = space; BLO = back loop only; inc = 2 stitches in one stitch. Sc2tog, hdc2tog and dc2tog combine two neighboring stitches into one. A number before a stitch tells you how many consecutive stitches to work. Parentheses followed by a repeat number describe one complete group repeated that many times.
Step 1: Fit the Crocheted Ring Sleeve
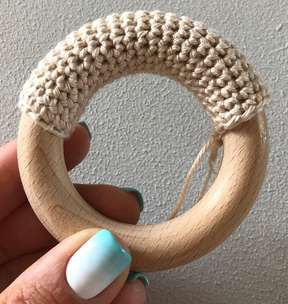
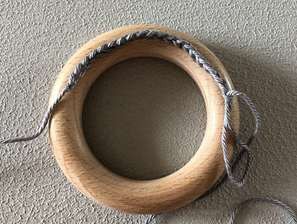
With the 2.5 mm hook, ch 10 and join the chain around the wooden ring without twisting. Switch to the 2 mm hook and work sc continuously around that small chain tube. Slide the tube along the wood as it grows, covering about half the ring or a little less. The starting ten chains go around the thickness of the wood, not around the entire ring.
Fit is important: the sleeve should grip the wood rather than rotate loosely. If necessary, restart with one fewer chain. Finish with a slip stitch and hide the beginning, end and tails toward the inside of the ring. Alternatively, ch 20 and work nine flat rows of sc, then wrap that rectangle around the ring and sew its long edges together on the inner side. Adjust the rectangle to your actual ring before sewing.
Step 2: Shape the Bunny Head
Use the main face color and the 2.5 mm hook. Mark the first stitch and work continuously without joining. The marker follows the spiral; move it after every round. Count before adding filling, since a missed increase can change where the face sits.
| Row / round | Instructions | Count / note |
|---|---|---|
| 1 | 6 sc in a magic ring. | 6 |
| 2 | Inc in every stitch. | 12 |
| 3 | (Inc, 1 sc) six times. | 18 |
| 4 | (Inc, 2 sc) six times. | 24 |
| 5 | (Inc, 3 sc) six times. | 30 |
| 6 | (Inc, 4 sc) six times. | 36 |
| 7 | (Inc, 5 sc) six times. | 42 |
| 8 | (Inc, 6 sc) six times. | 48 |
| 9–15 | Sc around for seven rounds. | 48 |
| 16 | (Dec, 6 sc) six times. | 42 |
| 17 | (Dec, 5 sc) six times. | 36 |
| 18 | (Dec, 4 sc) six times. | 30 |
| 19 | (Dec, 3 sc) six times. | 24 |
| 20 | (Dec, 2 sc) six times. | 18 |
| 21 | (Dec, 1 sc) six times. | 12 |
| 22 | Dec six times. | 6 |
After Round 19, distribute filling evenly and place the enclosed rattle insert inside. Continue stuffing as the opening narrows. After Round 22, thread the tail through the front loops of the remaining six stitches and close. Leave 45–50 cm for attaching the head to the covered ring.
Step 3: Embroider the Sleepy Face
Before closing the lower head, position the eyes three or four rows below the final increase round, leaving about seven stitches between them. Embroider a small nose one row below the eyes. Work short, even stitches and secure the ends inside. Use the front photograph to compare both eyes before filling the head completely. The ears and bow are made separately and attached after the face is centered.
Step 4: Make the Ears
Make two ears in the head color. Round 1: 4 sc in a magic ring. Rounds 2–7: (inc, 1 sc) twice for 6, then (inc, 2 sc) twice for 8, (inc, 3 sc) twice for 10, (inc, 4 sc) twice for 12, (inc, 5 sc) twice for 14 and (inc, 6 sc) twice for 16. Rounds 8–20: 16 sc. Leave the ears unstuffed, flatten each base and sew it closed. Attach them near head Round 4, checking the front view for balance.
Step 5: Attach and Finish
For a bow, work into one magic ring: ch 4, four tr, ch 4, slip stitch; repeat that whole sequence once for the second wing. Tighten the center, wrap it with the tail and sew the bow at the neck.
Use the long head tail to sew the lower head securely to the middle of the ring sleeve. Hold the head against the sleeve rather than leaving a long narrow neck, and make a second complete pass around the attachment. Weave every tail through several stitches. Inspect all seams, embroidery and the wooden surface before use; the reference pattern does not certify the finished item as a tested toy. Choose a purpose-made enclosed rattle component and keep it fully inside the stuffing.
Frequently Asked Questions
Are the head rounds joined? No. Use a marker and crochet continuously; join only where an accessory specifically calls for it.
Can I sew a sleeve around the ring instead? Yes. The flat rectangle option is included, with the seam positioned on the inside of the ring.
How do I keep the face centered? Pin all features before sewing, check the front view and secure the head in the middle of the covered section.
More Baby Crochet Ideas
Browse our Crochet Baby collection, compare baby bootie patterns, or explore baby cardigan ideas. Save the project to Pinterest before gathering your yarn.
Pattern and Photo Credits
Adapted from the supplied Pattern_rattle_bunny.pdf. Pattern and photographs: supplied Pattern_rattle_bunny PDF; no designer name is printed in the extracted source text. Source photographs show the reference samples; captions identify any detail crops. This written adaptation has been reviewed against the supplied pattern pages but has not been physically crocheted or maker-tested. Yarn substitutions and tension can change the result.
Leave a Reply