
Acorn Dishcloth Pattern
· admin
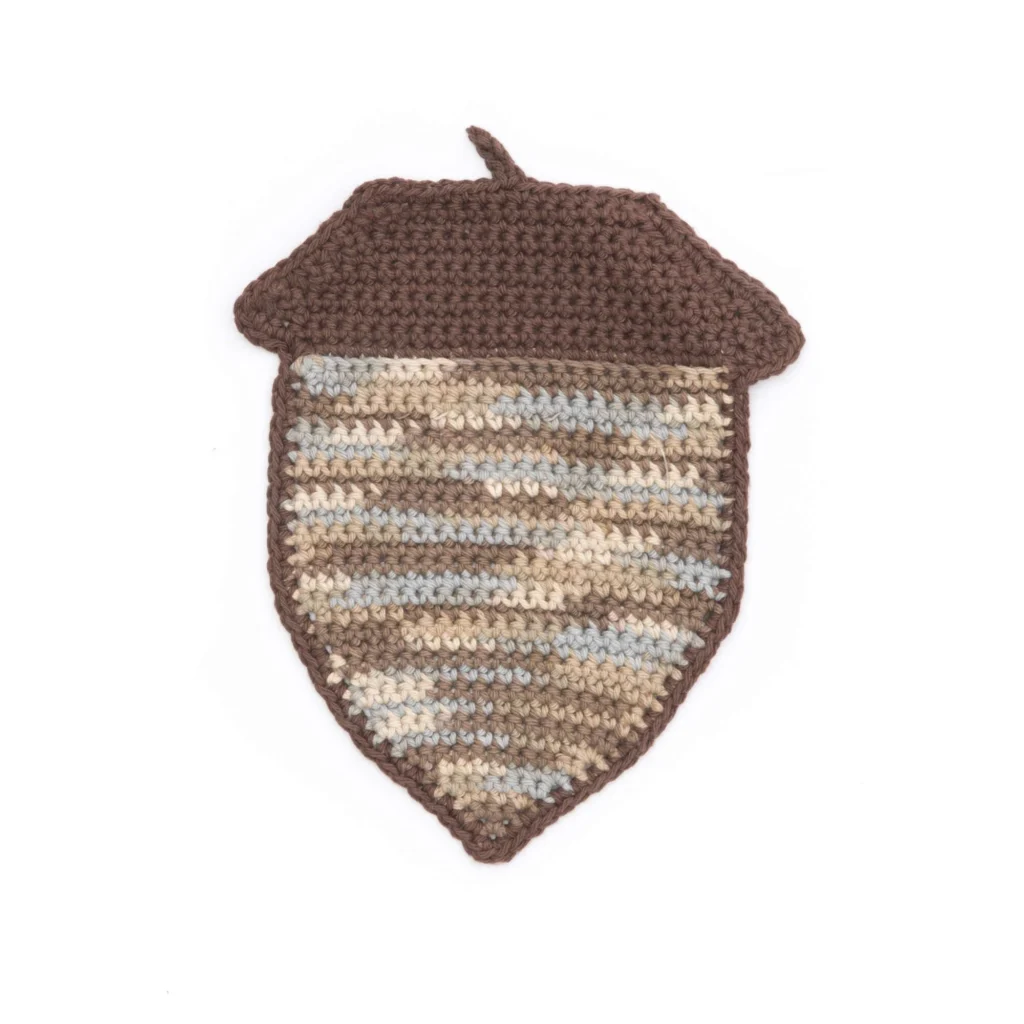
Engaging in Crochet with the Acorn Dishcloth Pattern
As a crochet enthusiast, there’s a special joy that comes from creating something both functional and beautiful. The Acorn Dishcloth Pattern is a delightful project that combines quick completion with a unique aesthetic. Suitable for all skill levels, including beginners, this project provides an instant gratification boost with its rapid crafting potential. Whether you’re sprucing up your kitchen or looking to make thoughtful handmade gifts, this pattern is versatile and enjoyable for those cozy crafting days.
Why you’ll love this pattern
What makes the Acorn Dishcloth truly special is how beginner-friendly and quick it is to complete. It’s an excellent introduction to crochet for novices, allowing them to practice essential stitches without a substantial time commitment. Experienced crocheters will also appreciate its potential for relaxation and creativity. This dishcloth not only serves practical purposes, adding charm to your home décor, but it also makes a lovely gift. Plus, it’s great for using up those leftover bits of yarn in your stash!
"I loved making the Acorn Dishcloth! It was simple, fun, and perfect for a quick gift!” – A satisfied crocheter.
How this crochet pattern comes together
The Acorn Dishcloth is designed to be a rectangular piece that showcases both the base color and a contrasting accent. You start by creating the base with the main color, developing a sturdy fabric. The main crochet technique used here is the single crochet stitch, which provides a lovely texture and absorbency. Generally, you can expect to complete this project in just a couple of hours, making it perfect for a weekend crafting spree!
Materials you’ll need
To create your Acorn Dishcloth, gather the following materials:
- Lily Sugar’n Cream Naturals (56.7 g/2 oz; 86 m/95 yds)
- Main Color (MC) (02046 Earth Ombre): 1 ball
- Lily Sugar’n Cream (70 g/2.5 oz; 109 m/120 yds)
- Contrast A (01130 Warm Brown): 1 ball
- Crochet hook: Size 5 mm (U.S. H or 8) or size needed to obtain gauge
Make sure to consider the color combinations. The warm hues of the yarn provide a cozy vibe, perfect for kitchen textiles. For a unique touch, feel free to explore other color variations that match your home décor!
Step-by-step instructions
Instructions (All Rows / Rounds)
Base (with MC)
With MC, ch 2.
- 1st row: 2 sc in 2nd ch from hook. Turn. (2 sc)
- 2nd row: Ch 1. 2 sc in first sc. 2 sc in last sc. Turn. (4 sc)
- 3rd to 8th rows: Ch 1. 2 sc in first sc. 1 sc in each sc to last sc. 2 sc in last sc. Turn. (16 sc at end of last row)
- 9th row: Ch 1. 1 sc in each sc across. Turn.
- 10th to 13th rows: Ch 1. 2 sc in first sc. 1 sc in each sc to last sc. 2 sc in last sc. Turn. (24 sc at end of last row)
- 14th row: Ch 1. 1 sc in each sc across. Turn. Place marker at end of last row.
- Repeat last row until work from marked row measures 3½ ins [9 cm], ending with a WS row and joining A at the end of the last row.
Top Shaping (with A)
- 1st row (RS): With A, ch 4. 1 sc in 2nd ch from hook. 1 sc in each of next 2 ch. Working in back loops only, 1 sc in each of next 24 sc. Ch 4. Turn.
- 2nd row: 1 sc in 2nd ch from hook. 1 sc in each of next 2 ch. 1 sc in each sc across. Turn. (30 sc)
- 3rd row: Ch 1. Draw up a loop in each of the next 2 sc. Yoh and draw through all loops on hook – sc2tog made. 1 sc in each sc to last 2 sc. Sc2tog over last 2 sc. Turn. (28 sc)
- 4th to 10th rows: Ch 1. Sc2tog over first 2 sc. 1 sc in each sc to last 2 sc. Sc2tog over last 2 sc. Turn. (14 sc at end of 10th row)
Edging (next rnd)
- Ch 1. 1 sc in each of the next 7 sc.
- Ch 5.
- 1 sc in 2nd ch from hook.
- 1 sc in each of next 3 ch.
- 1 sc in each of next 6 sc.
- 3 sc in last sc.
- Do not turn.
- Work 1 sc in end of each row around, having 3 sc in each corner.
- Join with sl st to first sc.
- Fasten off.
Ways to use your finished project
Once you’ve completed your Acorn Dishcloth, there are plenty of creative uses for it. This dishcloth is perfect for everyday kitchen tasks, offering absorbency and a lovely touch to your home. Alternatively, consider using it as a base for a gift set, paired with homemade treats or other kitchen accessories. It can also serve as a decorative piece during seasonal gatherings or as part of a thoughtful housewarming gift.
How to care for your crochet project
To keep your dishcloth looking fresh and new, hand washing is the best approach, especially given that you’re using cotton yarn. Use cold water and a gentle detergent, then lay flat to dry. If needed, you can reshape your dishcloth after washing to maintain its form. When storing, fold it neatly to avoid stretching or creasing.
Helpful crochet tips
Here are some practical tips to ensure your success with the Acorn Dishcloth:
- Maintain even tension: Consistent tension will make your dishcloth look polished.
- Use stitch markers: They can help keep track of your rows, especially when you’re using color changes.
- Count your stitches: Regularly check your stitch count to avoid any surprises later on.
- Weave in ends securely: Don’t forget to secure those loose ends, ensuring a neat finish.
Creative variations
Feel free to customize your Acorn Dishcloth! Consider using different yarn colors for a personal touch, or try a contrasting border to elevate your design. If you want to adapt the sizing, simply adjust the number of chains in the foundation or add more rows for length. Just keep in mind that these variations may affect the overall drape and size.
Frequently asked questions
-
Is this crochet pattern beginner-friendly?
Yes, it is designed for beginners, focusing on the single crochet stitch. -
What yarn works best?
Lily Sugar’n Cream is highly recommended for its durability and absorbency. -
Can I use a different hook size?
While a size 5 mm hook is standard, you can adjust if necessary to achieve your desired gauge. -
How long does the project take?
Expect to complete this project in just a few hours, depending on your experience. -
Can I sell finished items made from this pattern?
Check the original designer’s usage terms for any restrictions on selling finished products.
Leave a Reply