
Textured Ribbed Baby Sweater Crochet Guide
· admin
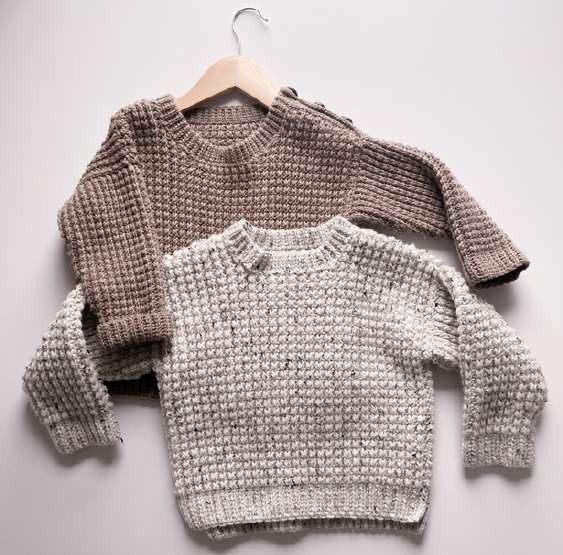
This textured ribbed baby sweater is crocheted sideways in a stitch that resembles knit ribbing. Separate front and back panels include their own lower ribbing, and short rows shape the shoulders and sleeves. The smallest source version has an optional left-shoulder button opening. This guide organizes that size and the construction stages beside the detailed fifteen-page reference.
Project details
| Skill level | Intermediate to advanced |
|---|---|
| Size | Source 0–6 months: flat body width 21 cm, back length 35 cm and sleeve length 19 cm. |
| Hook | 4 mm body; 3 mm finishing ribbing and bands. |
| Source | Textured Ribbed Sweater, supplied Ribbed Sweater.pdf; 0–6 month size selected. |
Materials and gauge
About 407 yd / 372 m worsted yarn for the smallest size, 3 mm and 4 mm hooks, markers, needle and three 13 mm buttons. Source sample: Plymouth Encore Tweed. Gauge after blocking: 16.5 stitches vertically × 18 rows horizontally per 10 cm in texture.
Swatch in the correct direction
The source distinguishes vertical stitch count from horizontal row count because the sweater is worked from side to side. A row runs along the garment length rather than straight across its chest. Block the actual texture sample before checking the gauge; a generic sc or dc square is not equivalent.
The main texture alternates back-loop slip stitch and back-loop hdc, keeping slip stitches above slip stitches and hdc above hdc. The hem uses back-loop yarn-over slip stitches. To make one, yarn over, insert and draw up a loop, then pull the new loop through the other two loops on the hook. This differs from an ordinary slip stitch.
Set up the smallest front panel
The 0–6 month front begins with chain 54. Mark the six-chain lower-ribbing section before working the longer textured area. Turning chains do not count. Keep the hem edge flat while the other edge receives the shoulder and neckline shaping.
The first shoulder uses eleven rows in the smallest size; the opposite shoulder section uses ten. The source’s complete shoulder sequence is written through its largest size, so stop at the row number assigned to the small size rather than working every listed row.
Shape the neckline with the source map
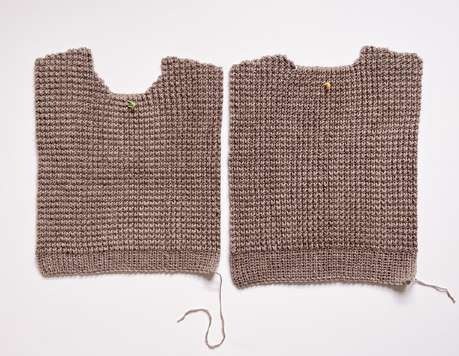
The front neck has decrease rows, a flat section and increase rows. The flat portion uses eight extra rows in the selected size. Added chains create extra stitches at the upper edge, while leaving stitches unworked creates the decreases. Keep a marker at the six-stitch hem section so those changes stay at the neckline end.
The left shoulder has two versions: full length without an opening, or slightly shorter to make room for button bands. Choose before making the back panel. This article maps the parts; use the original point-labeled diagram on pages 5–9 for each short-row turn and chain extension.
Make the back and two sleeves
The smallest back begins with chain 56 when making the button opening, or chain 58 without it. Its lower ribbing has ten stitches, four more than the front, creating the longer rear hem. The back neckline is shallower than the front even though both panels share the same stitch texture.
Each smallest sleeve begins with chain 32 and six ribbing stitches. Its forty-row schedule contains seven short rows, twenty-six full rows and seven short rows on the opposite side. Mark the previously worked short-row ends so the later connecting row does not leave holes between sections.
Join shoulders and work the opening
Align the front, back and sleeves with the ribbed V shapes facing the same direction. Mattress stitch the right shoulder, matching the vertical ribs. For the opening, add six-row yarn-over-slip-stitch bands to the shortened left shoulder edges.
The buttonhole band has two holes, while the narrow neckline ribbing includes the third. The smallest neck rib is four stitches wide, begun with chain 5. Use the 3 mm hook for those finishing sections if it gives the source’s firmer result.
Attach sleeves and close the sides
Match the center of each sleeve top to the shoulder seam and sew it in place before closing the sides. The source closes body and sleeve seams with the same alternating slip-stitch/hdc texture, using both corresponding edges as anchors. Leave the lower ribbing side slits open as designed.
Sew all three buttons securely, weave the tails onto the wrong side and block according to the yarn. Compare the actual chest, neck and sleeve measurements before use; the age label is a guide rather than a substitute for measured fit.
Frequently asked questions
Is the sweater worked from the hem upward?
No. It is worked sideways, so the length of a row relates to the sweater length.
Why is the back foundation longer?
The back includes four additional ribbing stitches for its longer hem, with a separate adjustment for the shoulder opening.
Where are the three buttonholes?
Two are in the shoulder band and the third is incorporated into the neckline ribbing.
Pattern and photograph credits
Textured Ribbed Sweater, supplied Ribbed Sweater.pdf; 0–6 month size selected. Photographs show the supplied source projects. Crops, rotated photographs and editorial checklists are identified in their captions. Any stitch-count or terminology clarification is identified in the relevant section.
Open the original Ribbed Sweater.pdf pattern reference in Drive — Whole PDF. Keep the original pages beside this guide for the detailed diagrams and any section specifically referenced above.
Leave a Reply