
Willow Crochet Baby Mittens Pattern with a Ribbed Cuff
· admin
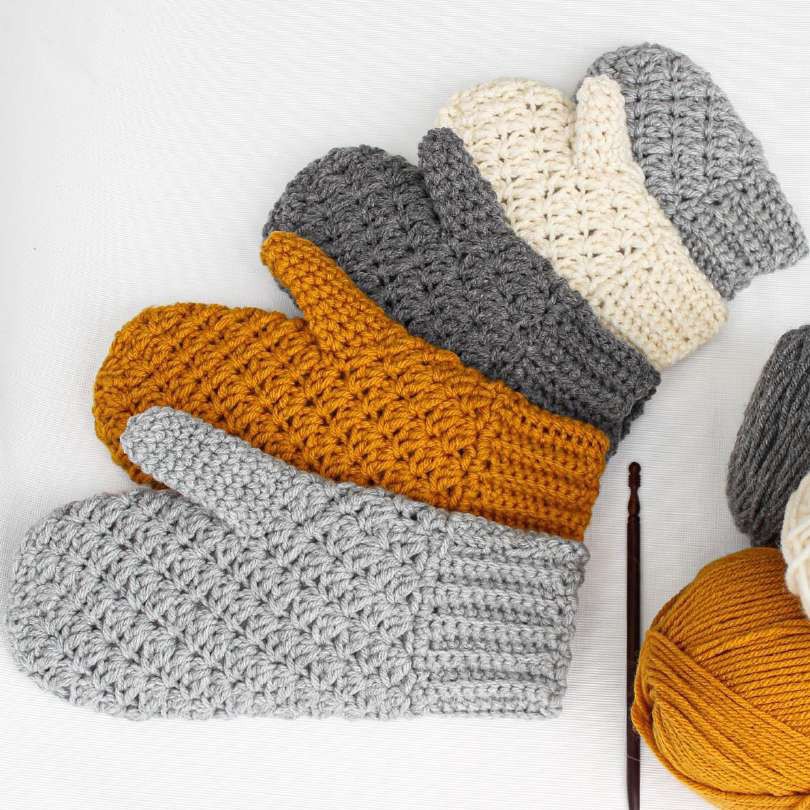
These Willow crochet baby mittens use a ribbed cuff and a small repeating fan made from single and double crochet. The baby size is deliberately thumbless. The supplied Willow file includes toddler through adult sizes with thumbs, so the larger photographed samples are useful fabric references but should not be mistaken for the exact baby construction.
Materials and Gauge
- Worsted / category 4 yarn. The source lists about 120 yd for its baby-size pair.
- 4.25 mm / US G-6 hook, or the size needed for gauge.
- Tapestry needle, scissors and a stitch marker.
The source suggests Loops & Threads Impeccable or Red Heart With Love and gives a gauge of 15 sc per 4 in. It does not give a baby age range or finished length and circumference. Make and measure the first mitten before completing its partner; the name “Baby” is the pattern’s size label, not a promise that it fits every newborn.
US Stitches and Fan Pattern
US terms: ch = chain; sc = single crochet; hdc = half double crochet; dc = double crochet; sl st = slip stitch; st(s) = stitch(es); sp = space; BLO = back loop only; inc = 2 stitches in one stitch. A decrease combines two stitches into one. Use a marker where a round begins. Unless specifically stated, a turning ch 1 adds height and is not a stitch.
Fan: work (sc, dc, dc) into one stitch. The fan produces three stitches from a single insertion point. On later body rounds, work the next fan into the sc of the previous fan and skip its two dc. A fan is a stitch group, not a chain space. Keep the marker in the first sc of the first fan.
Step 1: Make the Ribbed Cuff
| Row | Baby instructions | Count |
|---|---|---|
| 1 | Leave a 10-inch tail. Ch 8 and sc from second chain across; turn. | 7 |
| 2 | Ch 1; sc in first stitch, BLO sc in next 5 stitches, sc in last stitch. Turn. | 7 |
| 3–18 | Repeat Row 2. | 7 per row |
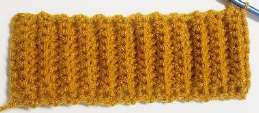
The first and last stitches use both loops to keep the cuff edge tidy. Lay the strip flat and count eighteen rows rather than eighteen raised ridges. Fold the short ends together and align Row 18 with the foundation edge. The source uses an initial slip-stitch join at the aligned ends and finishes the cuff seam with the long starting tail during assembly. Keep the working yarn attached for the body.
Step 2: Establish the Mitten Body
Work along the row ends around one edge of the cuff, not across the seven stitches of the final rib row. Body Round 1: ch 1; repeat (sc in each of the next five row ends, 2 sc in the next row end) three times. You use all eighteen row ends and make 21 sc. Join as in the source. Place a marker at the start of the next round.
Step 3: Work Seven Fans Around
| Round | Instructions | Count |
|---|---|---|
| 2 | Fan in the first sc, skip 2 sc; repeat around without joining. | 7 fans / 21 stitches |
| 3 | Fan in the sc of each previous fan; skip both dc of that fan. Continue in a spiral. | 7 fans |
| 4–10 | Repeat Round 3. | 7 fans per round |
Do not turn these fan rounds. Move the marker up with the first sc at each pass. The seven fans remain stacked in the same positions; putting a fan into one of the dc instead shifts the texture sideways. The baby size has no thumb-hole round, so continue the closed tube through Round 10.
Step 4: Close the Top
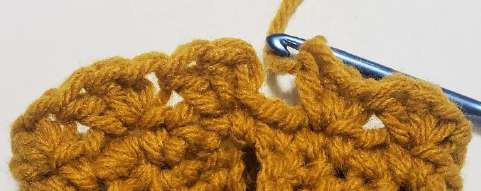
The supplied file says to decrease around for two rounds and finish with six stitches, but leaves the odd leftover stitch unstated. To preserve that six-stitch result explicitly: Round 11, sc2tog ten times and sc in the last stitch (11 sc). Round 12, sc2tog five times and sc in the last stitch (6 sc). Join with a slip stitch and fasten off, leaving a 5–6 in tail. These rounds work across all individual stitch tops, not only the seven sc where the fans were anchored.
Step 5: Finish and Make the Second Mitten
Thread the finishing tail through the front loops of the final six stitches and draw the top closed. Secure it inside the mitten. Use the long cuff tail to whipstitch the aligned cuff ends together and close any remaining gap. Weave all tails into the inside fabric. Make the second mitten with the same eighteen-row cuff and seven-fan body, then compare their lengths and openings.
Keep the cuff comfortably fitted rather than tight. This version has no cords, buttons or attached decorations. A different yarn or hook changes the fabric and fit; check both mittens after washing according to the yarn label before using them.
Frequently Asked Questions
Does the baby size have a thumb?
No. The baby instructions skip the thumb opening used by the larger source sizes.
Why do some photos show thumbs?
The supplied photographs cover the wider pattern size range. Their captions identify them as texture or construction references.
How do 21 stitches become six at the top?
Ten sc2tog plus a final sc make 11 stitches. Five sc2tog plus a final sc then make six, which are gathered closed.
More Baby Crochet Projects
Explore our baby crochet collection, compare baby bootie styles, or choose a baby cardigan project. Save your favorite idea to Pinterest before starting.
Pattern and Photo Credits
Written adaptation of Willow Mittens; the supplied copy does not identify its designer in readable text. All reference photographs come from that supplied pattern and show its original samples. Detail crops are labelled in their captions. The written steps and arithmetic have been reviewed against the supplied pages; this article has not been physically crocheted or maker-tested.
Leave a Reply