Crochet Dog Phone Pouch Pattern with Floppy Ears and a Bone
· admin
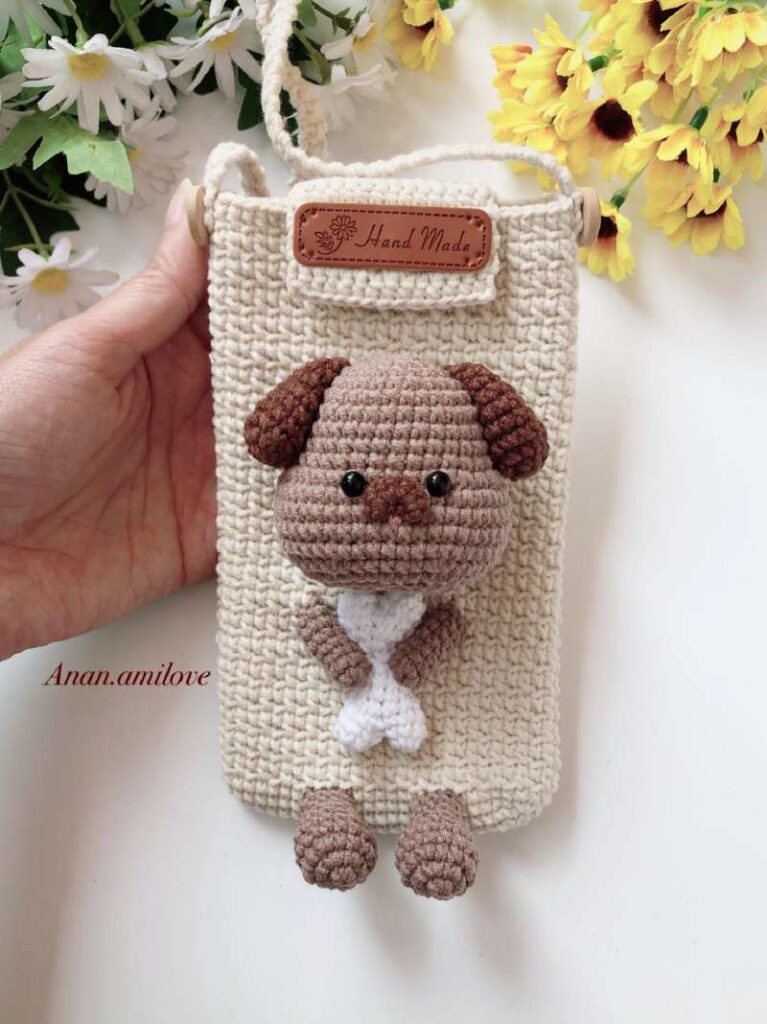
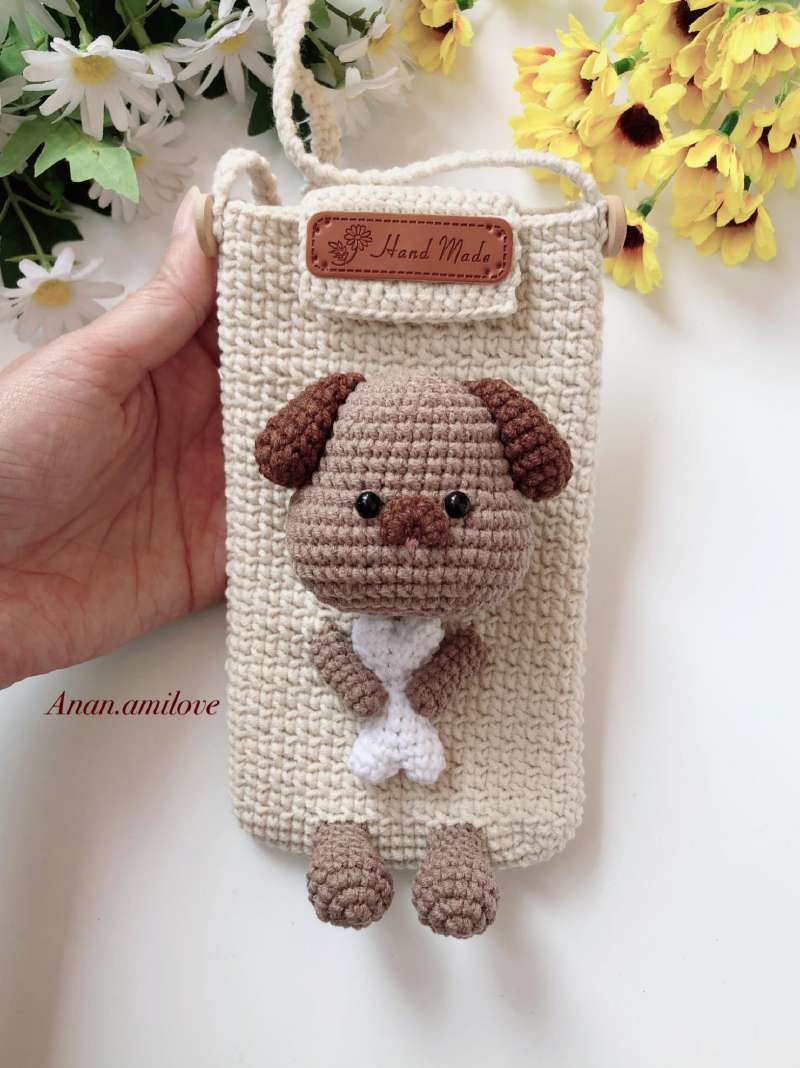
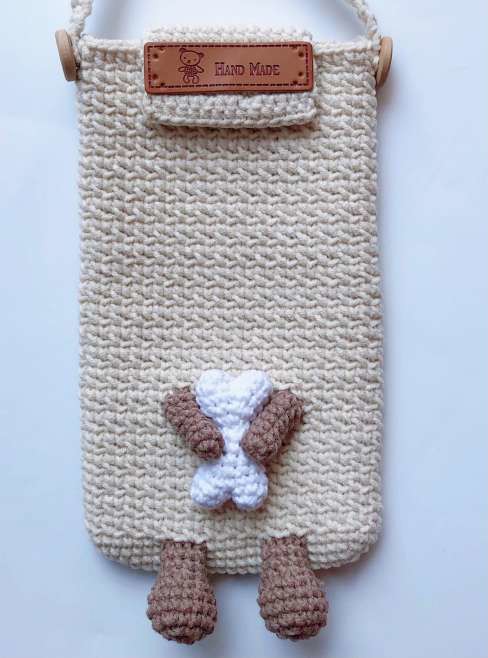
This crochet dog phone pouch pattern places a floppy-eared puppy above a small white bone. The bag uses a repeating textured stitch, while the face and paws are worked in dense single crochet. The separate bone is made in two halves so its rounded ends remain visible between the dog’s arms.
Materials and Finished Size
- Sport-weight yarn such as YarnArt Jeans: beige for the pouch, medium brown for the head and limbs, dark brown for ears and muzzle, white for the bone and pink for the tongue. The source gives colors but no measured total yardage.
- 2.3 mm crochet hook; tapestry needle, scissors, stitch marker, pins and polyester fiberfill for the stuffed details.
- Two 15 mm buttons for the strap attachment; a sew-on magnetic snap for the flap, visible in the source assembly photographs.
- Two 6 mm safety eyes for the character, or embroidered eyes instead.
- Optional fabric glue for positioning details, as used in the source. Sewing the pieces down gives an additional mechanical attachment.
Reference size: approximately 17 × 10 cm (6.7 × 3.9 in), with a 113 cm (44.5 in) strap. These are sample measurements, not a promise of fit. Measure your phone with its case on and test the usable opening before adding the character. The dense shaping and sewn details suit a crocheter comfortable with amigurumi and small parts.
Stitches and Pattern Notes
US terms: ch = chain; sc = single crochet; inc = 2 sc in one stitch; dec = sc2tog; sl st = slip stitch; hdc = half double crochet; dc = double crochet; st(s) = stitch(es); MR = magic ring. Parentheses followed by a repeat number mean repeat that group. Numbers in the Total column are the completed stitches, except where chain spaces are explicitly included. Work the small animal pieces in continuous rounds unless a row or join is specified.
The designer uses yarn-under single crochet, which makes an X-shaped stitch. Use the same stitch style consistently if you want fabric close to the reference. A yarn-over single crochet sample can be a different size. Keep a marker in the first stitch and move it after each completed round. Turning chains added to flat rows are for height and do not count as stitches.
Step 1: Crochet the Phone Pouch
With the pouch color, ch 24. Work along both sides of this chain to create the oval bottom; do not join the chain into a ring.
| Round / row | Instructions | Total |
|---|---|---|
| 1 | From the second ch: 22 sc, 3 sc in the last ch; along the other side, 21 sc, inc. | 48 |
| 2 | Inc, 21 sc, inc in each of the next 3 sts, 21 sc, inc twice. | 54 |
| 3 | Inc, 24 sc, inc in each of the next 3 sts, 24 sc, inc twice. | 60 |
| 4 | Sc around. | 60 |
| 5 | Repeat (ch 1, skip 1 st, sc in the next st) 30 times. | 30 sc + 30 ch-1 spaces |
| 6 | Repeat (sc in the ch-1 space, sc in the next sc) 30 times. | 60 |
| 7–48 | Repeat Round 5 on odd-numbered rounds and Round 6 on even-numbered rounds; finish after Round 48. | 60 positions |
Fasten off and weave in the end. Check that the phone slides in without forcing the side walls apart. Changing the foundation width also changes the oval increases and the placement of the decoration, so make and measure the pouch before committing to the small character pieces.
Step 2: Add the Flap and Strap
Mark fourteen centered stitches on the back at body Round 46. Rejoin yarn along those marked stitches and work 14 sc for the first flap row. Ch 1 and turn. Work twelve more rows of 14 sc, turning after each row, so the flap has thirteen rows. Fasten off and finish the ends. The source photographs show this flap folding over the opening.
For the strap, ch 3. Sc in the second ch and in the last ch for 2 sc. Ch 1, turn, then keep working two sc per row until the strip measures approximately 113 cm, or your chosen wearing length. Leave sewing tails. The reference uses a short folded loop at each strap end with the 15 mm side buttons; alternatively sew the ends securely to the two pouch sides. Check the length with the phone inside, because the fabric can stretch under its weight.
Fit the two halves of the magnetic snap to the flap and corresponding pouch front while they are aligned. Reinforce the attachment through several stitches, and keep the hardware out of the phone opening. The snap is visible in the source photographs even though its written materials list does not name it separately.
Step 3: Crochet the Dog Head
| Round / row | Instructions | Total |
|---|---|---|
| 1 | Brown: 6 sc in MR. | 6 |
| 2 | Inc around. | 12 |
| 3 | Repeat (sc, inc) six times. | 18 |
| 4 | Repeat (inc, 2 sc) six times. | 24 |
| 5 | Repeat (3 sc, inc) six times. | 30 |
| 6 | Sc, inc, (4 sc, inc) five times, 3 sc. | 36 |
| 7–10 | Sc around. | 36 each |
| 11 | 9 sc, 6 inc, 6 sc, 6 inc, 9 sc. | 48 |
| 12–15 | Sc around. | 48 each |
| 16 | 9 sc, dec, 8 sc, dec, 6 sc, dec, 8 sc, dec, 9 sc. | 44 |
| 17 | 9 sc, (dec, 6 sc) three times, dec, 9 sc. | 40 |
| 18 | Repeat (dec, 3 sc) eight times. | 32 |
| 19 | Repeat (2 sc, dec) eight times. | 24 |
| 20 | Repeat (dec, sc) eight times. | 16 |
| 21 | Dec eight times. | 8 |
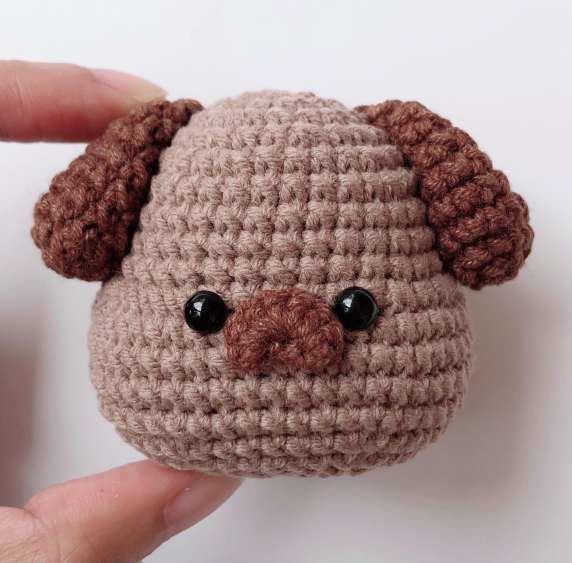
Place the eyes between Rounds 11 and 12 with five stitches between them. The six plain sc in the middle of Round 11 separate the two increase areas. Install backed eyes before closing, add stuffing after Round 19, then close the last eight stitches.
Floppy Ears — Make Two in Dark Brown
| Round / row | Instructions | Total |
|---|---|---|
| 1 | 6 sc in MR. | 6 |
| 2 | Inc around. | 12 |
| 3 | Repeat (2 sc, inc) four times. | 16 |
| 4–6 | Sc around. | 16 each |
| 7 | Repeat (dec, 6 sc) twice. | 14 |
| 8 | Repeat (dec, 5 sc) twice. | 12 |
| 9 | Repeat (2 sc, dec) three times. | 9 |
Do not stuff. Flatten and fold the open edge, then sew the ears over head Rounds 3–7 so their wide ends drop down at the sides.
Small Muzzle
With dark brown, ch 4. Starting in the second chain, work 2 sc in the first available chain, 3 sc in the next and 2 sc in the last: seven stitches in total. Fasten off. Attach this small curved piece across head Rounds 10–14 and embroider a pink tongue beneath it.
Step 4: Make the Dog’s Legs and Arms
Legs — Make Two in Brown
| Round / row | Instructions | Total |
|---|---|---|
| 1 | 6 sc in MR. | 6 |
| 2 | Inc in every st. | 12 |
| 3 | Repeat (2 sc, inc) four times. | 16 |
| 4–5 | Sc around. | 16 each |
| 6 | Repeat (2 sc, dec) four times. | 12 |
| 7 | Repeat (2 sc, dec) three times. | 9 |
| 8–9 | Sc around. | 9 each |
Stuff only the lower five rounds and retain a tail. Sew the narrow tops at pouch Round 4.
Arms — Make Two in Brown
| Round / row | Instructions | Total |
|---|---|---|
| 1 | 7 sc in MR. | 7 |
| 2–7 | Sc around. | 7 each |
Leave the arms unstuffed; their tails are used to attach them to the bag and bone.
Step 5: Crochet the White Bone
Start each half with two little rounded lobes. Make four lobes altogether, paired into two bone halves. For each lobe, work 6 sc in MR for Round 1 and 5 sc, inc for Round 2 (7 sts). Fasten off the first lobe of a pair; keep the second attached and join the two openings in the next round.
| Round / row | Instructions | Total |
|---|---|---|
| 3 | Work 7 sc around the first lobe and 7 sc around the second. | 14 |
| 4 | Repeat (5 sc, dec) twice. | 12 |
| 5 | Repeat (2 sc, dec) three times. | 9 |
| 6–7 — first half only | Sc around. | 9 each |
Make the first half through Round 7. Make the second half through Round 5 only. Stuff both halves lightly and sew their two nine-stitch openings together. The shorter second half meets the longer first half to form the middle of the bone. Close any small gap where the starting lobes meet.
Step 6: Assemble the Dog Pouch
- Sew the two legs to pouch Round 4.
- Center the bone above the legs and fix it in place. Keep the pouch back free of the attachment stitches.
- Attach the unstuffed arms so the dog appears to hold the bone; secure their ends to both the pouch and bone.
- Pin the head above the bone, attach it firmly, finish the tails and check the strap anchors and magnetic closure.
Frequently Asked Questions
Why are the two bone halves different lengths?
The first half continues through Round 7; the second stops at Round 5. Both end with nine stitches, so they can be sewn together.
Where do the eyes go?
Between head Rounds 11–12, with five stitches between the two eyes. Check their positions before the head opening becomes too small.
Can the ears stand upright?
This design’s ears are unstuffed and folded at the top so they hang down. Upright ears would require a different construction.
More Crochet Phone Pouches
Browse our crochet phone cases and covers, compare animal phone-pouch styles, or try a simple phone pouch with a strap.
Pattern and Photo Credits
Written adaptation of Anna.amilove, Dog Phone Pouch, as credited on the supplied reference photographs. The instructions have been checked against the supplied pattern pages; this article has not been physically crocheted or maker-tested. Reference images show the source project, rather than a newly made sample.
Leave a Reply