
Free Ribbed Crochet Pumpkin Pattern: Harvest Pumpkin PDF
· admin
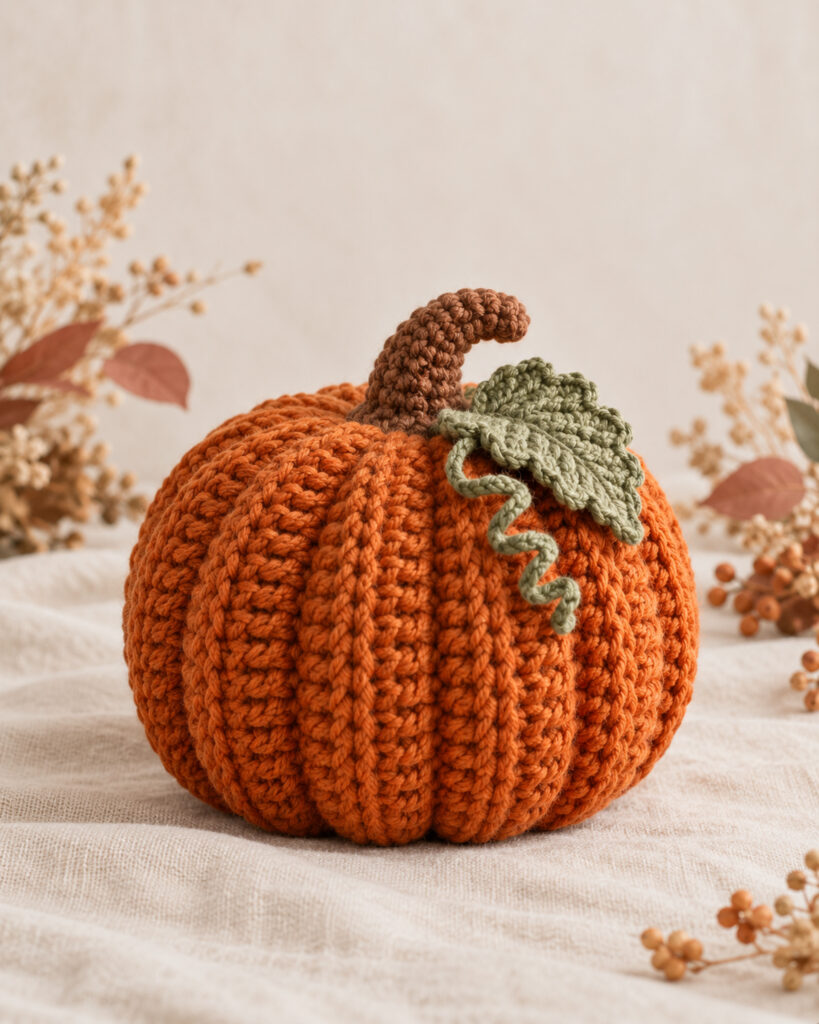
Bring a warm handmade touch to your fall decor with the Harvest Rib Pumpkin, a softly textured crochet pumpkin worked flat, seamed, stuffed, and finished with a curved stem, leaf, and optional vine.
This free crochet pumpkin pattern is designed for confident beginners who want a relaxing seasonal project without complicated shaping. The ribbed fabric creates beautiful natural grooves, while the three included sizes make it easy to build a coordinated autumn display.
Harvest Rib Pumpkin at a Glance
| Skill level | Confident beginner |
| Crochet terms | US terminology |
| Construction | Worked flat, then seamed and shaped |
| Estimated time | About 2.5–4 hours |
| Sizes | Small, medium, and large |
| Main technique | Half double crochet in the back loop only |
Why You’ll Love This Crochet Pumpkin
- The ribbed texture gives the pumpkin a polished, realistic shape.
- It is worked as a simple rectangle, so there is no complicated amigurumi-style shaping.
- Three sizes are included for easy decorating, gifting, or craft-market sets.
- The stem, leaf, and optional curly vine add a professional finishing touch.
- The printable PDF keeps all instructions together for comfortable offline use.
Finished Sizes
The pattern includes three finished sizes. Measurements are approximate and may vary slightly depending on your yarn, gauge, and stuffing.
| Size | Approximate finished measurement |
|---|---|
| Small | 11 × 8 cm |
| Medium | 16 × 12 cm |
| Large | 22 × 16 cm |
Materials for the Medium Pumpkin
- 100–120 m of #4 medium-weight yarn for the pumpkin body
- 10–15 m of brown yarn for the stem
- 15–20 m of sage or green yarn for the leaf and optional vine
- 4.0 mm crochet hook
- 100–150 g polyester fiberfill
- Yarn needle, scissors, and stitch marker
Gauge: 14 half double crochet stitches worked in the back loop only × 11 rows = 10 × 10 cm.
How the Pumpkin Is Constructed
1. Crochet the ribbed rectangle
The body begins as a flat rectangle. Working half double crochet through the back loop only creates the raised ribs that later become the pumpkin’s natural grooves.
2. Join the short edges
Once the rectangle reaches the required length, the first and last rows are joined to form a tube. Keep the seam neat and secure because it will become part of the finished pumpkin body.
3. Cinch, stuff, and shape
One end is gathered tightly to form the base. Add fiberfill gradually, distributing it evenly so the pumpkin stays round and firm without losing the definition of the ribs. Gather the top closed when you are happy with the shape.
4. Add the finishing details
Crochet the curved brown stem, then add the sage leaf and optional vine. Sew each piece securely to the top and weave in every yarn end for a clean finish.
Helpful tip: Add stuffing in small sections and rotate the pumpkin as you work. This gives you better control over the final shape and helps prevent lumps.
Color and Styling Ideas
Burnt orange creates a classic harvest look, but this design is equally beautiful in cream, rust, mustard, olive, terracotta, or soft neutral shades. Make several sizes in coordinating colors for a table centerpiece, mantel display, autumn shelf, or handmade gift.
Download the Free Harvest Rib Pumpkin PDF
The complete 10-page pattern includes the detailed instructions for all three sizes, materials, gauge, construction notes, and professional step-by-step guidance in US crochet terms.
Frequently Asked Questions
Is this crochet pumpkin pattern beginner-friendly?
Yes. It is best for a confident beginner who is comfortable with basic stitches, working in the back loop, simple seaming, and reading US crochet terminology.
How long does one pumpkin take?
Most makers can complete one pumpkin in approximately 2.5–4 hours. The exact time depends on the chosen size and your crochet pace.
Can I sell finished pumpkins made from this pattern?
Yes, you may sell finished items made from the pattern. Please credit Crochet Pattern Nest as the pattern designer when possible. The written pattern and PDF may not be copied, resold, or redistributed.
Can I use a different yarn weight?
You can experiment with a different yarn, but the finished size and amount of fiberfill will change. Choose a hook that creates a firm fabric so the stuffing does not show through.
Looking for more projects? Browse our free crochet patterns and choose your next cozy make.
Leave a Reply