
Free Crochet Tulip Bouquet Pattern: Five-Stem Guide
· admin
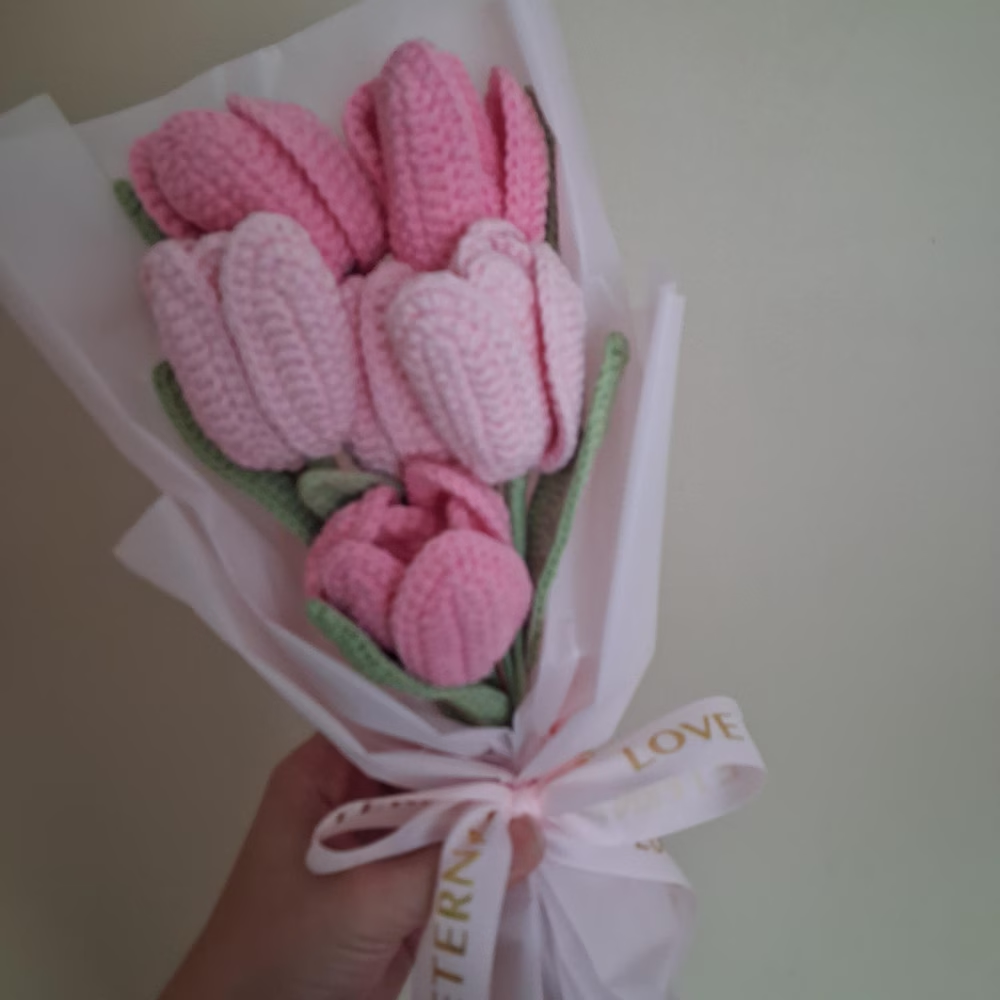
This free crochet tulip bouquet pattern includes the complete instructions for one separate-petal tulip and a five-stem making plan. Two blush flowers, two lavender flowers and one cream flower create the suggested palette, while staggered stem heights keep the arrangement from looking flat.
This updated tutorial replaces the earlier pinched-cup flower on this page. Each tulip now uses a stuffed center, three separately crocheted petals and a leaf. The five-stem arrangement uses measured height targets of 18, 20 and 22 cm; those sizes are adjustable assembly targets, not verified dimensions from the photographs.
Materials and US crochet terms
- Fingering / super-fine yarn in flower colors and green. Use the same thickness for all crochet pieces.
- A hook suitable for that yarn; 2 mm is a possible swatching starting point, not a hook size specified by the source. Adjust for dense, flexible fabric.
- Polyester fiberfill, tapestry needle, scissors, stitch markers and a ruler.
- Covered floral wire that fits inside a six-stitch stem tube, plus suitable cutters and pliers. Round both ends into small loops and cover them with floral tape.
- Ribbon or paper for wrapping, if desired.
The source lists 70 yards (about 64 m) of yarn for its single flower, without a color split or a precise hook/gauge combination. Treat this as a starting allowance only. The altered stem length and your yarn choice change actual consumption. Five times that source allowance is 350 yards (about 320 m), before extra stem length and a working margin; it is not a tested bouquet yardage.
Terms: ch = chain; sc = single crochet; hdc = half double crochet; dc = double crochet; sl st = slip stitch; inc = 2 sc in one stitch; dec = single-crochet two stitches together; BLO = back loop only; st = stitch. Work the center and stem in a continuous spiral, without joining or turning. Move a marker to the first stitch of each round. Petals and leaves have their own joining or turning instructions.
Set the size by measuring your own crochet
The supplied pattern mentions an overall height of approximately 18 cm / 7.08 inches but provides no numerical gauge or hook size. Its fixed round counts therefore cannot guarantee that height in another yarn. This tutorial uses a ruler to set the stem after the head is complete.
| Piece / arrangement | Overall height target |
|---|---|
| 2 front stems | 18 cm / 7.09 in |
| 2 middle stems | 20 cm / 7.87 in |
| 1 rear stem | 22 cm / 8.66 in |
- Complete the center and attach its petals. Measure the head vertically from the stem attachment point to the highest petal tip; call this H.
- Subtract H from the desired total height T. The exposed stem target is T − H. Example only: an actual 4 cm head with an 18 cm target needs about 14 cm of exposed stem.
- Crochet the sleeve to that measured length, temporarily position the head and remeasure the complete flower. Add or remove whole stem rounds before inserting wire and sewing.
If you want a round-count estimate, count your own rounds per centimetre on the stem tube. Estimated total stem rounds = desired sleeve length × measured rounds per centimetre. Count from the closed base. Use the ruler for the final adjustment, since seams and shaping affect the assembled height. Petal and leaf dimensions should be recorded from your first sample; no verified centimetre dimensions are available for them.
Crochet the stuffed center
Use the flower color. Make five centers. Close the beginning magic ring fully; the stem is sewn underneath it rather than pushed through an opening.
| Round | Instructions | Total stitches |
|---|---|---|
| 1 | 6 sc in a magic ring. | 6 |
| 2 | Inc in each stitch. | 12 |
| 3 | (Sc, inc) 6 times. | 18 |
| 4 | (Inc, sc in next 5 sts) 3 times. | 21 |
| 5–6 | Sc in each stitch for 2 rounds. | 21 |
| 7 | (Dec, sc in next 5 sts) 3 times. | 18 |
| 8 | Sc in each stitch. | 18 |
| 9 | (Dec, sc in next 4 sts) 3 times. | 15 |
| 10 | Sc in each stitch. | 15 |
| 11 | (Dec, sc in next 3 sts) 3 times. | 12 |
| 12 | Sc in each stitch. | 12 |
| 13 | Dec 6 times. | 6 |
Add small amounts of stuffing before the final decrease rounds, keeping the center softly shaped. At the end, cut the yarn, thread it through the front loops of the remaining 6 stitches and draw the opening closed. Secure and bury the tail. The narrow tapered end is the top; the broad magic-ring end is the bottom where the stem will attach.
Crochet the separate petals
Make 3 petals per flower — 15 petals for all five stems. Leave a 25 cm starting tail at the base if convenient for assembly. Ch 16.
- Round 1: starting in the second chain from the hook, sc in the next 14 chains. Work 2 sc in the remaining far-end chain. Rotate around the end and sc in each of the 14 unused chain loops down the opposite side. Total: 30 stitches. Do not add a joining slip stitch.
- Round 2: continue into the first sc of Round 1. Work sc in the next stitch, hdc in the next, dc in the next 9 stitches, hdc in the next 2 stitches, and sc in the next stitch. Inc in each of the next 2 stitches at the far end. On the return side, work sc in the next stitch, hdc in the next 2 stitches, dc in the next 9 stitches, hdc in the next, and sc in the last stitch. Total: 32 stitches.
- Round 3: hdc in each of the 32 stitches. Sl st into the first hdc to finish, without counting the slip stitch. Fasten off with a sewing tail.
Count check: Round 1 is 14 + 2 + 14 = 30. Round 2 consumes those 30 stitches and adds two increases, producing 32. Round 3 retains 32. This is an editorial 30/32/32-stitch interpretation: the supplied petal text omits the return side in its first round and does not support its printed 33-stitch total as written. It is not a designer-issued correction.
Mark the base near the starting tail so you do not attach the petal upside down. Match all petal lengths before sewing. A slightly cupped shape is useful; do not stretch the edges flat to force a particular measurement.
Short leaf: make one per stem
With green, ch 18. Start in the second chain from the hook.
- First circuit: work 3 sc, 3 hdc, 7 dc, 2 hdc and 1 sc over the next 16 chains. Work 5 sc into the remaining far-end chain. Rotate around that end and work into the unused loops down the opposite side: 1 sc, 2 hdc, 7 dc, 3 hdc and 3 sc. Total: 37 stitches (16 + 5 + 16).
- Second row: ch 1 and turn. The chain does not count. Starting in the last stitch just worked, sc in the first stitch, hdc in the next, then dc in each of the next 16 stitches. Work 5 dc into the next single stitch, which is the middle stitch of the 5-sc tip group. Dc in each of the next 16 stitches, hdc in the next, and sc in the last. Total: 41 stitches.
- Fasten off with a 25 cm tail. Do not join across the short base opening. Smooth the leaf gently and leave the base available for sewing.
The five tip dc all go into one stitch. For this row, 37 input stitches produce 41 output stitches. If the tip lands off-center, recount the first circuit before continuing.
Crochet a fitted stem sleeve
With green, work 6 sc into a magic ring and close it firmly (Round 1: 6 sts). For Round 2, sc in the back loop of each stitch (6 sts). For Round 3 onward, sc through both loops of each stitch (6 sts per round), making a narrow tube.
Continue to the sleeve length calculated in the measurement section. The source uses 30 total rounds, but this tutorial intentionally fits the sleeve to the chosen height. Count rounds and measure the relaxed tube without pulling it longer. Leave the top open and leave a 30 cm tail for attaching it.
Measure and prepare the covered wire so that its finished, looped ends fit fully inside the tube with a little clearance. Allow extra wire for bending those loops, then check the finished support against the actual sleeve; do not use a universal cut length. Insert it through the open top. Both ends must remain completely covered and must not press through the closed base or flower head.
This is a decorative wired flower, not a toy. Keep exposed wire, cutters and small parts away from children while making it.
Assemble the flower
Attach and shape the petals
For each flower, space three petal bases evenly around the broad bottom of the center. Baste first, overlap the neighboring edges slightly, then sew the bases and lower third into place. Leave the upper tips free. Complete one whole flower and check the petal fit before crocheting the remaining four sets.
Sew the stem to the center
Hold the open six-stitch rim of the sleeve against the broad bottom of the flower center. Sew through the sleeve rim and the center’s base stitches all the way around, taking a second pass if needed. Keep the narrow tapered flower tip pointing upward. The support stays inside the sleeve; it should not protrude into a petal or out of the flower.
Check the overall height with a ruler before securing the final knot. If it needs adjustment, undo the temporary attachment and add or remove sleeve rounds; refit the support if the sleeve length changes. Secure the seam and bury the tails only after the head sits upright.
Attach the leaf
Place the leaf base against the stem, point directed upward and slightly outward. For the standard, open and mini versions, start by positioning the base around the upper third of the exposed stem. For the long-leaf version, place it lower if necessary so it does not obscure the head. Wrap the narrow base around the sleeve and sew through crochet stitches, not through the wire. Adjust the position by eye before tightening.
Finishing and presentation
Put the tallest stem at the rear or center, two medium stems beside it and two short stems toward the front. Rotate the leaves toward the outside of the bouquet. Tie below the leaves without crushing the stem tubes. The supplied photographs include other flower types; only the separate-petal tulips are covered here.
| Color | Flowers | Petals | Leaves | Height targets |
|---|---|---|---|---|
| Blush | 2 | 6 | 2 | 18 cm and 20 cm |
| Lavender | 2 | 6 | 2 | 18 cm and 20 cm |
| Cream | 1 | 3 | 1 | 22 cm |
| Total | 5 | 15 | 5 | 5 fitted stem sleeves |
Make one flower completely before preparing the other four. Record its yarn use, head height and sleeve round count. Lay the bouquet on paper, bring the lower stems together and fold the paper around them loosely. Tie the ribbon below the leaf attachments. Change the color placement freely while retaining the five-stem quantity plan.
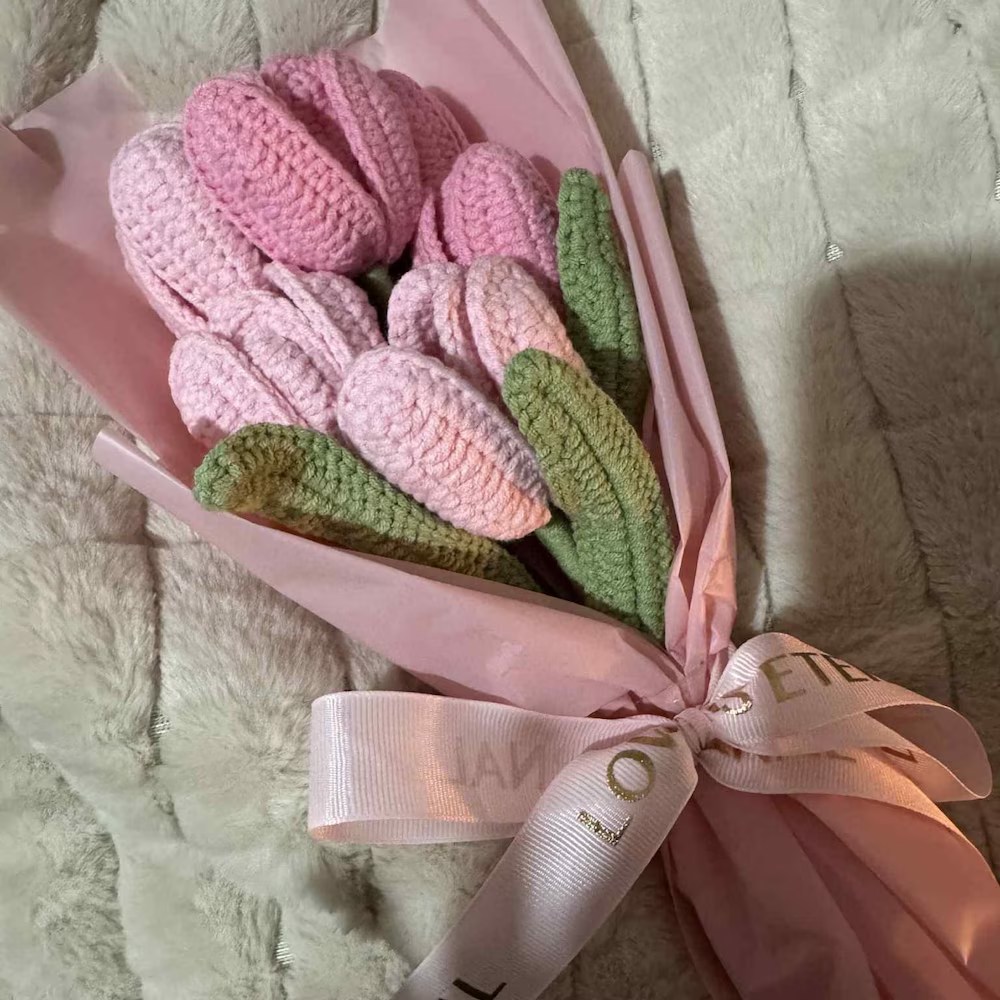
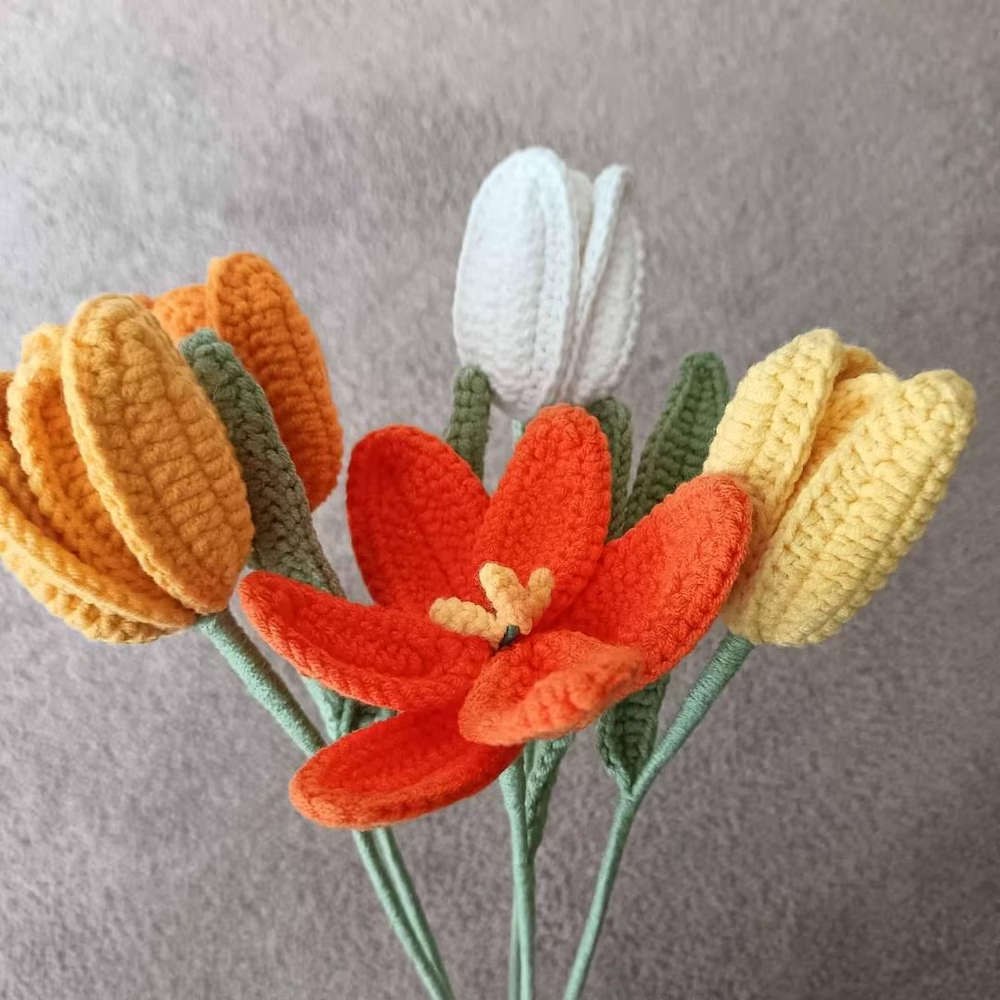
Photo references for color and arrangement
The photographs are not evidence that this edited pattern was test-crocheted. Different petal shapes, filler flowers and other centers shown in them are not automatically included in this tutorial.
Checks before making more flowers
- Count every round before continuing; a missing increase affects how the petals fit.
- Baste petals first and check the silhouette from several sides.
- Confirm that both support ends remain covered and the head is firmly attached.
- Record actual head height, leaf length, total height, hook size and yarn details.
- Compare yarn used on one completed sample before estimating a larger batch.
Frequently asked questions
Does the bouquet pattern include all flowers in the photos?
No. It provides complete instructions for five tulips. Open flowers with yellow centers, extra filler flowers and different petal shapes in the reference photographs are styling examples, not additional patterns.
Are the dimensions guaranteed with any yarn?
No. The overall height is a target you set by measuring and fitting the stem. A numerical gauge, exact source hook size and physically verified dimensions for the edited versions were not supplied. Do not interpret a photograph as a scale reference.
Can I wash the finished flower?
Follow the yarn and support-material care instructions. Gentle surface cleaning is the practical starting point for a wired decorative stem. Avoid soaking unless every component is suitable and dry it fully.