
Crochet Gothic Skull Collar Pattern with Corset Lacing
· admin
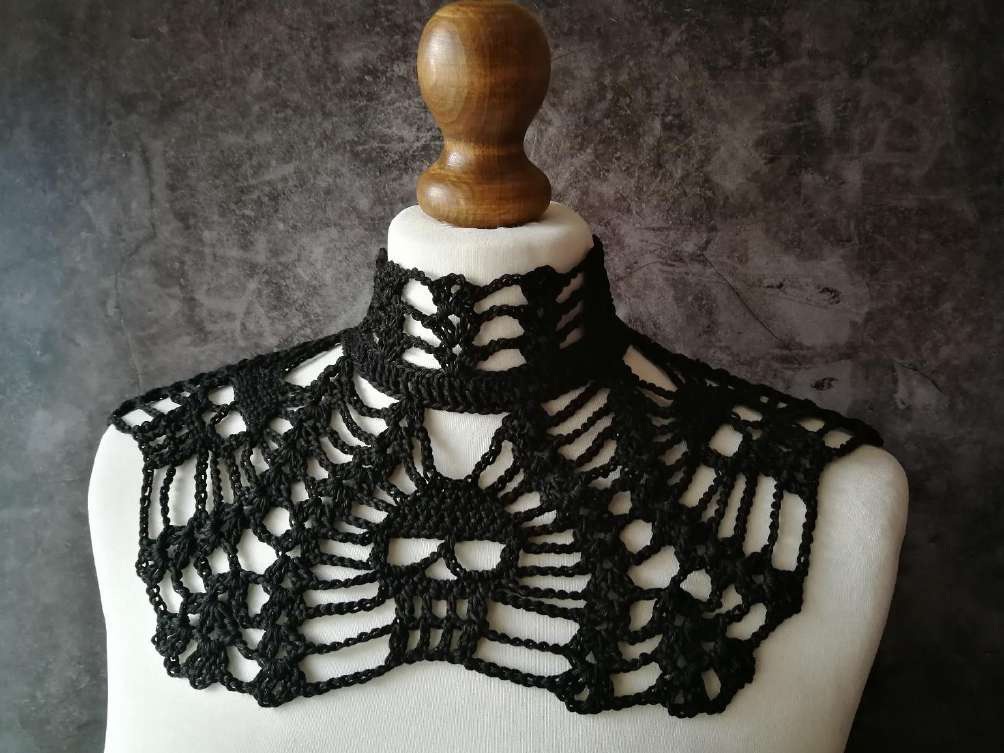
A lace skull collar creates a dramatic Halloween accessory with very little yarn. Five skull motifs grow downward from a firm foundation band, while shells and chain arches connect their outlines. An open choker section finishes the upper edge and a long chain lace closes the back in a corset-style arrangement.
Project at a glance
| Detail | What to expect |
|---|---|
| Skill level | Intermediate lace with careful row tracking |
| Finished size | Adjust the choker to fit; the source gives no fixed circumference |
| Pattern language | English; stitch terms explained below |
| Construction | See the component and assembly sections |
Materials and tools
- Approximately half a ball of sport-weight cotton thread or yarn suitable for a 2 mm hook; the source suggests Drops Safran
- 2 mm hook
- Tapestry needle, scissors and pins for blocking
- Optional stitch markers to separate the five skull repeats
Stitches and pattern notes
Unless stated otherwise, this article uses US crochet terms. ch = chain; sl st = slip stitch; sc = single crochet; hdc = half double crochet; dc = double crochet; inc = 2 stitches in one stitch; dec = work 2 stitches together; MR = magic ring; BLO/FLO = back/front loop only. Numbers in the final column are the finished stitch counts.
Use US terms. Shell = (2 dc, ch 2, 2 dc) in one stitch or space. A starting shell = (ch 2, dc, ch 2, 2 dc) in the first shell space. When the source says “4 sc in each of the following chains,” its later count shows that it means one sc across four chains, not four sc in every chain. Beginning chains and shell placement are structural: count complete motif groups rather than treating every row as a plain strip.
Foundation and skull layout
Chain 78: the source writes this as 76 + 2. Work dc from the third chain through the last chain. There are 76 worked dc plus the beginning ch-2 counted as a dc, giving 77 foundation positions. Chain 1 and turn. In Row 2, make a starting shell, ch 14, skip 7 foundation positions and make a shell. Then repeat (ch 7, skip 8, shell; ch 14, skip 7, shell) four times. Chain 1 and turn. The five ch-14 arches become the skulls; the four ch-7 gaps lie between them.
Build the rounded skull tops
Begin each new row by slip stitching to the first shell space and working a starting shell. End each skull section in the next shell space with an ordinary shell. The table gives the central skull section and the connector used before each of the remaining four skulls. Work the first skull section once, then the connector plus skull section four times. Chain 1 and turn after each row.
| Row | One skull section after its starting shell | Connector before next skull |
|---|---|---|
| 3 | Ch 5; skip 5 chains of the ch-14 arch; sc in each of the next 4 chains; ch 5; shell in next shell space. | Ch 7, shell in next shell space. |
| 4 | Ch 4; sc around the neighboring chain arch, sc across 4 sc, sc around the next arch = 6 sc; ch 4; shell. | Ch 5, skip old connector, shell. |
| 5 | Ch 3; sc around arch, sc across 6 sc, sc around next arch = 8 sc; ch 3; shell. | Ch 3, skip old connector, shell. |
| 6 | Ch 3; sc around arch, sc across 8 sc, sc around next arch = 10 sc; ch 3; shell. | Ch 1, skip old connector, shell. |
| 7 | Ch 3; sc around arch, sc across 10 sc, sc around next arch = 12 sc; ch 3; shell. | Skip connector chain, shell directly in next shell space. |
This arrangement widens each skull from four central sc to twelve while the spaces between motifs narrow. Mark the five centers if you have trouble distinguishing a skull arch from an inter-motif arch. Do not add multiple sc into the side chain unless the row explicitly asks for them.
Eyes, nose and jaw rows
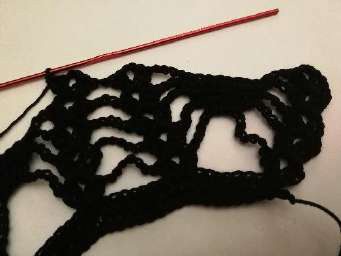
The source uses dc2tog both as a shaping cluster and in its lace drawing. Where it directs dc2tog in one specified sc, make a two-dc cluster into that one stitch. This placement is essential in the eye row: it anchors at the first and last of the twelve sc. In the following rows, compare the source close-ups before tightening a cluster so the two eye openings and center nose arch stay distinct.
| Row | Skull section | Connector before each remaining skull |
|---|---|---|
| 8 | Ch 5; skip side arch; 2-dc cluster in first sc; ch 6, skip 4 sc, sc in next sc; ch 6, skip 5 sc, 2-dc cluster in last sc; ch 5, shell. | Ch 3, shell in next shell space. |
| 9 | Ch 6; sc in cluster, 3 sc around first eye arch, ch 3, 3 sc around second eye arch, sc in cluster; ch 6, shell. | Ch 5, shell in next shell space. |
| 10 | Ch 7; skip side arch and first sc; sc across next 3 sc, 3 sc in central ch-3 arch, sc across next 3 sc = 9 sc; ch 7, skip last sc and arch, shell. | Ch 3; skip 2 connector chains, shell in third chain; ch 3, shell in next shell space. |
| 11 | Ch 7; skip arch and first sc; dc2tog cluster, ch 1, skip stitch, dc, ch 1, skip stitch, dc, ch 1, skip stitch, dc2tog cluster; skip last stitch and arch, ch 7, shell. | Ch 3; (2 dc, ch 2, 2 dc, ch 2, 2 dc) in middle shell space; ch 3, shell in next shell space. |
| 12 | Ch 7; skip arch; dc2tog cluster, ch 1, skip stitch, dc, ch 1, skip stitch, dc, ch 1, skip stitch, dc2tog cluster; skip arch, ch 7, shell. | Ch 3; skip chain and 2 dc; shell in next ch-space; ch 3, skip 2 dc, shell in next ch-space; ch 3, shell in next shell space. |
As above, start with a starting shell, work the first skull section and repeat connector plus skull section four times. Fasten off after Row 12. The source does not supply per-row stitch totals for these lace rows; keep the five motif positions consistent and use the original photos to check the jaw shaping.
Make the adjustable choker
Join yarn along the original dc foundation and work one row of sc. Try it gently around the neck before making the lace extension. If the foundation is too wide, the source suggests omitting some foundation stitches evenly rather than gathering a tight lump at the back. Leave comfortable wearing ease.
For each of the next three rows, the source begins ch 5, skips two positions and works a dc, then ch 4. Work a shell in the next intended position after skipping seven positions; continue evenly spaced shell-and-ch-4 sections across. Finish with a dc, ch 2, skip two positions and a final dc. On later rows use the established shell spaces. If you reduced the foundation, the source’s original repeat count no longer fits exactly: preserve the end loops for lacing and space the interior shells evenly. This is a fit-dependent part of the design, not a fixed repeat to force into every neck size.
Lacing and finishing
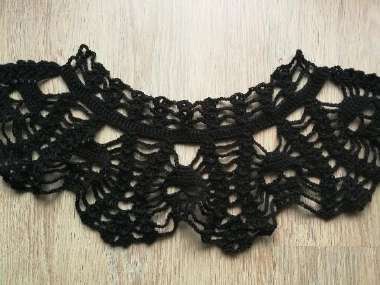
Chain about 300 for the lace, or adjust its length to your collar. Thread it through the side loops in alternating crosses, like a corset back. Block the lace flat using the yarn’s care instructions, opening the skull eye spaces without stretching the foundation band. Allow it to dry before trying the fit. Tie a comfortable bow that can be undone readily.
Tips for a neat finish
- Separate the five skull motifs with temporary markers while the lace is new.
- Count one sc per chain across the four-, six-, eight- and ten-stitch central areas.
- Check the choker fit before adding three rows of shell lace.
- Do not pull the lacing tight enough to distort the band or restrict comfortable movement.
Frequently asked questions
Is this a fixed-size necklace?
No. The source includes a fit check and allows the upper sc row and lace spacing to be adjusted.
Why does the first band have 77 positions?
Its 76 worked dc are joined by a counted beginning ch-2. That supports the five skull sections and four connecting sections.
Can I make it in another color?
Yes. Black emphasizes the Gothic outline, but a light thread makes the skull openings easier to see while learning the rows.
More Halloween crochet ideas
Build a coordinated seasonal display with our Halloween crochet collection. For another small project, explore the crochet ghost tutorial or browse these Halloween coaster ideas.
Pattern source and credit
This article is based on Goth Victorian Neck Skull.pdf. Designer not named in the readable source text. The project photographs come from that source and show its original samples. The text has been organized into an article with additional explanations; any editorial clarification is identified where it matters. This is a document-based adaptation, without a claim that we physically tested the finished project.
Open the original pattern reference for the source photographs and original layout.
Leave a Reply