
Lighted Granny Crochet Pumpkin Pattern in Three Sizes
· admin
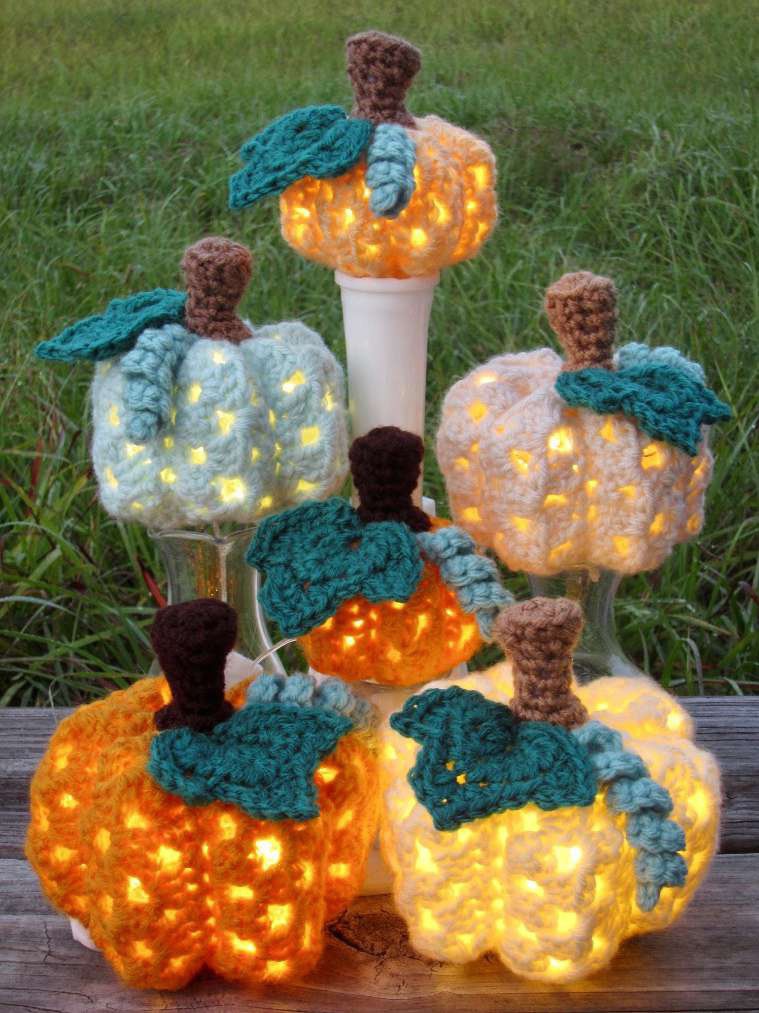
These lighted granny crochet pumpkins use open clusters to let tiny battery-powered lights shine through the fabric. A six-section strip becomes a rounded pumpkin, and a clear internal support keeps the lobes open. The small version uses half double crochet clusters; the medium and large versions use double crochet. All three share the same stem and leaf.
Project at a glance
| Detail | What to expect |
|---|---|
| Skill level | Intermediate construction and assembly |
| Finished size | Small about 7.6 × 9 cm; medium 10 × 10 cm; large 12 × 12.7 cm, including stem |
| Pattern language | English; stitch terms explained below |
| Construction | See the component and assembly sections |
Materials and tools
- Worsted yarn and 5 mm / H-8 hook
- Body yarn: source estimates under 15 g / 28 yd for small, 30 g / 55 yd for medium, 45 g / 83 yd for large
- Scraps of brown and green for stem, leaf and vine; a pinch of fiberfill for the stem
- Optional but recommended: clear 6 mil mylar craft plastic, scissors and a stapler
- A battery-powered 20-LED fairy-light string, plus tapestry needle; keep the battery compartment accessible
Stitches and pattern notes
Unless stated otherwise, this article uses US crochet terms. ch = chain; sl st = slip stitch; sc = single crochet; hdc = half double crochet; dc = double crochet; inc = 2 stitches in one stitch; dec = work 2 stitches together; MR = magic ring; BLO/FLO = back/front loop only. Numbers in the final column are the finished stitch counts.
Work the pumpkin strip back and forth, with ch 1 and turn after each row unless finishing. Turning chains do not count. A granny cluster means three dc in one space for medium/large, or three hdc for small. When a decrease row says to ignore chain spaces, work into the actual stitches only; inserting decreases into chain spaces changes the count and distorts the section.
Choose the size and row repeat
| Size | Foundation | Expanded sc row | Cluster stitch | Strip length |
|---|---|---|---|---|
| Small | Ch 8 | 11 | hdc | 30 rows / six 5-row sections |
| Medium | Ch 12 | 16 | dc | 30 rows / six 5-row sections |
| Large | Ch 14 | 19 | dc | 36 rows / six 6-row sections |
Small pumpkin strip
First section: small
| Round / row | Instructions | Count |
|---|---|---|
| 1 | Ch 8; from second chain: sc, 2 sc in next 2 chains, sc, 2 sc in next 2 chains, sc. | 11 |
| 2 | Sc, ch 1, skip 1; (3 hdc in next stitch, ch 1, skip 2) × 2; 3 hdc in next stitch, ch 1, skip 1, sc. | 3 clusters, 1 sc each end |
| 3 | Sc, ch 1, hdc in first ch-1 space, ch 1; (skip 3 hdc, 3 hdc in next space, ch 1) × 2; skip 3 hdc, hdc in last space, ch 1, sc. | 2 full clusters plus edge hdc |
| 4 | Sc, ch 1; skip first chain space and edge hdc; (3 hdc in next space, ch 1, skip 3 hdc) × 2; 3 hdc in next space, ch 1; skip edge hdc and space; sc. | 3 clusters |
| 5 | Ignore chain spaces: sc, 2 sc decreases, sc, 2 sc decreases, sc. | 7 |
For Rows 6–10, expand the seven stitches using Row 1’s increase placement, then repeat Rows 2–5. The expansion row is worked in BLO. Repeat this five-row unit for Rows 11–15, 16–20, 21–25 and 26–30. Use FLO on expansion Rows 11 and 21, and BLO on Rows 6, 16 and 26. Work both loops on the cluster and decrease rows. Fasten off after Row 30 with about 14 inches of tail.
Medium pumpkin strip
First section: medium
| Round / row | Instructions | Count |
|---|---|---|
| 1 | Ch 12; from second chain: 2 sc, inc, sc, inc in next 3 chains, sc, inc, 2 sc. | 16 |
| 2 | 2 sc, ch 1, skip 1; (3 dc in next stitch, ch 1, skip 2) × 3; 3 dc in next stitch, ch 1, skip 1, 2 sc. | 4 clusters, 2 sc each end |
| 3 | 2 sc, ch 1, dc in first space, ch 1; (skip 3 dc, 3 dc in next space, ch 1) × 3; skip 3 dc, dc in last space, ch 1, 2 sc. | 3 full clusters plus edge dc |
| 4 | 2 sc, ch 1; skip first space and edge dc; (3 dc in next space, ch 1, skip 3 dc) × 3; 3 dc in next space, ch 1; skip edge dc and space; 2 sc. | 4 clusters |
| 5 | Ignore spaces: 2 sc, dec, sc, 3 dec, sc, dec, 2 sc. | 11 |
Repeat the same five-row section through Row 30. Expand the eleven stitches using the increase placement from Row 1, then work the cluster and decrease rows. As for small, expansion Rows 6, 16 and 26 use BLO; Rows 11 and 21 use FLO. The alternate loops help the six lobes fold in the correct direction. Leave a 14-inch tail at the end.
Large pumpkin strip
First section: large
| Round / row | Instructions | Count |
|---|---|---|
| 1 | Ch 14; from second chain: 2 sc, inc, sc, (inc in next 2 chains, sc) × 2, inc, 2 sc. | 19 |
| 2 | 2 sc, ch 1, skip 1; (3 dc in next stitch, ch 1, skip 2) × 4; 3 dc in next stitch, ch 1, skip 1, 2 sc. | 5 clusters, 2 sc each end |
| 3 | 2 sc, ch 1, dc in first space, ch 1; (skip 3 dc, 3 dc in next space, ch 1) × 4; skip 3 dc, dc in last space, ch 1, 2 sc. | 4 full clusters plus edge dc |
| 4 | 2 sc, ch 1; skip first space and edge dc; (3 dc in next space, ch 1, skip 3 dc) × 4; 3 dc in next space, ch 1; skip edge dc and space; 2 sc. | 5 clusters |
| 5 | Repeat Row 3. | 4 full clusters plus edge dc |
| 6 | Ignore spaces: 2 sc, (dec, sc) × 5, sc. | 13 |
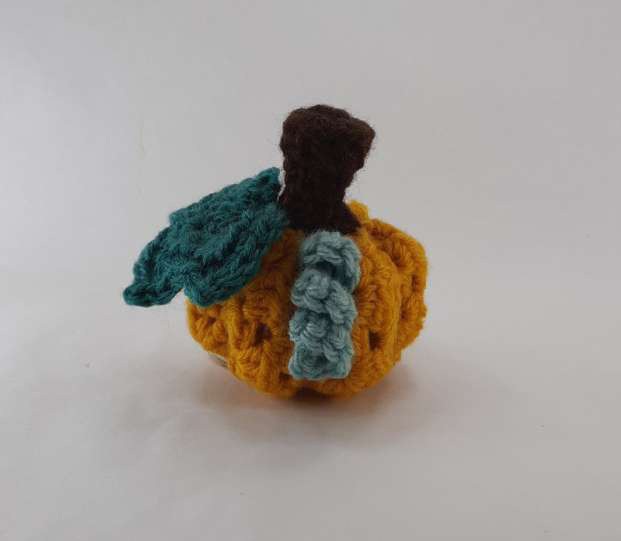
Repeat the six-row section five more times to finish at Row 36. On each new section, use Row 1’s increase placement over the thirteen stitches to return to nineteen. Work these expansion rows in FLO, as specified for the large source sample. The other rows use both loops. Fasten off leaving about 14 inches of tail.
Stem, curly vine and leaf
Stem: all sizes
| Round / row | Instructions | Count |
|---|---|---|
| 1 | 6 sc in MR. | 6 |
| 2 | 6 inc. | 12 |
| 3 | BLO (2 sc, dec) × 3. | 9 |
| 4 | Through both loops: (dec, sc) × 3. | 6 |
| 5–6 | Sc around; add one extra straight round for a longer stem if desired. | 6 |
| 7 | Inc around; leave a long tail and add a pinch of filling. | 12 |
For a curly vine, chain 13 for small, 17 for medium or 21 for large. From the second chain, work 2 sc into every chain, giving 24, 32 or 40 sc. The extra stitches curl the strip naturally. Leave a tail for attaching it beside the stem.
Leaf: no turning chains
| Round / row | Instructions | Count |
|---|---|---|
| 1 | Ch 2; in the second chain work sc, hdc, 5 dc, hdc, sc; turn. | 9 |
| 2 | Sl st, (skip 1, 5 hdc in next stitch) × 3, skip 1, sl st; turn. | 17 |
| 3 | Sl st, 3 sc; (2 dc, picot, dc) in next stitch; sl st, 2 sc; (2 dc, picot, 2 dc) in next stitch; 2 sc, sl st; (dc, picot, 2 dc) in next stitch; 3 sc, sl st; sl st in beginning center ring; ch 1 and fasten off. | Three pointed lobes |
For this leaf only, each picot is ch 2 then sl st into the second chain from the hook. Do not use the larger five-chain picot from the separate spiderweb pattern.
Assemble the pumpkin and support
Fold the strip with right sides together and join the short ends using relaxed slip stitches through the foundation edge and the inside loop of the final row. Turn right side out. Gather one opening closed; this is the top. Sew on the filled stem, vine and leaf, then hide the ends.
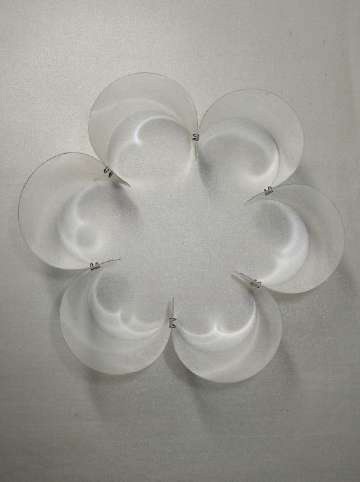
Measure the width of one finished rib. Cut six clear-plastic rectangles: each rectangle is that width plus 1 inch, and that width minus 1/2 inch in height. The source examples are 2.5 × 1 inch for small, 3 × 1.5 inches for medium, and 3.5 × 2 inches for large. Join their short sides into the source’s six-part star with a staple about 1/4 inch in from each edge. Round sharp plastic corners, check staple ends, and turn the structure inward to create six rounded compartments. Compress it gently through the pumpkin’s bottom opening and ease each compartment into a crochet lobe.
Fit the fairy lights
Distribute a 20-LED battery string into six loose coils, about three or four lights per lobe. Keep the wire bends gentle and follow the light manufacturer’s limits. The large source sample uses two 20-LED strings, though a single string is also possible. Draw a separate matching yarn around the bottom opening and tie it loosely around the outgoing wire; leave the battery pack outside and accessible. A small bow allows the lights to be removed for cleaning.
Use cool battery-operated LEDs only, never a real candle. Keep batteries, sharp plastic and stapled supports away from children, and switch the lights off when the decoration is unattended. The pumpkin is a decorative light cover, not a stuffed toy.
Tips for a neat finish
- Count six repeated sections before joining the strip into a tube.
- Measure your own rib before cutting the support; source dimensions are examples.
- Keep the bottom opening removable so the light string can be checked or replaced.
- Remove the entire electrical unit before spot-cleaning the crochet.
Frequently asked questions
Do I stuff the pumpkin body?
No. The clear support holds the lobes open so light can pass through; only the stem gets a small amount of filling.
Do all sizes use dc clusters?
Small uses hdc clusters, while medium and large use dc clusters.
Can I display it without lights?
Yes. Use the internal support to keep the openwork shape, or display it as an unlit seasonal decoration.
More Halloween crochet ideas
Build a coordinated seasonal display with our Halloween crochet collection. For another small project, explore the crochet ghost tutorial or browse these Halloween coaster ideas.
Pattern source and credit
This article is based on Lighted Pumpkin.pdf. Designer not named in the readable source text. The project photographs come from that source and show its original samples. The text has been organized into an article with additional explanations; any editorial clarification is identified where it matters. This is a document-based adaptation, without a claim that we physically tested the finished project.
Open the original pattern reference for the source photographs and original layout.
Leave a Reply