
Crochet Halloween Cat Gnome Pattern with a Witch Hat
· admin
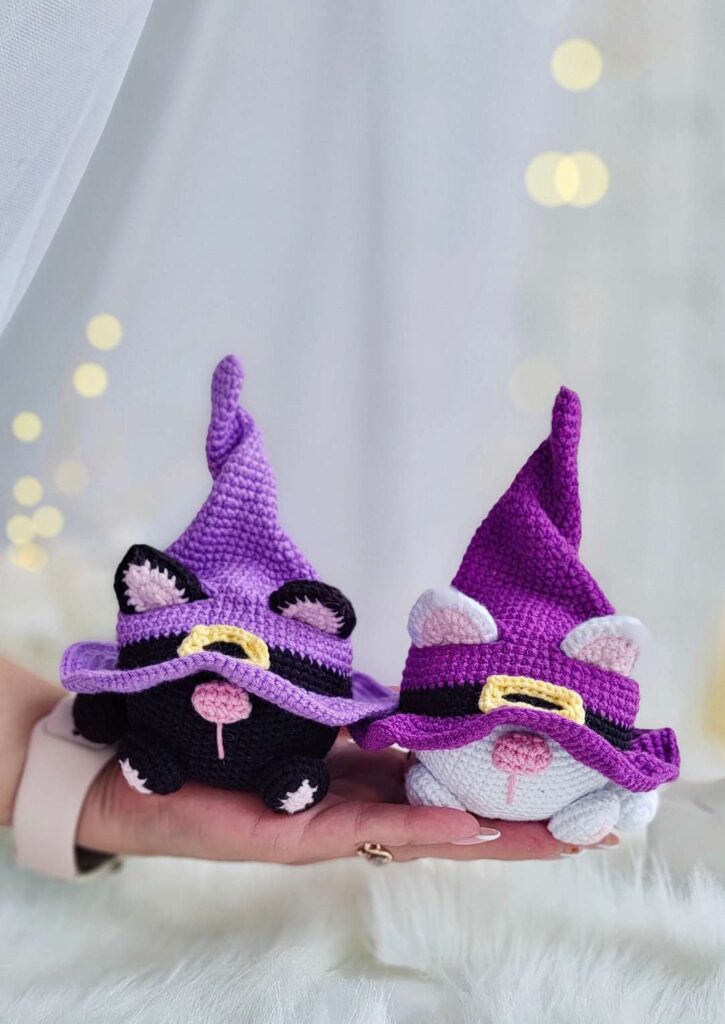
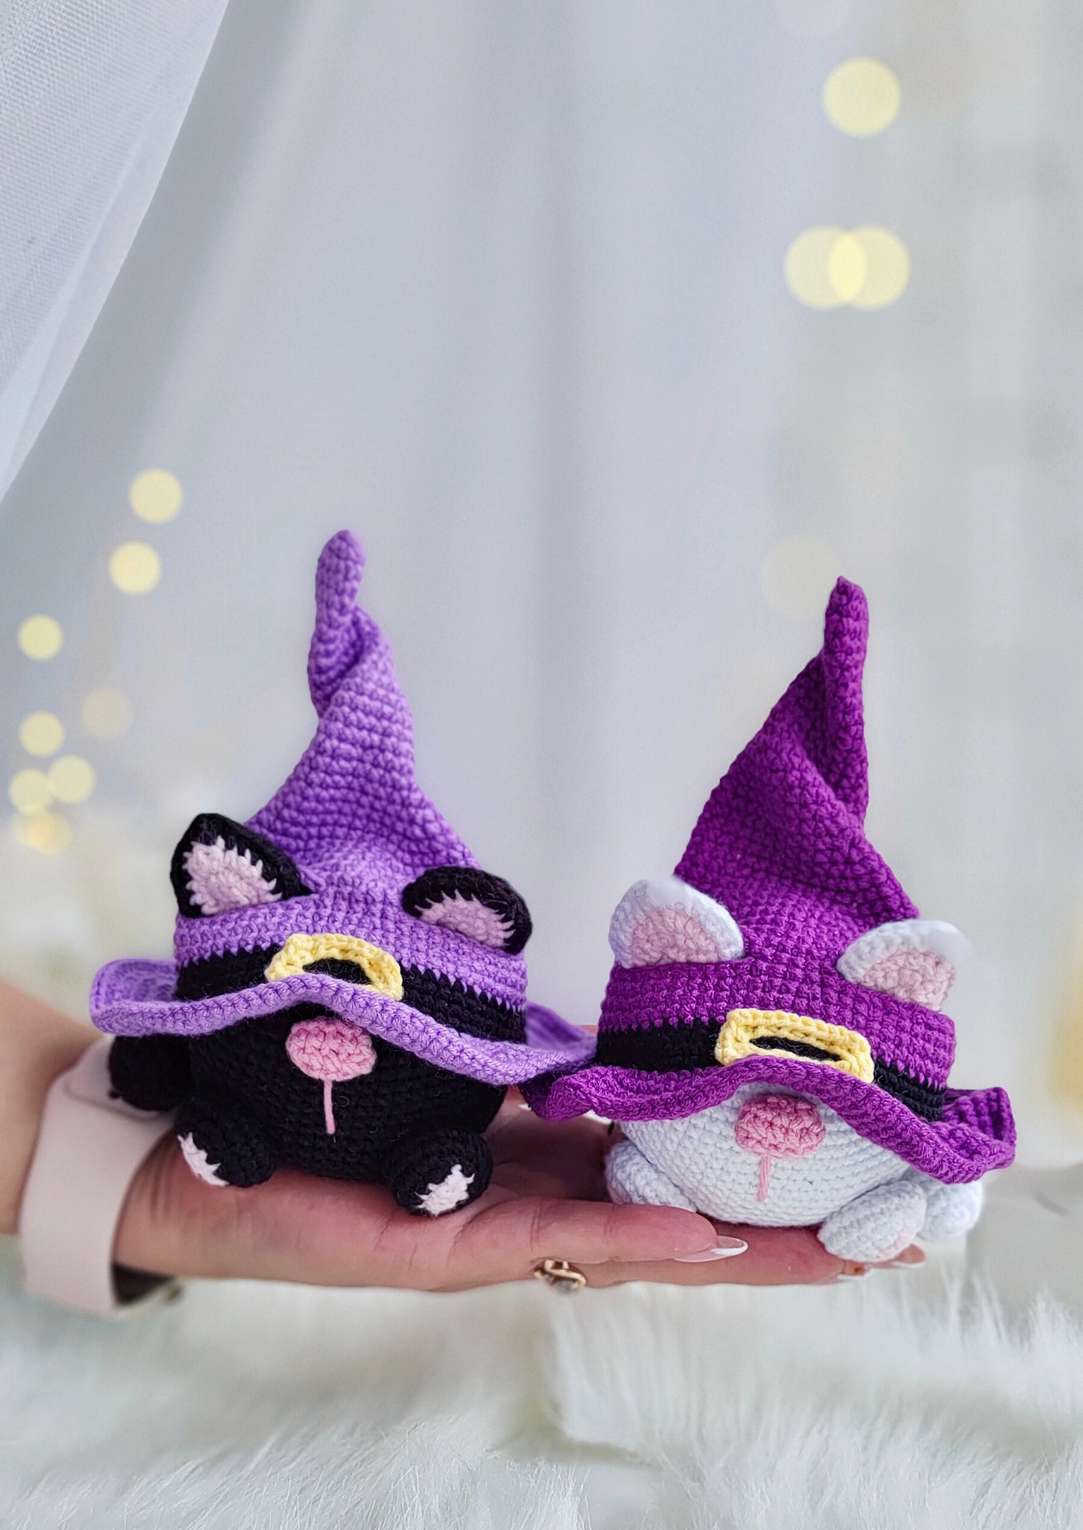
A tall purple witch hat turns this rounded crochet cat into a charming Halloween gnome. The brim sits low over the face, with the ears peeking through two openings and a pink nose showing underneath. The source makes a white cat, but the same construction can be worked in black for a coordinated pair.
Project at a glance
| Detail | What to expect |
|---|---|
| Skill level | Intermediate |
| Finished size | About 14 cm / 5.5 inches with the source materials |
| Pattern language | English; stitch terms explained below |
| Construction | See the component and assembly sections |
Materials and tools
- Sport/4-ply yarn: YarnArt Jeans or Alize Cotton Gold
- White or black for the cat, light pink for ears and paws, pink for the nose, purple for the hat, black for its band and yellow for the buckle
- 1.75 mm hook or a hook giving a firm amigurumi fabric
- Fiberfill, tapestry needle, pins, scissors and stitch marker
Stitches and pattern notes
Unless stated otherwise, this article uses US crochet terms. ch = chain; sl st = slip stitch; sc = single crochet; hdc = half double crochet; dc = double crochet; inc = 2 stitches in one stitch; dec = work 2 stitches together; MR = magic ring; BLO/FLO = back/front loop only. Numbers in the final column are the finished stitch counts.
Work the amigurumi in a continuous spiral and move a marker to the first stitch of each round. Do not add a joining slip stitch or turning chain unless directed. A repeat such as (2 sc, inc) × 6 means repeat the complete bracket six times. Count before proceeding to a shaping round.
Crochet the cat
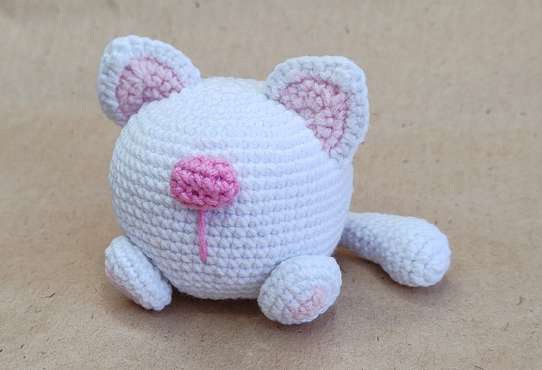
Rounded body
| Round / row | Instructions | Count |
|---|---|---|
| 1 | 8 sc in MR. | 8 |
| 2 | 8 inc. | 16 |
| 3 | (sc, inc) × 8. | 24 |
| 4 | Sc, inc, (2 sc, inc) × 7, sc. | 32 |
| 5 | (3 sc, inc) × 8. | 40 |
| 6 | 2 sc, inc, (4 sc, inc) × 7, 2 sc. | 48 |
| 7 | (5 sc, inc) × 8. | 56 |
| 8 | 3 sc, inc, (6 sc, inc) × 7, 3 sc. | 64 |
| 9–21 | 64 sc for 13 rounds. | 64 |
| 22 | 3 sc, dec, (6 sc, dec) × 7, 3 sc. | 56 |
| 23 | (5 sc, dec) × 8. | 48 |
| 24 | 2 sc, dec, (4 sc, dec) × 7, 2 sc. | 40 |
| 25 | (3 sc, dec) × 8. | 32 |
| 26 | Sc, dec, (2 sc, dec) × 7, sc. | 24 |
| 27 | (sc, dec) × 8. | 16 |
| 28 | 8 dec; close the opening. | 8 |
Add small portions of stuffing as the body grows. Shape it into a rounded, slightly upright form; do not leave a hard lump at the base. The source cat has no plastic eyes because the hat covers the upper face.
Ears: two inner and two outer layers
| Round / row | Instructions | Count |
|---|---|---|
| 1 | In light pink, work 4 sc in MR; ch 1 and turn. | 4 |
| 2 | 4 inc; ch 1 and turn. | 8 |
| 3 | Sc, inc, sc, (hdc, dc, hdc) in one stitch, (sc, inc) × 2. | 13 |
| 4 | Change to body color; ch 1, turn; 2 sc, inc, 3 sc, (hdc, dc, hdc) in one stitch, 2 sc, inc, 3 sc. | 17 |
Make the two outer ear layers using the same four rows entirely in the body color. Hold each outer layer against an inner layer and join their edges with slip stitches. Keep a long sewing tail. The beginning ch-1 does not add to the row count.
Nose
| Round / row | Instructions | Count |
|---|---|---|
| 1 | In pink, ch 6. From the second chain: 4 sc, 3 sc in the last chain; continue around the underside with 3 sc, inc. | 12 |
| 2 | Sc around. | 12 |
| 3 | 6 dec; add a little stuffing and close. | 6 |
Paws: make two
| Round / row | Instructions | Count |
|---|---|---|
| 1 | In light pink, ch 4. From the second chain: 2 sc, 3 sc in the last chain; on the underside, sc, inc. | 8 |
| 2 | Change to body color: inc, sc, 3 inc, sc, 2 inc. | 14 |
| 3 | Sc, inc, sc, (sc, inc) × 3, sc, (sc, inc) × 2. | 20 |
| 4–5 | Sc around. | 20 |
| 6 | (3 sc, dec) × 4. | 16 |
| 7 | 8 dec; stuff lightly and leave a sewing tail. | 8 |
Tail
| Round / row | Instructions | Count |
|---|---|---|
| 1 | In body color, 6 sc in MR. | 6 |
| 2 | 6 inc. | 12 |
| 3 | (sc, inc) × 6. | 18 |
| 4–6 | Sc around. | 18 |
| 7 | (sc, dec) × 6. | 12 |
| 8–10 | Sc around. | 12 |
| 11 | (2 sc, dec) × 3. | 9 |
| 12–18 | Sc around. | 9 |
Lightly stuff the tail, flatten its opening and close with 4 sc through paired sides, leaving the odd stitch at the fold. Leave a sewing tail. Position the ears between body Rounds 3 and 10 with five stitches between them; sew the nose centrally between Rounds 10–11. Add the paws near Rounds 21–22 and the tail at the side between Rounds 19–22. Embroider the short line beneath the nose as shown in the assembly photo.
Make the witch hat
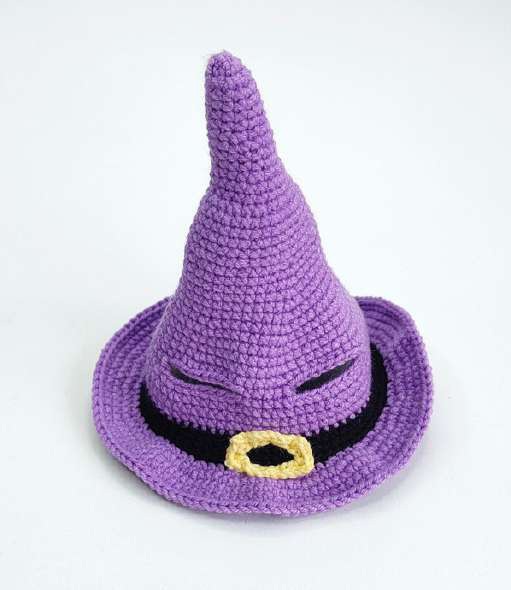
Hat cone and band
| Round / row | Instructions | Count |
|---|---|---|
| 1 | In purple, 6 sc in MR. | 6 |
| 2 | Sc around. | 6 |
| 3 | 6 inc. | 12 |
| 4–7 | Sc around. | 12 |
| 8 | (3 sc, inc) × 3. | 15 |
| 9–11 | Sc around. | 15 |
| 12 | (2 sc, inc) × 5. | 20 |
| 13–14 | Sc around. | 20 |
| 15 | (sc, inc) × 10. | 30 |
| 16 | Sc around. | 30 |
| 17 | Inc, 29 sc. | 31 |
| 18 | Inc, 30 sc. | 32 |
| 19 | Sc around. | 32 |
| 20 | (3 sc, inc) × 8. | 40 |
| 21 | (3 sc, dec) × 8. | 32 |
| 22 | (inc, 15 sc) × 2. | 34 |
| 23 | (inc, 16 sc) × 2. | 36 |
| 24 | (inc, 17 sc) × 2. | 38 |
| 25 | (inc, 18 sc) × 2. | 40 |
| 26 | (inc, 19 sc) × 2. | 42 |
| 27 | (inc, 6 sc) × 6. | 48 |
| 28 | (inc, 7 sc) × 6. | 54 |
| 29–30 | Sc around. | 54 |
| 31 | (inc, 8 sc) × 6. | 60 |
| 32 | (inc, 9 sc) × 6. | 66 |
| 33 | 20 sc, ch 10, skip 10 stitches, 5 sc, ch 10, skip 10 stitches, 21 sc. | 66 positions |
| 34 | Sc around, working into the chains as stitches. | 66 |
| 35 | (inc, 10 sc) × 6. | 72 |
| 36–37 | Sc around. | 72 |
| 38–41 | Change to black; sc around. | 72 |
| 42 | Change to purple; FLO (2 sc, inc) × 24. | 96 |
| 43 | (3 sc, inc) × 24. | 120 |
| 44–46 | Sc around; fasten off and weave in ends. | 120 |
The two chain-10 openings are functional ear holes. Test the hat on the cat before completing the brim so the ears do not fold awkwardly underneath. Keep the brim relaxed: an overly tight final round can make it curl upward.
Buckle and finishing
With yellow, chain 22 and join without twisting. Work (7 sl st, 3 sl st in one chain, 2 sl st, 3 sl st in one chain) twice. The four clusters of three slip stitches form the corners. Sew the buckle centrally over the black band, then ease the hat over the ears and arrange the brim above the nose.
Tips for a neat finish
- Choose the cat’s body color before starting the outer ears and tail.
- Keep the paws lightly filled so their oval shape remains visible.
- Pin the nose with the hat in place to check that it will show beneath the brim.
- Count the 66 positions after forming the ear holes; do not accidentally crochet into skipped body stitches.
Frequently asked questions
Is the hat removable?
The source finishes by placing the hat on the cat rather than sewing it permanently. You may secure it with a few discreet stitches for a fixed display.
Can I make the black cat in the photos?
Yes. Substitute black for the white body yarn and keep the light inner-ear and nose colors for contrast.
Does the cat need safety eyes?
No. The source design uses the low hat and nose to create the face.
More Halloween crochet ideas
Build a coordinated seasonal display with our Halloween crochet collection. For another small project, explore the crochet ghost tutorial or browse these Halloween coaster ideas.
Pattern source and credit
This article is based on Cat Gnome.pdf. Designer not named in the readable source text. The project photographs come from that source and show its original samples. The text has been organized into an article with additional explanations; any editorial clarification is identified where it matters. This is a document-based adaptation, without a claim that we physically tested the finished project.
Open the original pattern reference for the source photographs and original layout.
Leave a Reply