
Loopy Corner Crochet Pillow Pattern
· admin
Why you’ll love this pattern
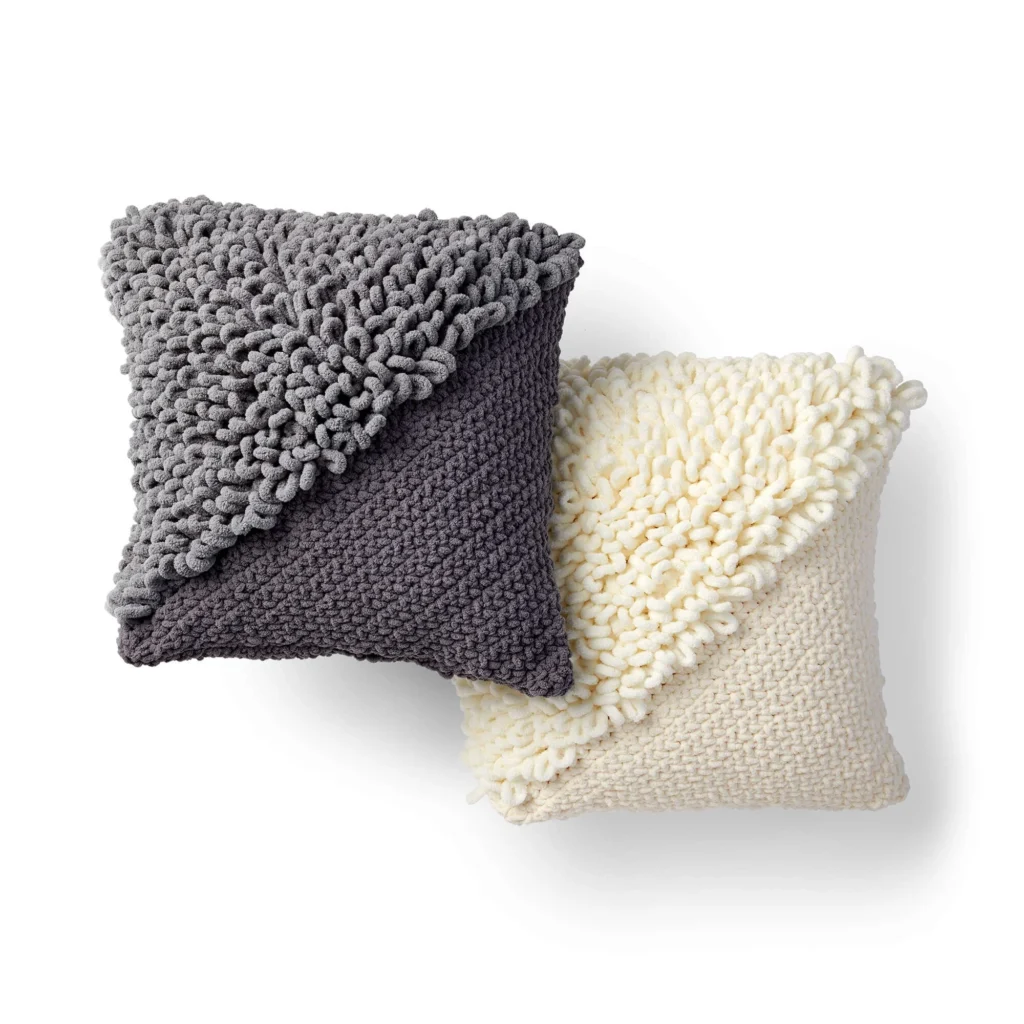
This Alize EZ Loopy Corner Crochet Pillow Pattern is designed to bring both comfort and creativity into your home. Not only is it a practical project that enhances your living space, but it also allows for exciting crochet techniques that are sure to captivate your attention. Crocheters of all skill levels, especially beginners, will find joy in working through this pattern thanks to its relatively straightforward stitches and innovative use of yarn. Perfect for brightening up a couch or making a thoughtful gift, this pillow project transforms ordinary yarn into an extraordinary handmade keepsake.
"This pattern was both soothing and satisfying to work on. I loved the loopy texture and how quickly it came together. Now, it’s the showpiece of my living room!"
Step-by-step overview
In this delightful crochet project, you’ll be crafting a cozy 20" square pillow cover featuring a beautiful loopy design. The main technique used in this pattern is a combination of single crochet and an engaging stitch method that integrates contrast yarn, creating a unique and appealing texture. As you progress through the rows, you’ll notice how the project evolves, presenting a working opportunity for beginners and seasoned crocheters alike. A typical completion time might be a cozy afternoon or two, depending on your pace and experience.
Materials you’ll need
To get started, you’ll gather the following materials:
-
Bernat® Blanket™ (10.5 oz/300 g; 220 yds/201 m)
- Main Color (MC): Dark Gray (10044) or Vintage White (10006)
- 2 balls or 400 yds/364 m
-
Bernat® Alize® Blanket EZ™ (6.4 oz/180 g; 18 yds/16 m)
- Contrast A: Dark Gray (37014) or Cream (37013)
- 1 ball
-
Crochet hook: Size U.S. L/11 (8 mm) or size needed to obtain gauge
-
Pillow form: 20" [51 cm] square
-
Button: 1" [2.5 cm] button
This pillow project uses fluffy, soft yarn, making it perfect for decorative touches while ensuring comfort. The recommended hook size enables you to achieve the right gauge, ensuring your pillow retains its intended shape and size. You may choose your colors based on your décor or personal preference.
Step-by-step instructions
Front
-
With MC, ch 2.
-
(WS) 2 sc in the 2nd ch from the hook. Join A (leaving 3 loops of A yarn at the side edge to weave in later).
-
Holding A yarn in front (towards RS) with MC above, ch 1 with MC. With MC, [(catching A yarn between 2 loops) 2 sc in next sc] twice. Turn.
-
Holding A yarn in back (towards RS) with MC above, ch 1 with MC. With MC, (catching A yarn between 2 loops for each sc across), 2 sc in first sc. 1 sc in each of next 2 sc. 2 sc in last sc. Turn.
-
Repeat rows of increasing stitches as indicated until you have 44 sts.
-
Break A. Continue with MC only for a smooth section.
-
For the next rows, follow the instructions to gradually decrease until reaching 4 sts.
-
Complete the final stitches to fasten off.
Back (make 2 pieces alike)
- With MC, ch 37.
- (RS) 1 sc in the 2nd ch from hook and in each ch to end. Turn.
- Ch 1. 1 sc in each sc to the end of the row.
- Continue this until your work measures 13" [33 cm]. Fasten off.
- Mark side edges 3" [7.5 cm] down from final row.
Finishing
- Overlap back pieces at markers and sew sections together.
- Ensure the center back opening remains across the middle for inserting the pillow form.
- Sew side edges of the front and back pieces together.
- Use the gap between stitches as a buttonhole to sew the button to the center back.
Ways to use your finished project
Once completed, your cozy crocheted pillow isn’t just for decoration. It can serve as a soft backrest on a chair, make a thoughtful gift for friends and family, or even act as a comforting piece for your outdoor seating. Consider using seasonal colors to change the vibe of your décor throughout the year, or create a matching set of pillows for a themed look.
How to care for your crochet project
To keep your new pillow looking great, consider the following care tips:
- Washing: Hand wash in cold water. If machine washing, use a gentle cycle and a laundry bag.
- Drying: Flat dry and reshape to preserve its appearance. Avoid hanging as this can stretch the fibers.
- Long-term storage: Store in a cool, dry place. Avoid damp environments to prevent mold or mildew.
Helpful crochet tips
Here are some tips to help you as you work on your project:
- Keep an eye on your stitch count to avoid accidental increases or decreases.
- Use stitch markers to help track pattern repeats easily.
- Maintain even tension for a consistent finish.
- Weave in yarn ends securely to prevent unraveling.
- Consider blocking your finished pillow for a polished look.
Creative variations
Feel free to customize your pillow in various ways:
- Select different yarn colors to match your existing home décor.
- Experiment with contrasting borders for a striking visual effect.
- Combine different yarn textures for a unique tactile experience.
- Add decorative appliqués or embroidery for an added personal touch.
Be mindful that changes in yarn weight or color may alter the finished size or drape of your pillow.
Frequently asked questions
-
Is this crochet pattern beginner-friendly?
Yes! It’s accessible for beginners, thanks to clear instructions and basic stitches. -
What yarn works best?
The pattern works great with the specified Bernat® blanket yarn for softness and durability. -
Can I use a different hook size?
You may use another size, but it could affect the final gauge and fit of your pillow. -
How long does the project take?
Depending on your skill level and pace, you could complete it in a few hours to a day. -
Can I sell finished items made from this pattern?
Check the original designer’s terms to confirm if selling is permissible.
With your new crocheted pillow, you’ll add not only comfort to your home but also a beautifully crafted piece of art that showcases your crochet skills. Happy crafting!
Leave a Reply