
Little Bit Loopy Crochet Pillow Pattern
· admin
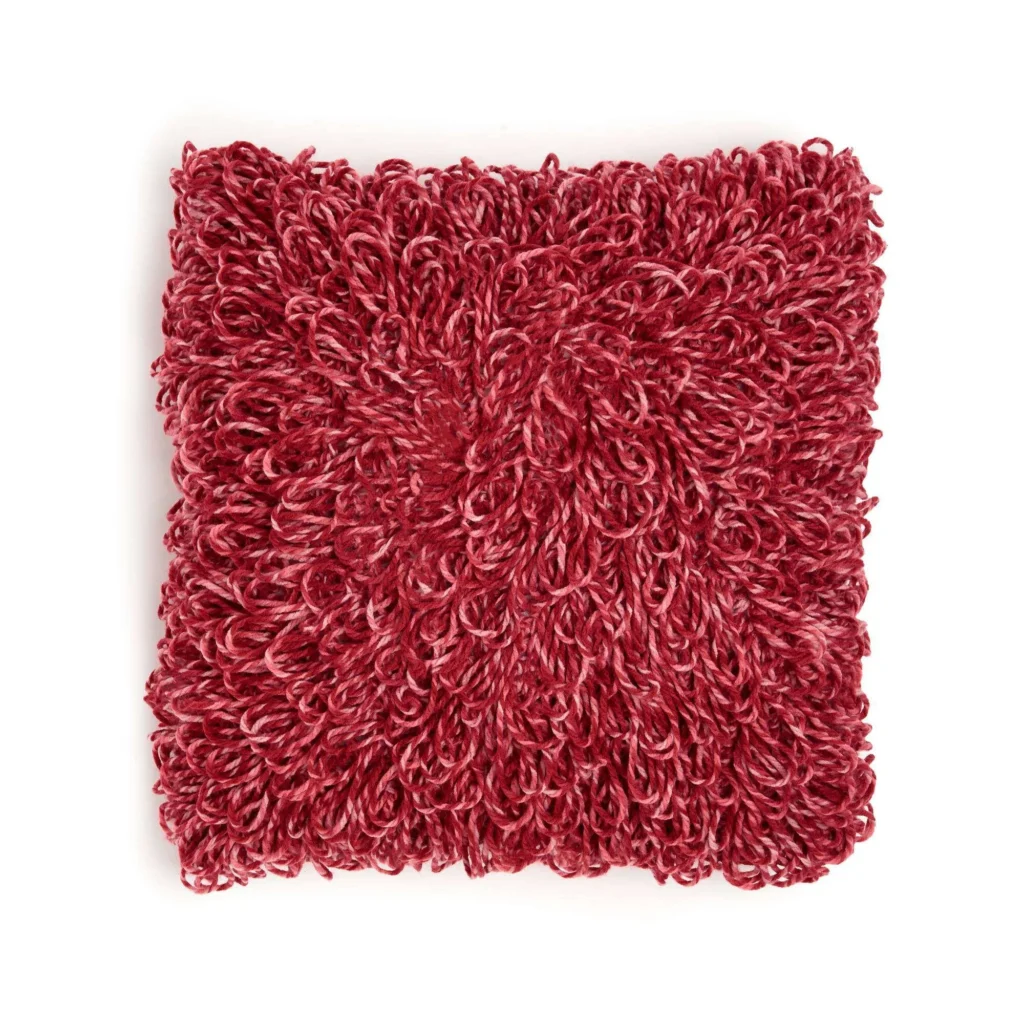
A Cozy Crochet Project to Brighten Your Home
Creating your own crochet pillow can be a delightful experience, especially when using this pattern. As someone who loves crocheting, I can tell you that there’s something special about crafting home décor pieces that reflect your style. This pillow pattern is perfect for crafters of all levels and adds a comfortable touch to any room. The “Little Bit Loopy” pillow combines a modern aesthetic with cozy functionality, making it an excellent choice for home decoration or thoughtful, handmade gifts.
What Makes This Crochet Pattern Special
This pattern is well-loved for several reasons:
- Beginner-Friendly: It’s easy to follow, making it ideal for new crocheters.
- Skill-Building: It introduces lovely loop stitches that help you enhance your skills.
- Quick Completion: With an estimated completion time of just a few hours, it’s perfect for a casual crafting weekend.
- Handmade Charm: Nothing beats the satisfaction of making something yourself – it adds personality to your space.
- Gift Potential: Friends and family will appreciate a lovingly crafted pillow as a unique and personal touch.
"I loved making this pillow! It was easy to follow, and the finished product looks stunning on my couch!" – A happy crocheter
Step-by-Step Overview
This project is all about creating a unique square pillow cover that fits a 20" [51 cm] pillow form. You’ll start by crocheting the front panel and then move on to the back, which features a ribbed texture. Using mostly single crochet stitches and loop stitches, this project is both enjoyable and satisfying. The skill level is suitable for beginners, and you can expect to complete it in just a few hours, depending on your pace.
Materials You’ll Need
To make your crochet pillow, gather the following supplies:
- Yarn: Bernat® Softee® Chunky Twist™ (10.5 oz/300 g; 316 yds/289 m) in Burgundy (10014): 2 balls (615 yds/562 m)
- Crochet Hook: Size U.S. L/11 (8 mm) or size needed to obtain gauge
- Stitch Marker: Helpful for marking your place in the pattern
- Yarn Needle: For weaving in ends
- Pillow Form: One 20" [51 cm] square pillow form
This yarn is chunky, making it warm and plush, ideal for a cozy, homey vibe.
Follow These Steps
Front Panel
- Chain 40.
- 1st Row (right side): Single crochet (sc) in the 2nd chain from the hook. Continue with 1 sc in each remaining chain. Turn. (39 stitches)
- 2nd Row: Chain 1. 1 sc in the first stitch, then work 1 loop stitch (Lp st) in each sc to the last stitch. Finish with 1 sc in the last stitch. Turn.
- 3rd Row: Chain 1 and work 1 sc in each stitch across. Turn.
- Repeat Rows 2 and 3 until your piece measures 20" [51 cm], finishing with a 3rd row.
- Fasten off.
Back Panel (Make 2 Pieces Alike)
Ribbing
- Chain 6.
- Row 1: 1 sc in the 2nd chain from the hook, then 1 sc in each chain to the end. Turn. (5 sc)
- Row 2: Chain 1. Working in back loops only, 1 sc in each sc to the end. Turn.
- Repeat Row 2 until your work, when slightly stretched, measures 20" [51 cm]. Do not fasten off.
Proceed as Follows:
- Turn work sideways.
- Chain 1, then work 39 sc evenly along the side of the ribbing. Turn. Place a stitch marker at the end of the row.
- Row 2: Chain 1 and work 1 sc in each sc to the end. Turn.
- Repeat Row 2 until the piece measures 11" [28 cm] from the stitch marker.
- Fasten off.
Finishing
- Overlap the back pieces to match the front, ensuring the ribbed sections are centered to create an opening for the pillow form.
- With the right side facing, join the yarn with a slip stitch to any corner of the pillow.
- Chain 1. Work sc evenly around all four sides, placing 3 sc in each corner.
- Join with a slip stitch in the first sc and fasten off.
- Insert the pillow form into the cover.
Creative Ways to Use Your Finished Pillow
Once completed, this beautiful crochet pillow can serve various purposes:
- Home Décor: Use it to enhance your living room or bedroom aesthetics.
- Handmade Gifts: Delight friends with a thoughtful addition to their home.
- Seasonal Decorations: Create pillows in different colors for various holidays and seasons.
How to Care for Your Crochet Project
To ensure your crocheted pillow stays looking fresh, follow these care tips:
- Washing: Hand wash the pillow cover in cold water. If machine washing is necessary, use a gentle cycle in cold water.
- Reshaping: Gently reshape and lay flat to dry. Avoid hanging to prevent stretching.
- Storage: If storing for a long time, keep it in a cool, dry place to prevent moth damage and dust accumulation.
Pro Crochet Tips
Here are some useful tips to make your crocheting smooth and enjoyable:
- Keep even tension throughout your work for a polished look.
- Regularly count your stitches to avoid mistakes.
- Use a stitch marker to track rows or specific stitches.
- Be sure to weave in ends securely to maintain the integrity of your pillow.
Customize Your Project
Feel free to add personal touches to your pillow:
- Experiment with different yarn colors for a custom look.
- Add a contrasting border for visual interest.
- Adjust the size of the pillow according to your needs by changing the initial chain length.
Common Crochet Questions
Here are a few FAQs that might help you:
- Is this crochet pattern beginner-friendly? Yes, it’s designed with clear instructions for beginners.
- What yarn works best? Bernat® Softee® Chunky Twist is recommended for its plush texture.
- Can I use a different hook size? Yes, but it may affect your gauge and the final size of the pillow.
- How long does the project take? Expect to complete this in a few hours, depending on your pace.
- How should I wash the finished project? Hand wash or use a gentle machine cycle with cold water.
This crochet pattern is a perfect example of the joy and creativity that crochet can bring to your home. Enjoy making your “Little Bit Loopy” pillow!
Leave a Reply