
Crochet Pattern A to Z
· admin
Why you’ll love this pattern
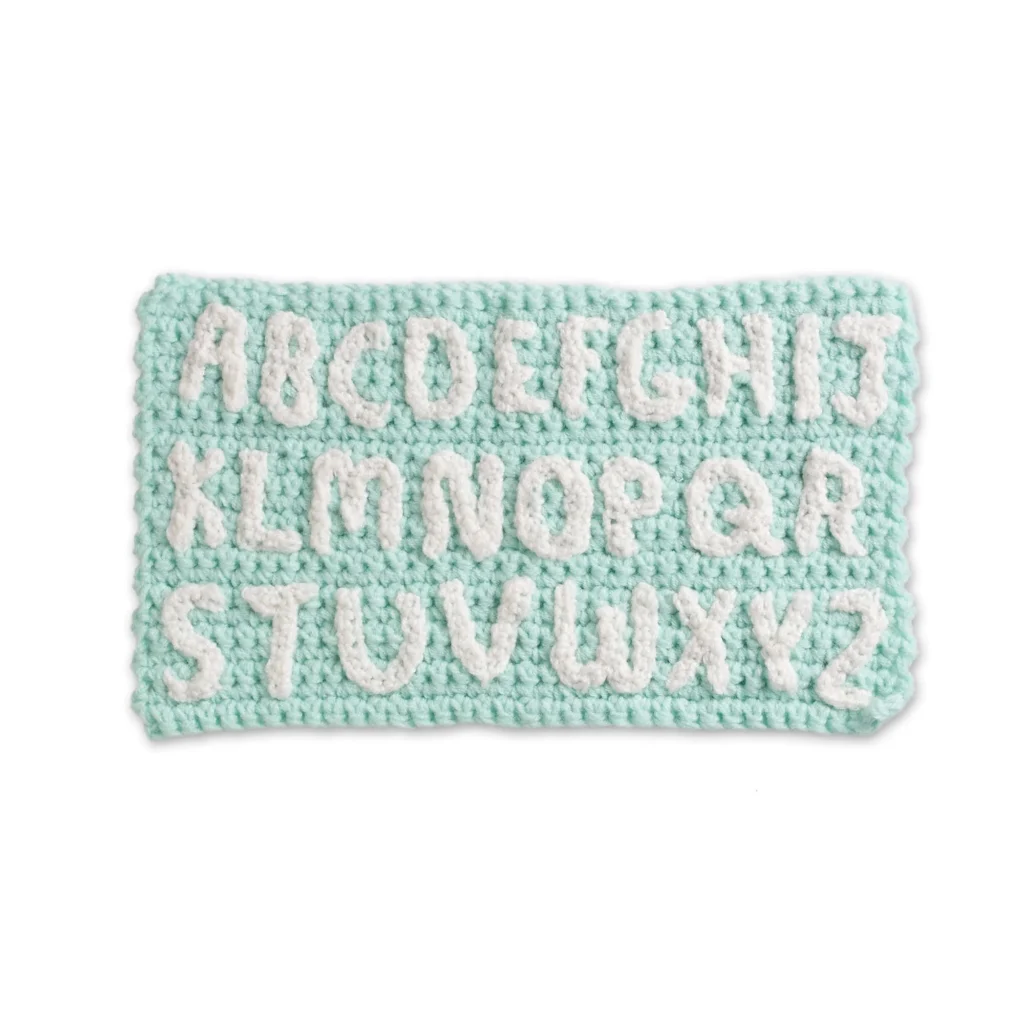
Crocheting an entire alphabet can be both a fun and fulfilling experience. This crochet project isn’t just about making individual letters; it’s an engaging way to dive into the art of crochet and produce something both creative and practical. Whether for a child’s name decoration, labels on handmade items, or festive decor, this crochet pattern allows for limitless creativity. Additionally, it’s a fantastic project for both beginners testing their skills and seasoned crocheters looking for a quick and enjoyable experience.
Start here: the complete letter-by-letter stitch instructions are linked in the A–Z section below. This article adds help with reading the pattern, arranging your letters, and sewing a custom name onto your project.
How this crochet pattern comes together
This crochet pattern will guide you to create each letter from A to Z, making it a comprehensive and enriching project. You’ll start by making each letter separately, allowing you to practice various crochet techniques like chains, single crochet, and slip stitches. It’s an excellent single-session project to complete a letter or two, making it perfect for those busy days when you want to indulge in your crochet hobby without a long commitment. The anticipated skill level is beginner-friendly, and you can expect to finish the whole alphabet in just a few crafting sessions.
Materials you’ll need
To make this alphabet crochet pattern, gather the following supplies:
- RED HEART® Anne Geddes Baby™: 1 ball (100 g / 3.5 oz)
- Solid: 340 yd (310 m)
- Multi: 290 yd (265 m)
- Susan Bates® Crochet Hook: 3.5 mm (US E-4)
- Yarn needle
Notes on Materials
- The RED HEART® Anne Geddes Baby yarn is soft and durable, perfect for this project, especially if you intend it for children’s use.
- A 3.5 mm hook is recommended, but if you tend to crochet tightly or loosely, adjust accordingly for the desired size of the letters.
- Choose color schemes that suit your project—bright colors for toddler names or muted tones for a classic look.
Complete A–Z crochet letter instructions
The matching alphabet design is A to Z in Crochet by Michele Wilcox for Red Heart. Use the complete designer’s pattern for each letter’s stitch sequence. The notes below help you read the pattern, arrange a name, and attach the finished letters.
Open the complete free A–Z crochet pattern (PDF)
All 26 letters are included: A–I are on page 1; J–Z and finishing instructions are on page 2. The original design makes letters approximately 2 inches (5 cm) tall. Your yarn and tension can affect their size.
| Letters you need | Full written instructions |
|---|---|
| A, B, C, D, E, F, G, H, I | Open page 1: A–I |
| J, K, L, M, N, O, P, Q, R, S, T, U, V, W, X, Y, Z | Open page 2: J–Z |
If the PDF does not open in your browser, visit the official pattern page and choose the free download.
Step 1: Read the crochet abbreviations
This project uses US crochet terminology. Keep this key beside the pattern:
- ch: chain.
- sc: single crochet; this is called double crochet in UK terminology.
- sl st / slip st: slip stitch.
- st / sts: stitch or stitches.
- skip: leave the indicated stitch or chain unworked.
- turn: turn your work before continuing in the other direction.
When counting a foundation chain, do not count the loop currently on your hook. If the instruction says to work into the second chain from the hook, pass over the nearest chain and insert your hook into the next one.
Step 2: Crochet each letter separately
- Write down the word or name you want to make, including repeated letters.
- Find the heading for your first letter in the PDF. Read that entire letter’s instructions before beginning.
- Make its foundation chain and follow its own sequence of stitches, turns, branches, and joins. Each letter has a different construction.
- At a branch or change of direction, pause and check which part of the letter you are making before continuing.
- Leave a sewing tail when fastening off. Keep the completed letter with its label until you are ready to arrange the whole word.
- Repeat for the other letters, keeping the same yarn weight, hook, and comfortable tension throughout the name.
Step 3: Arrange and shape the letters
Lay the finished project on a flat surface without stretching it. Set all the letters in position before attaching any of them. Check the word from a short distance: the letters should be readable, their openings should remain clear, and the tops and bottoms should look aligned.
Use removable basting stitches to hold the arrangement. Adjust the visual spacing between letter edges, rather than measuring only the distance between their centers. Wide letters need more room than narrow ones.
Step 4: Sew the letters onto your project
- Thread a yarn needle with a sewing tail or matching yarn.
- Anchor the first letter with a few small stitches, then work around its edges. Catch both the appliqué and the backing fabric.
- Keep the stitches relaxed enough that the backing stays flat. Stop occasionally and smooth the fabric to check for puckering.
- Secure projecting ends and crossbars so they do not lift away from the surface.
- Weave the remaining yarn securely through stitches on the reverse. Remove every temporary basting thread or pin.
Custom name option
Turn the alphabet into a personalized detail for a crochet sweater, tote, blanket, or cushion. For example, AYA needs two A letters and one Y; make both As with the same yarn and hook so they match.
- Choose the position: lay the item flat and mark the center of the available space with removable thread.
- Check the fit: arrange every finished letter and measure the entire name, including the gaps. If it is too wide, choose a larger placement area or make a smaller sample using finer yarn and a suitable hook.
- Choose the layout: a straight line works well across a chest or bag. On a blanket, a corner placement can leave more room for a longer name.
- Center the whole name: align the midpoint of its total width with your center marker. With mixed letter widths, this may fall between two letters.
- Baste, inspect, then sew: check the spelling and spacing before attaching the letters permanently.
- Finish carefully: secure all ends and avoid loose decorative additions on items made for babies.
Ways to use your finished project
Once you’ve crafted the full alphabet, consider these creative uses:
- Decorate a child’s nursery or play area with the letters of their name.
- Utilize the letters for seasonal decorations, such as spelling “FALL” or “WINTER.”
- Create personalized gifts, like a crochet name banner for baby showers.
- Incorporate them as labels for organizing items in a craft room or kitchen.
How to care for your crochet project
To ensure your finished crochet letters remain vibrant and intact, follow these care instructions:
- Hand wash gently in cool water with mild detergent.
- Reshape while damp and lay flat to dry to avoid stretching.
- Store in a cool, dry place to maintain shape and color.
Helpful crochet tips
- Maintain an even tension throughout your project for consistent size.
- Use stitch markers if you’re concerned about losing count.
- Keep a close eye on your edge stitches to avoid accidental increases.
- If you need to join rounds, use a slip stitch to ensure neat transitions.
Creative variations
Feel free to customize your alphabet project:
- Use various color combinations for each letter for a whimsical effect.
- Add embellishments like buttons or embroidery for a unique touch.
- Consider varying the size of your letters for specific decor or gifts.
- Create a border around each letter using a contrasting color to enhance visibility.
Frequently asked questions
-
Is this crochet pattern beginner-friendly?
Yes, it’s ideal for beginners and allows you to practice basic stitches. -
What yarn works best?
RED HEART® Anne Geddes Baby™ is perfect due to its softness and variety of colors. -
Can I use a different hook size?
Yes, as long as you keep your tension in mind—too large might cause loose letters. -
How long does the project take?
Depending on your pace, completing the alphabet may take a few sessions. -
How should I wash the finished project?
Hand wash in cool water, reshape, and lay flat to dry.
Leave a Reply